
In this post, we describe how to migrate the ADFS WID database to MS SQL 2016 server. In my lab I have two servers install in Microsoft Windows Server 2016 for the OS and WID Database with a primary and a secondary server. The MS SQL server is install in version 2016 with the last SP. The instance name DB is “ADFS” and this instance port is “11433”.
Logon on the primary ADFS Server
To verify if you are on the primary ADFS server, open a Powershell console and type this command:
get-adfssyncproperties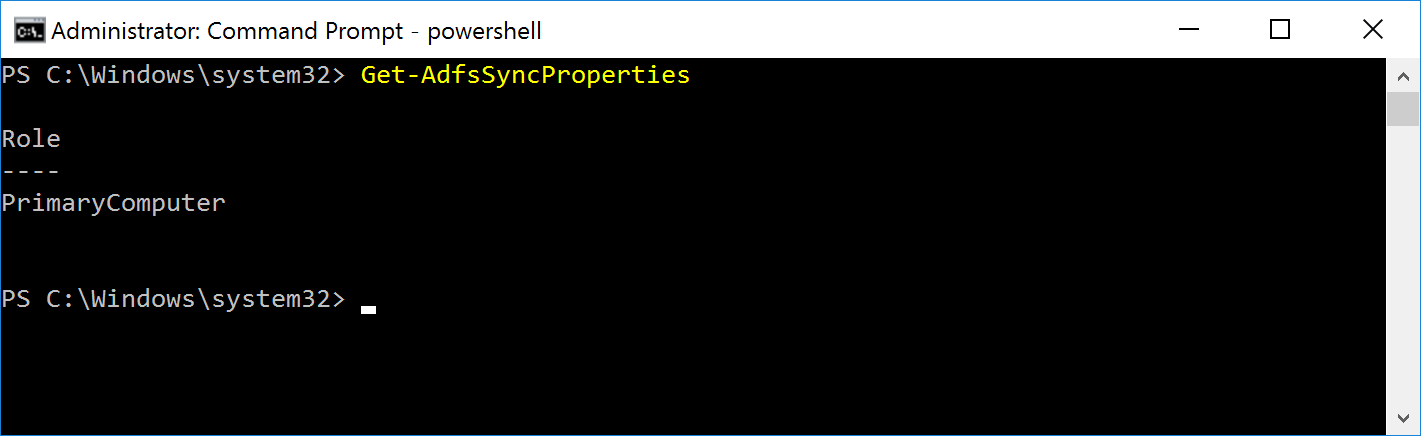
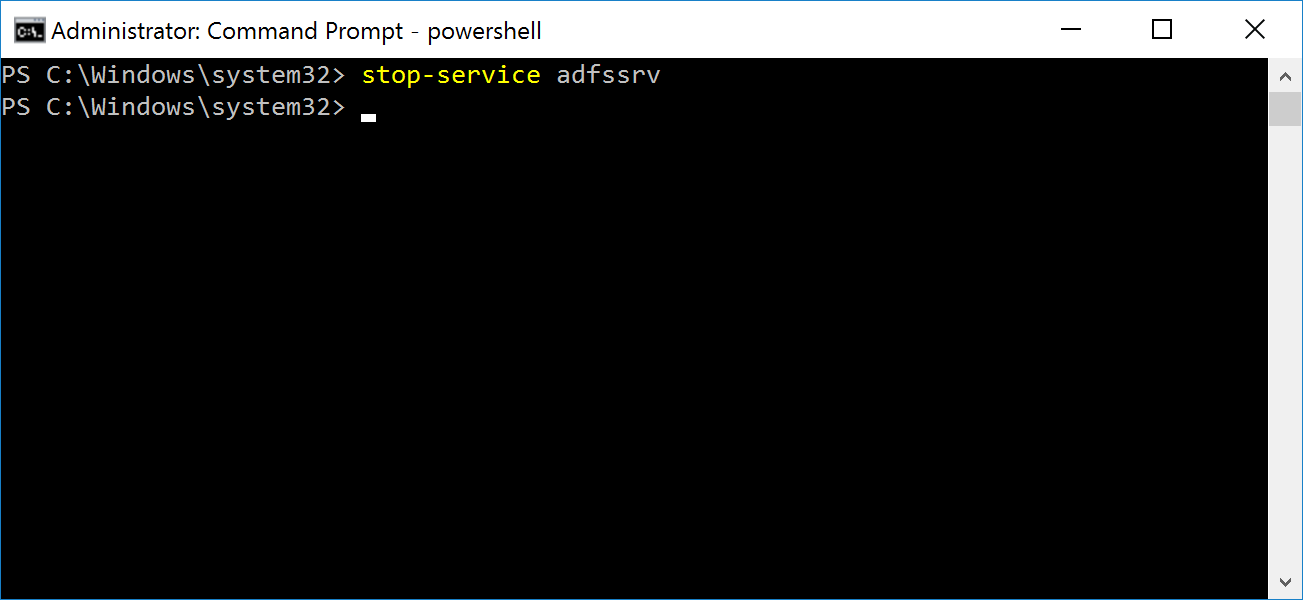
In first time, stop the ADFS service
Open the command prompt as Administrator and type:
Net stop adfssrv
 Or in the Powershell command prompt as Administrator and type:
Stop-service adfssrv
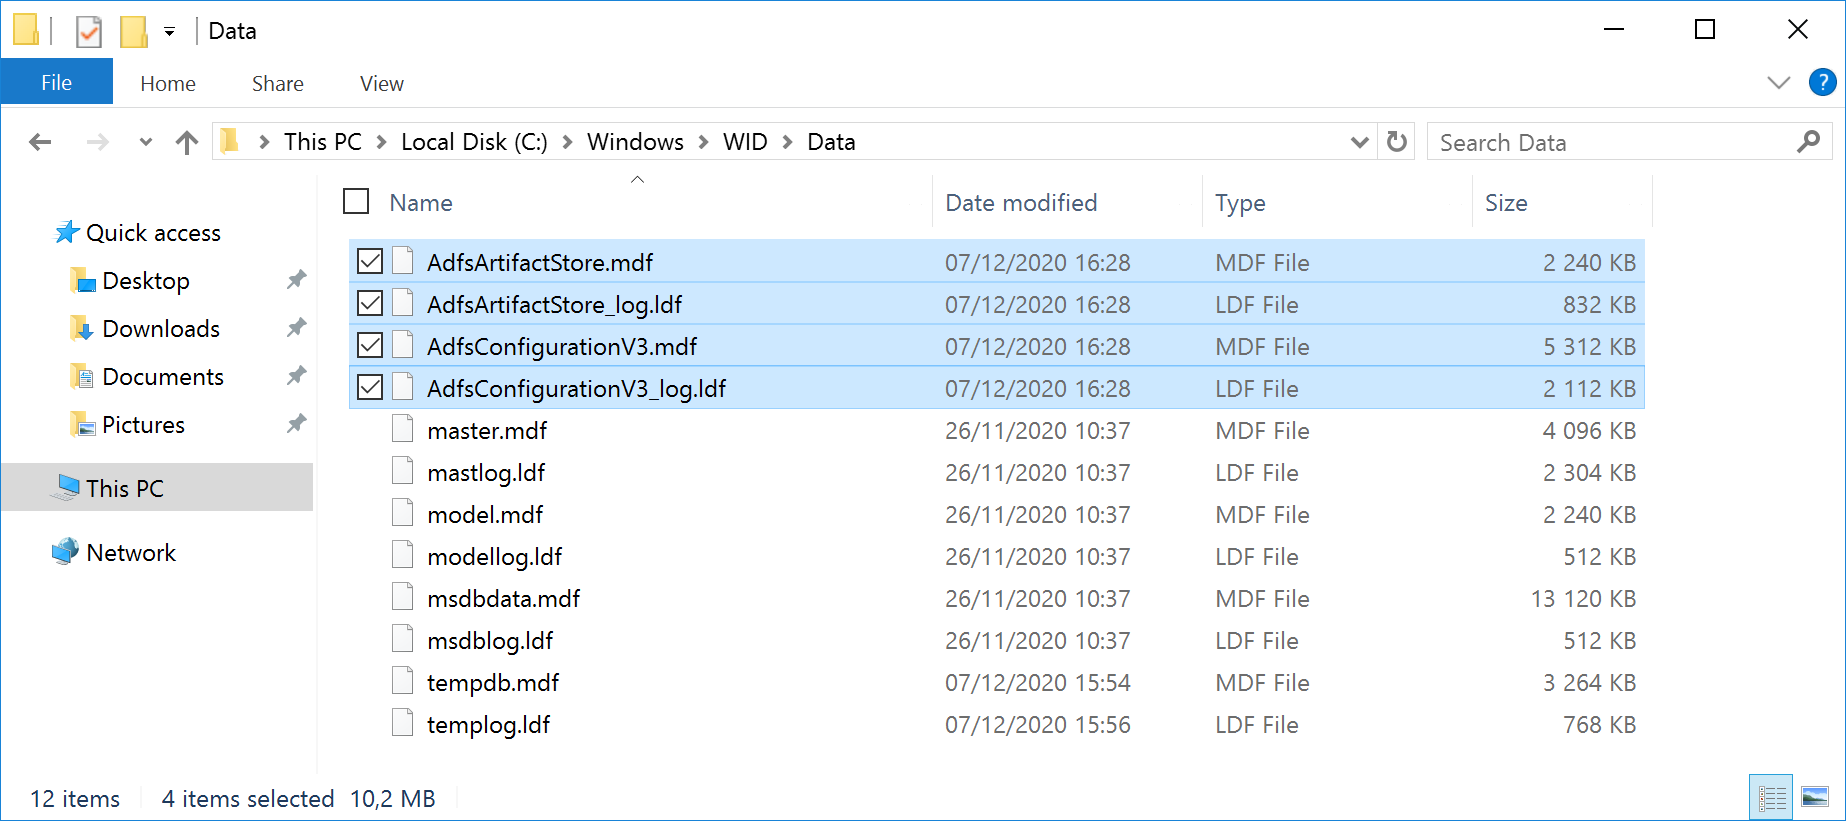
 Locate the ADFS database files
Open Windows Explorer and navigate to “C:WindowsWIDDATA”.
Note: This is the default location of WID Database. We will see the ADFSArtifactStore.mdf, ADFSArtifactStore_log.ldf, ADFSConfigurationV3.mdf and ADFSConfigurationV3_log.ldf files which are the AD FS Databases.
Detach ADFS database
Save below as PowerShell script file or paste below in PowerShell ISE and run it to detach ADFS Database from WID.
Detach Script:
$connection = New-Object -TypeName System.Data.SqlClient.SqlConnection

$connection.ConnectionString = 'Server=np:\.pipeMICROSOFT##WIDtsqlquery;Database=master;Trusted_Connection=True;'

$connection.Open()

$command = $connection.CreateCommand()

$command.CommandText = "EXEC sp_detach_db @dbname = N'AdfsArtifactStore';"

$result = $command.ExecuteReader()

$connection.close()

$connection.Open()

$command = $connection.CreateCommand()

$command.CommandText = "EXEC sp_detach_db @dbname = N'AdfsConfigurationV3';"

$result = $command.ExecuteReader()

$connection.close()
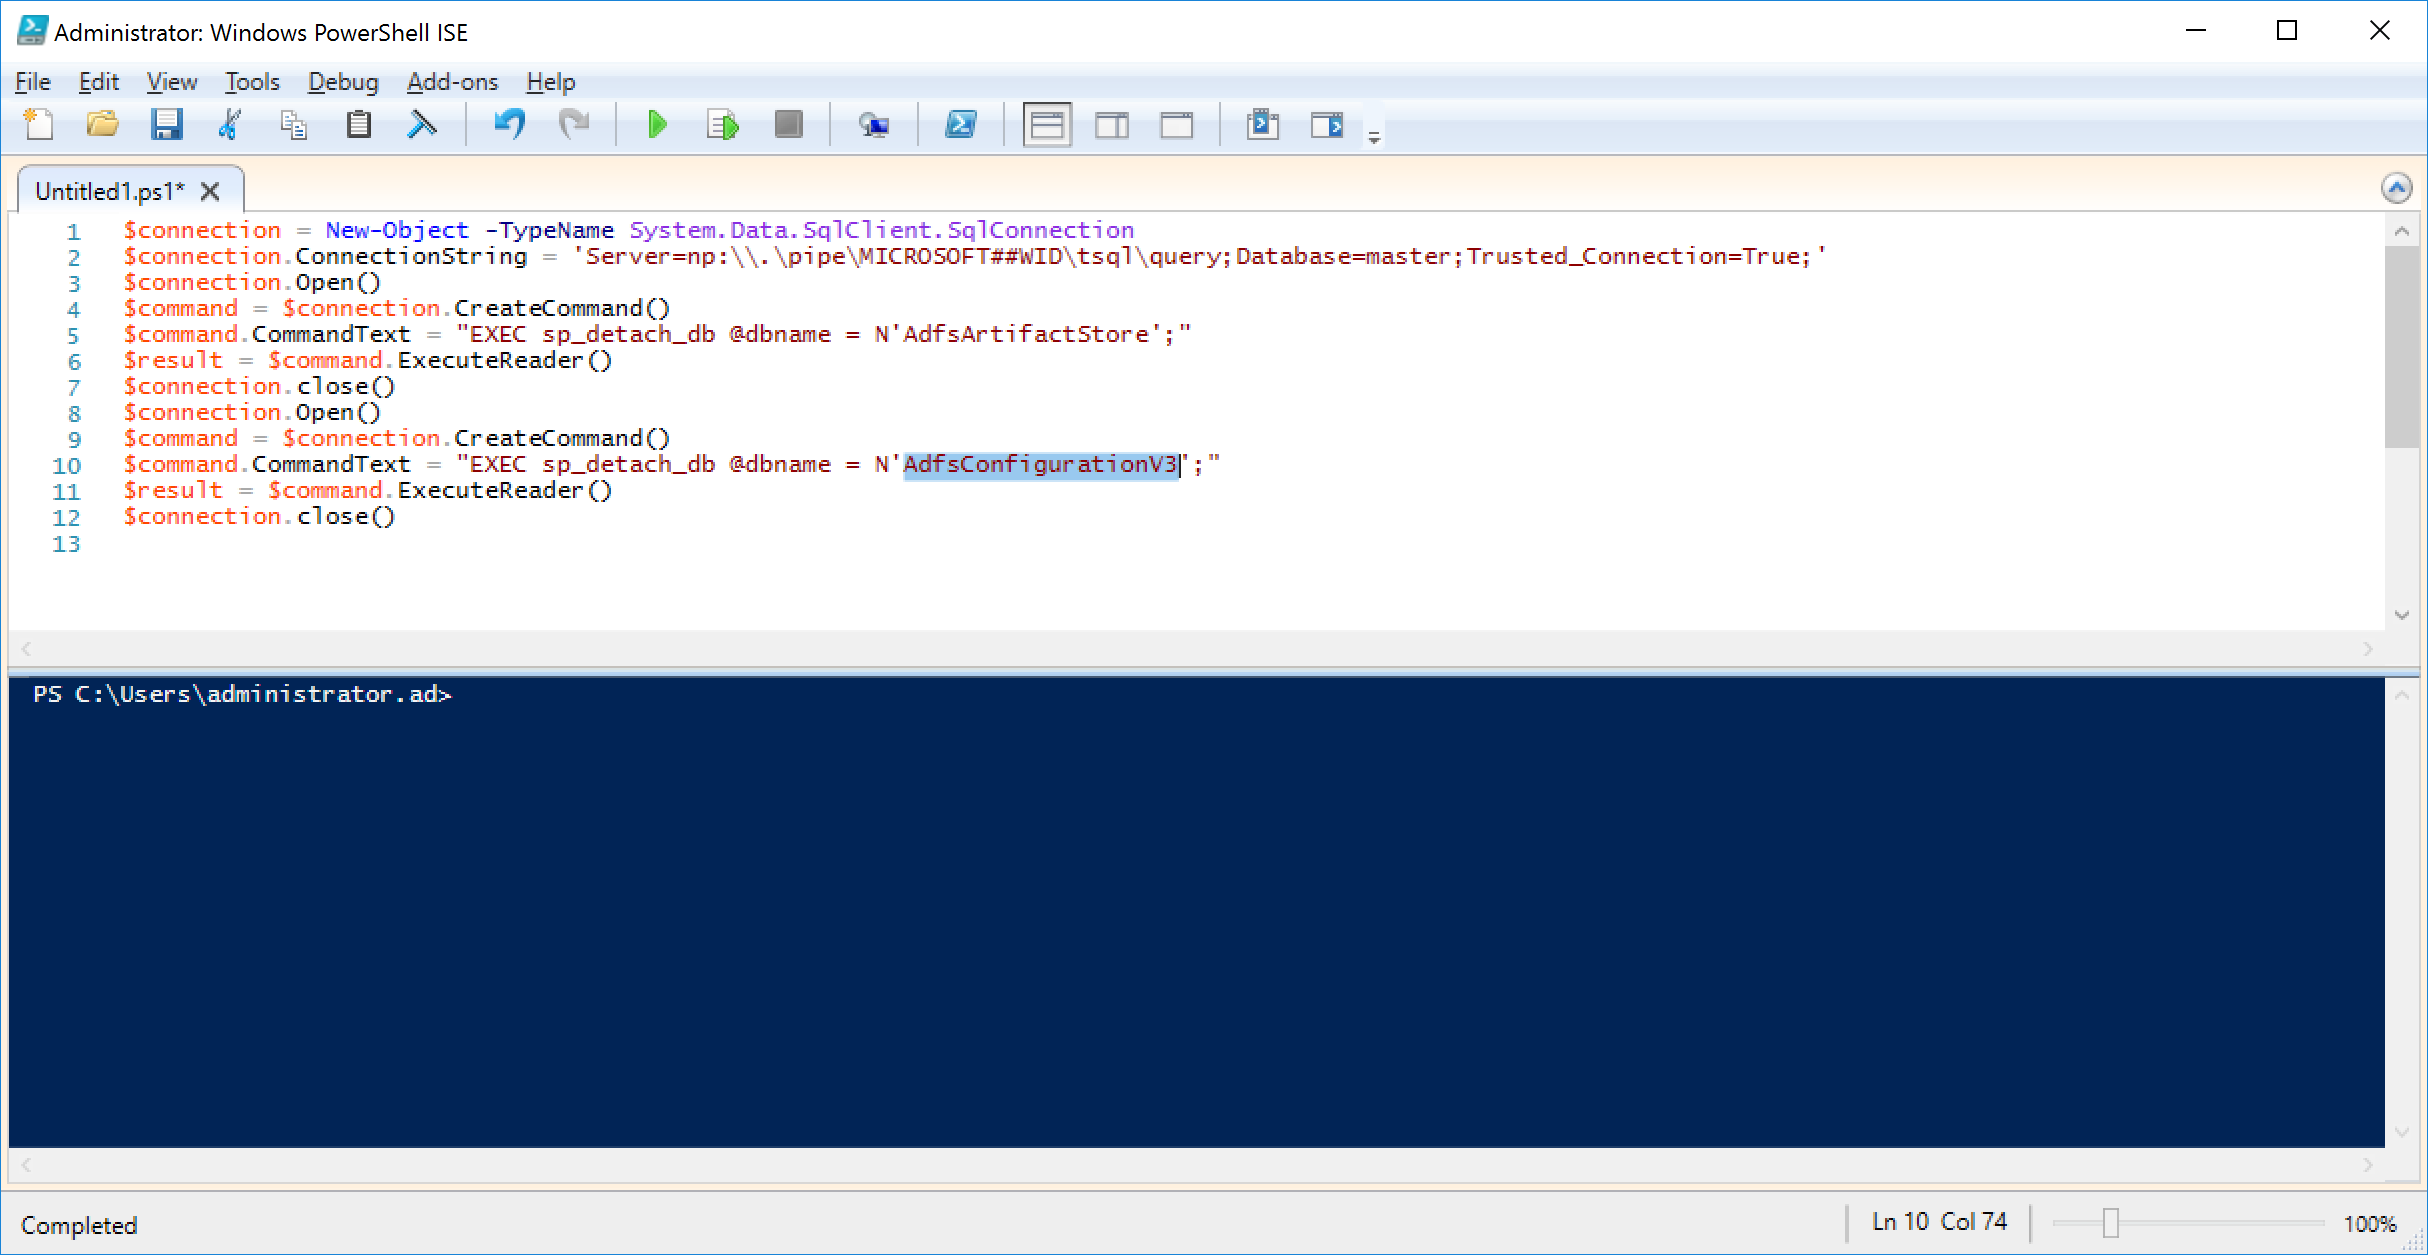 /! report correctly the good name of the two DB in the script.
Copy the database files from ADFS server to SQL server
Copy the following files below
Paste these files to SQL server
Open another Explorer and navigate to “C:Program FilesMicrosoft SQL ServerMSSQL12.MSSQLSERVERMSSQLDATA” or the path you declared when installing the MS SQL instance.
Paste the files you copied from ADFS Server to this location.
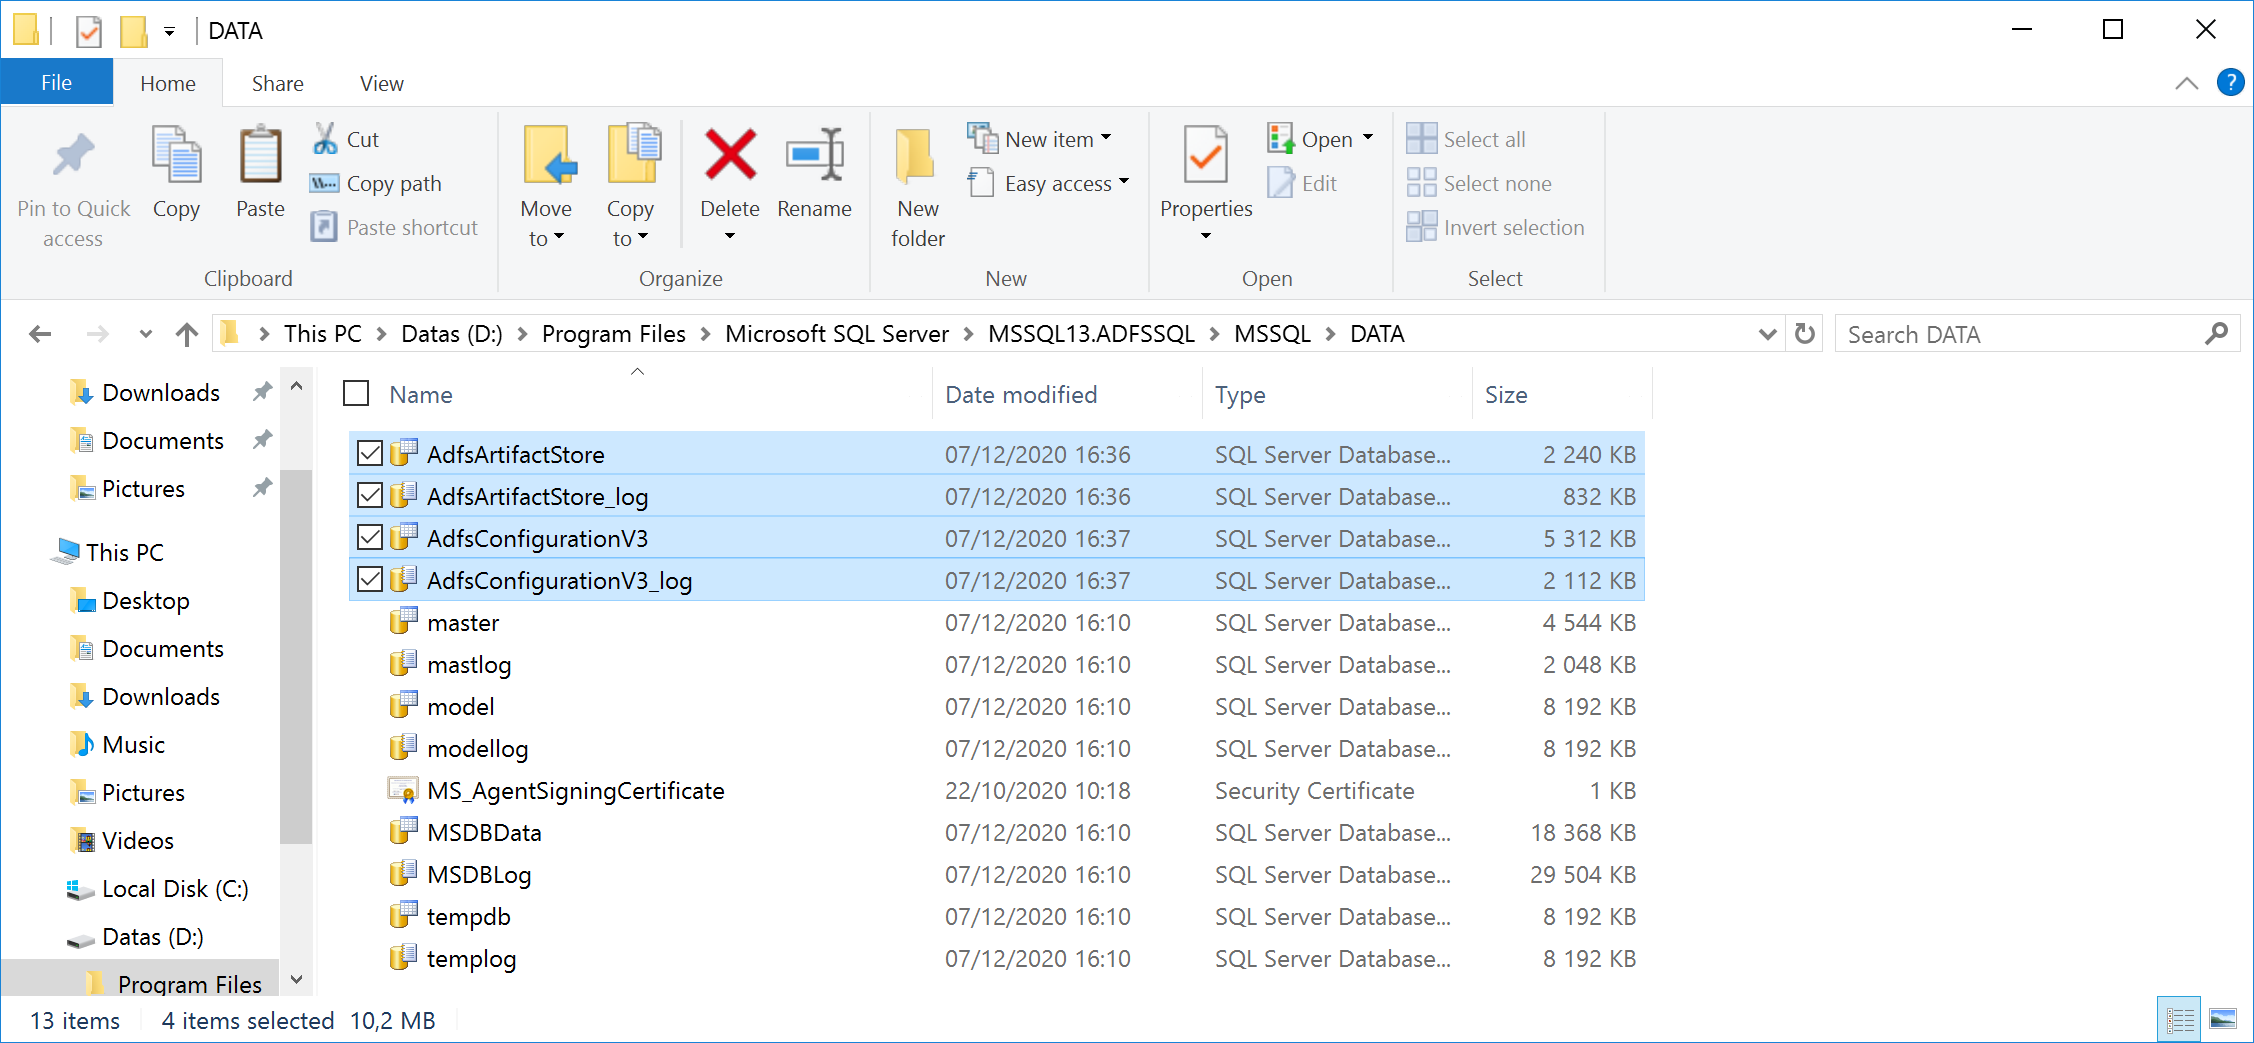
Attach the Database to the SQL Server
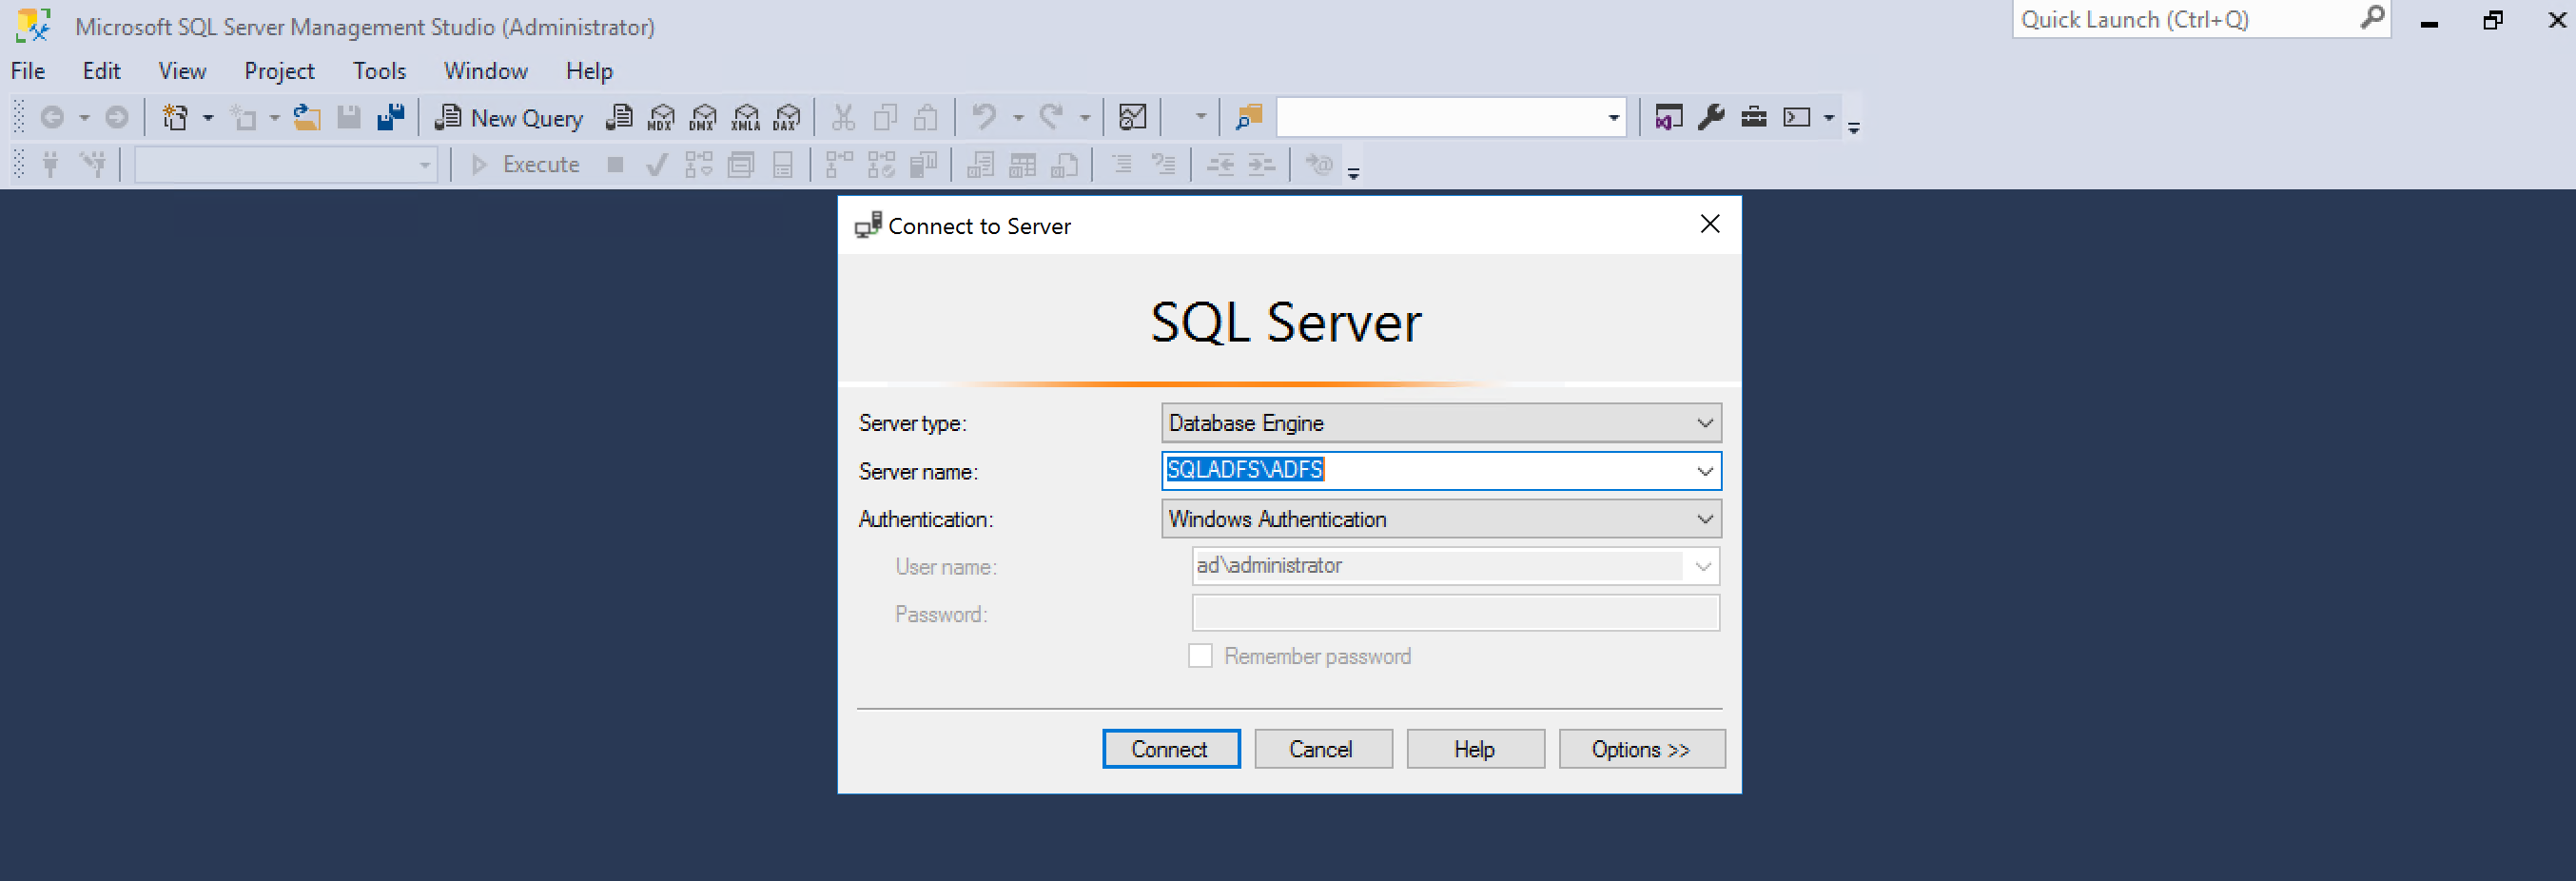
Connect to SQL Server in SQL Management Studio
Click the Windows button then go to Microsoft SQL Server and SQL Server Management Studio
At the Connect to Server prompt, confirm that Server Name is SQL Server and click Connect
Create a new query to attach database
Click the New Query button to open the query panel
Copy the following code and paste it to the SQLQuery panel:
USE [master]

GO

CREATE DATABASE [AdfsConfigurationV3] ON

( FILENAME = N'C:Program FilesMicrosoft SQL ServerMSSQL13.MSSQLSERVERMSSQLDATAAdfsConfigurationV3.mdf' ),

( FILENAME = N'C:Program FilesMicrosoft SQL ServerMSSQL13.MSSQLSERVERMSSQLDATAAdfsConfigurationV3_log.ldf' )

FOR ATTACH

GO

USE [master]

GO

CREATE DATABASE [AdfsArtifactStore] ON

( FILENAME = N'C:Program FilesMicrosoft SQL ServerMSSQL13.MSSQLSERVERMSSQLDATAAdfsArtifactStore.mdf' ),

( FILENAME = N'C:Program FilesMicrosoft SQL ServerMSSQL13.MSSQLSERVERMSSQLDATAAdfsArtifactStore_log.ldf' )

FOR ATTACH

GO

ALTER DATABASE AdfsConfiguration set enable_broker with rollback immediate

GO
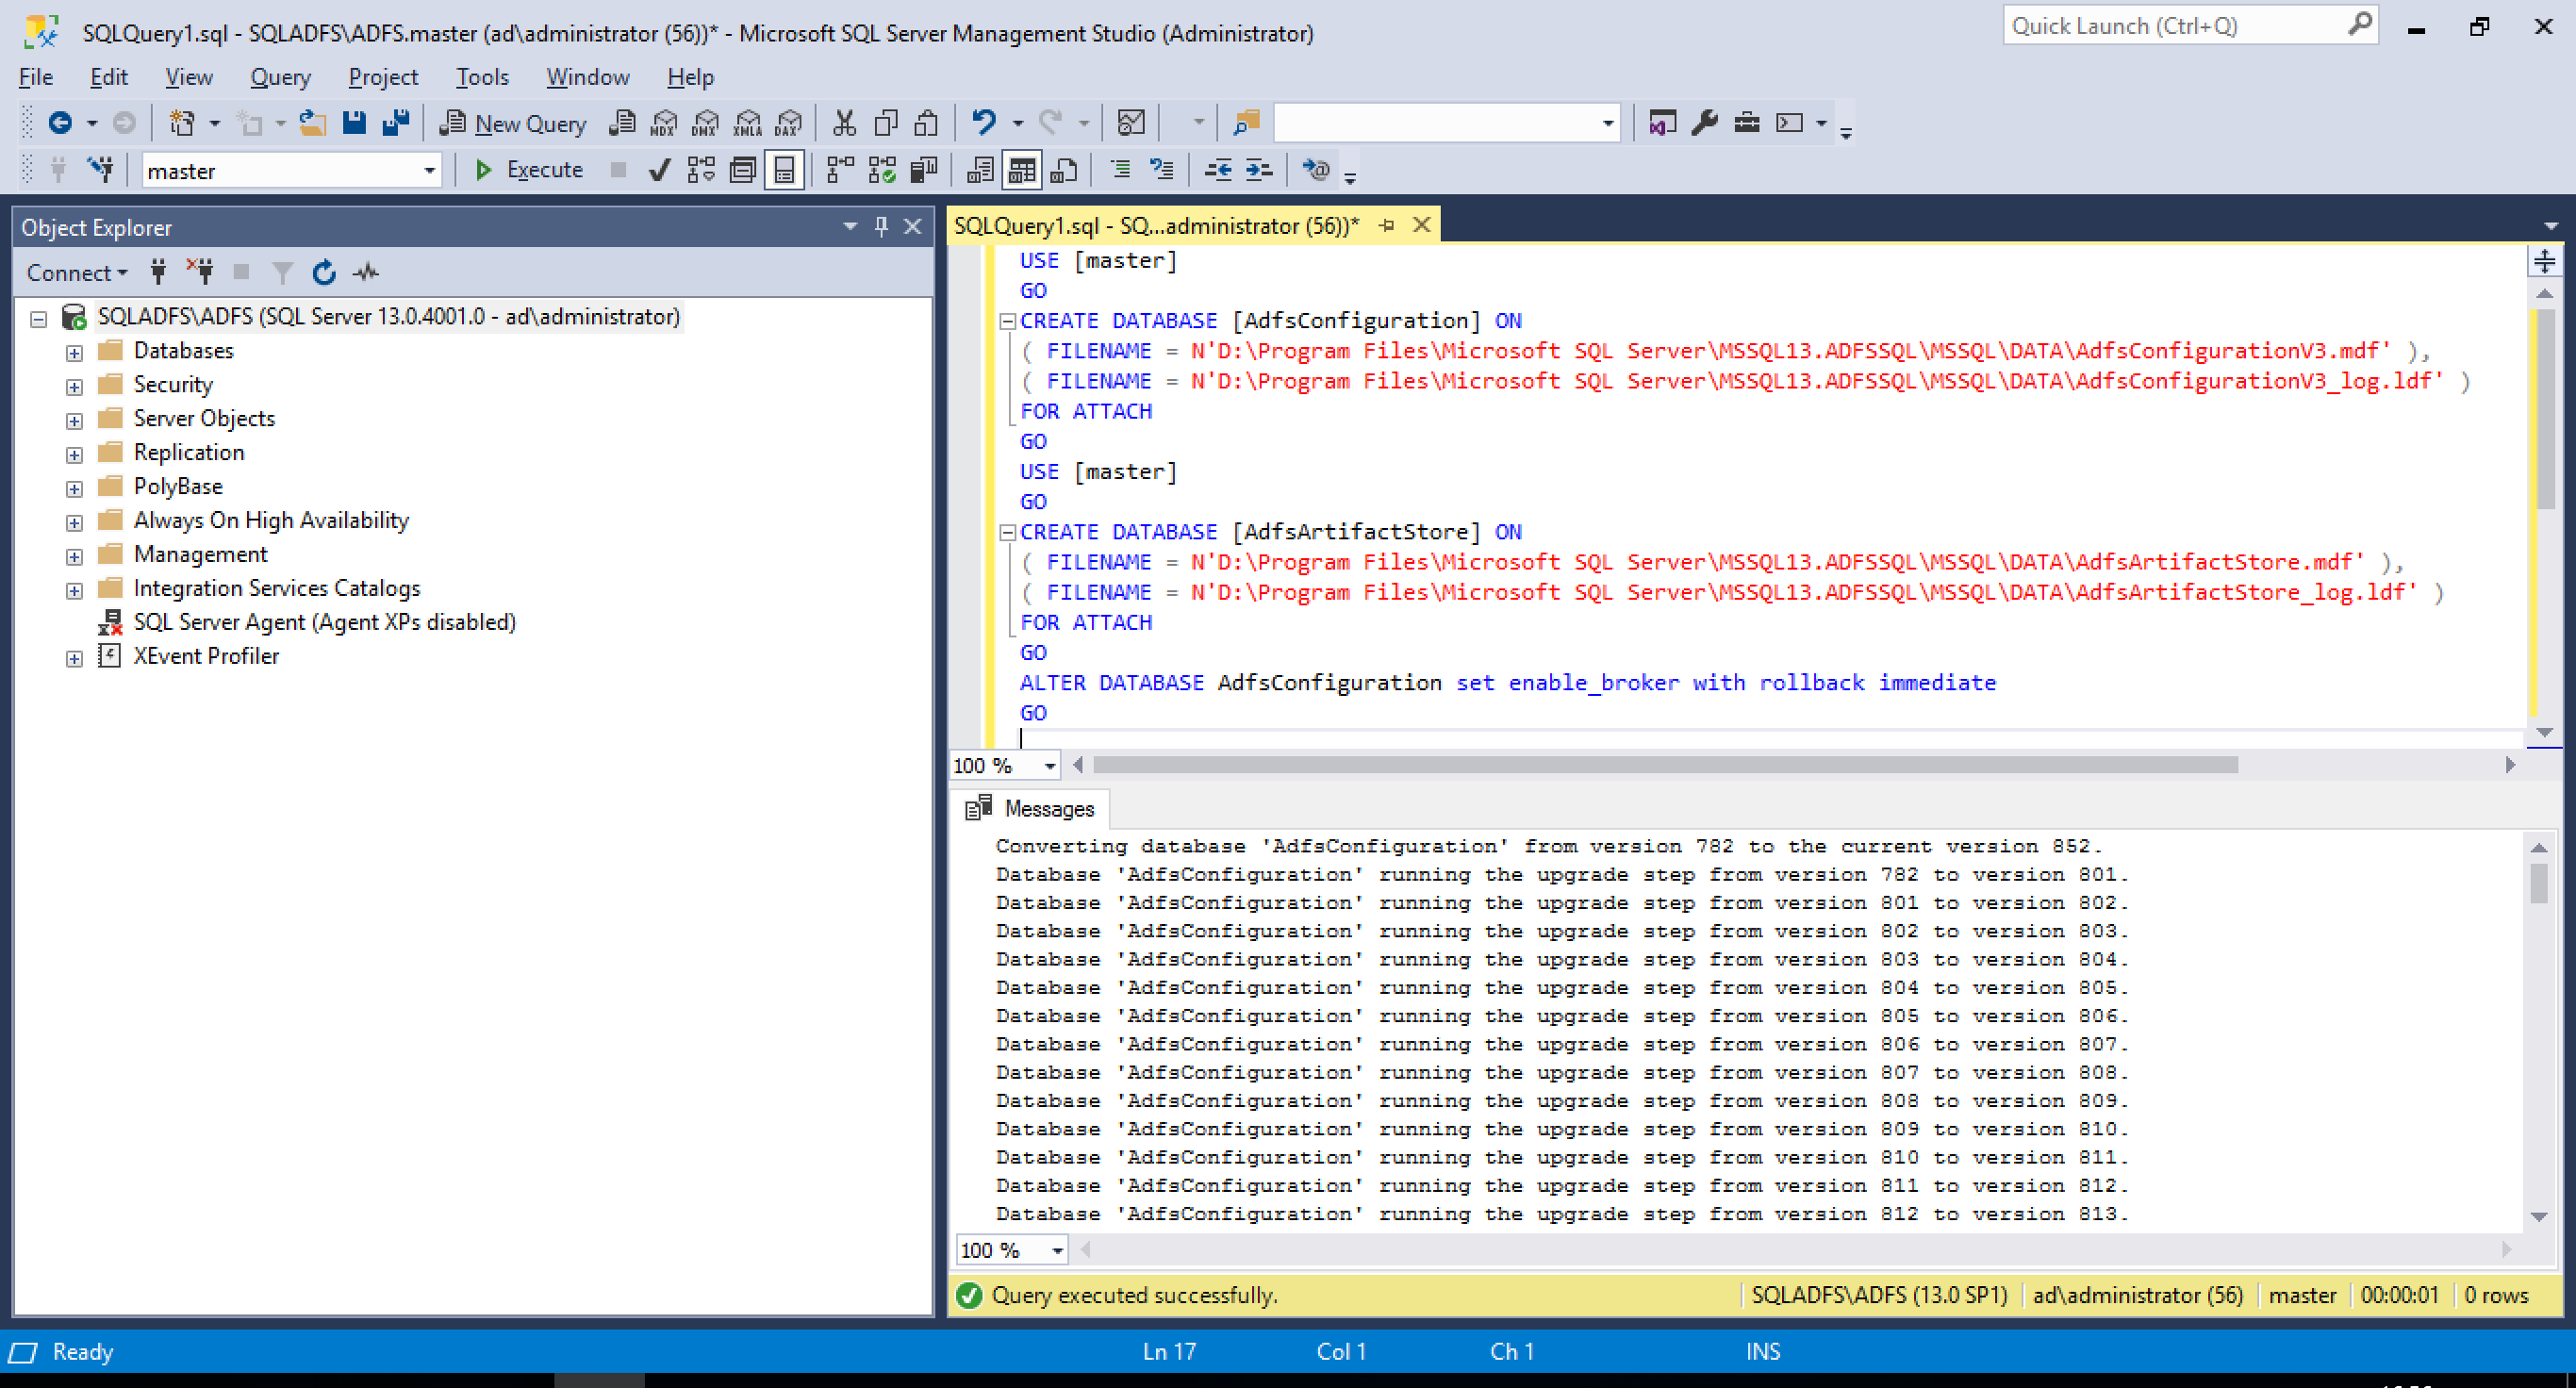 Click Execute to run the query and attach the database.
Verify if the query was successfully run.
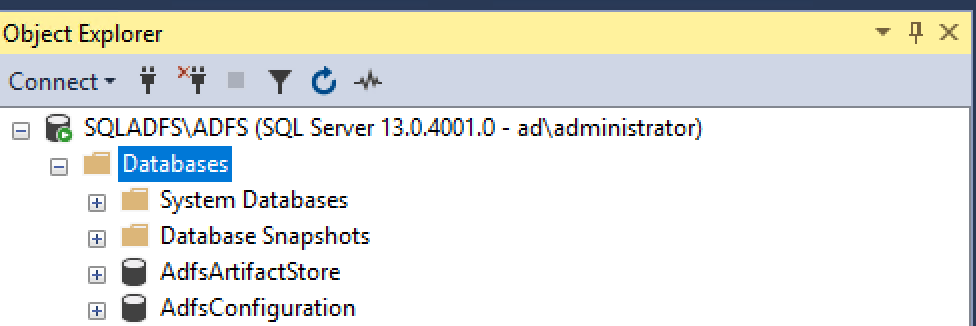
Check the databases are attached
On the Object Explorer, expand Databases and check that the New Databases are attached.
Create a new login to provide access to ADFS group managed account
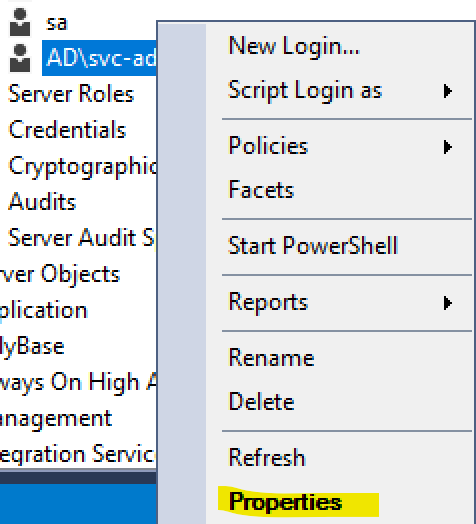
In object Explorer, expand Security, right-click at Logins and select New Login…
Note: Now verify the security settings of the SQL Server to make sure that AD FS Service Account has permissions to access the Database.
Choose the AD FS service account
 Select Server Roles
 Select role “Public”
Click OK.
Open the login’s properties
Check the user mapping
At User Mapping, select the AD FS Configuration Databases (AdfsArtifactStore and AdfsConfigurationV3)
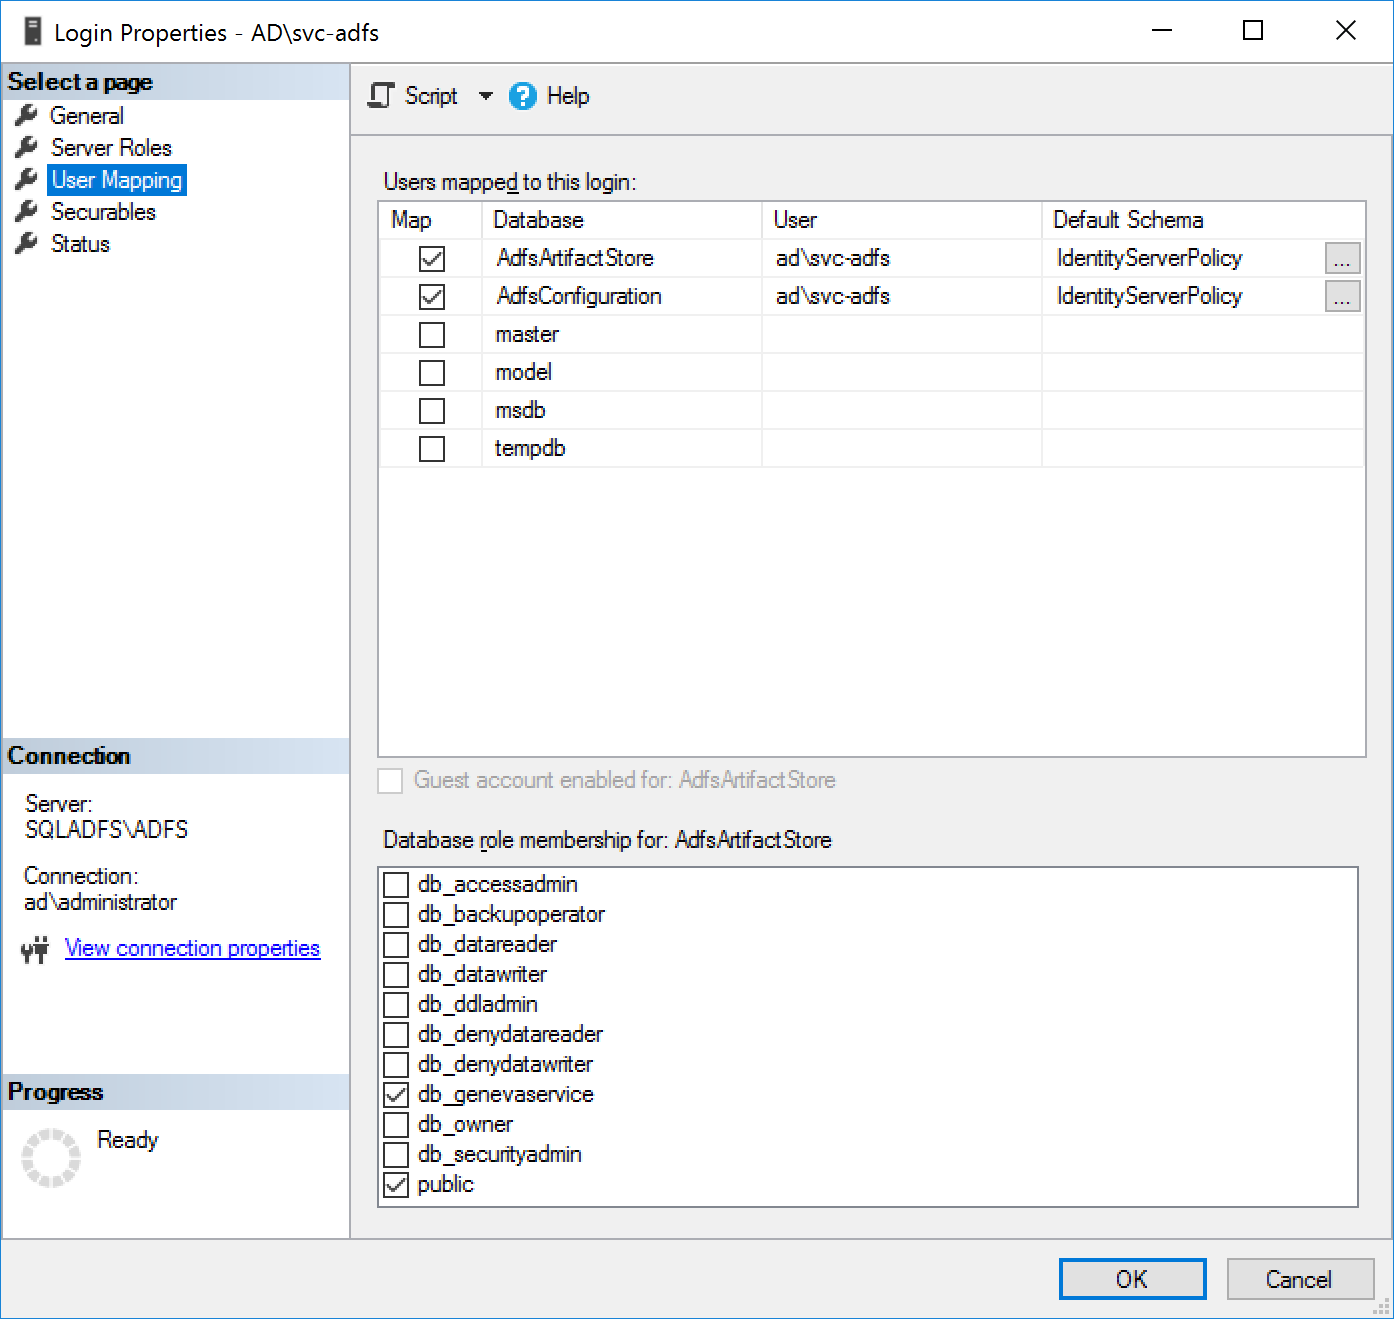 Make sure that options “Public” and “Db_genevaservice” are selected. (If not, select it and click OK)
Click Ok.
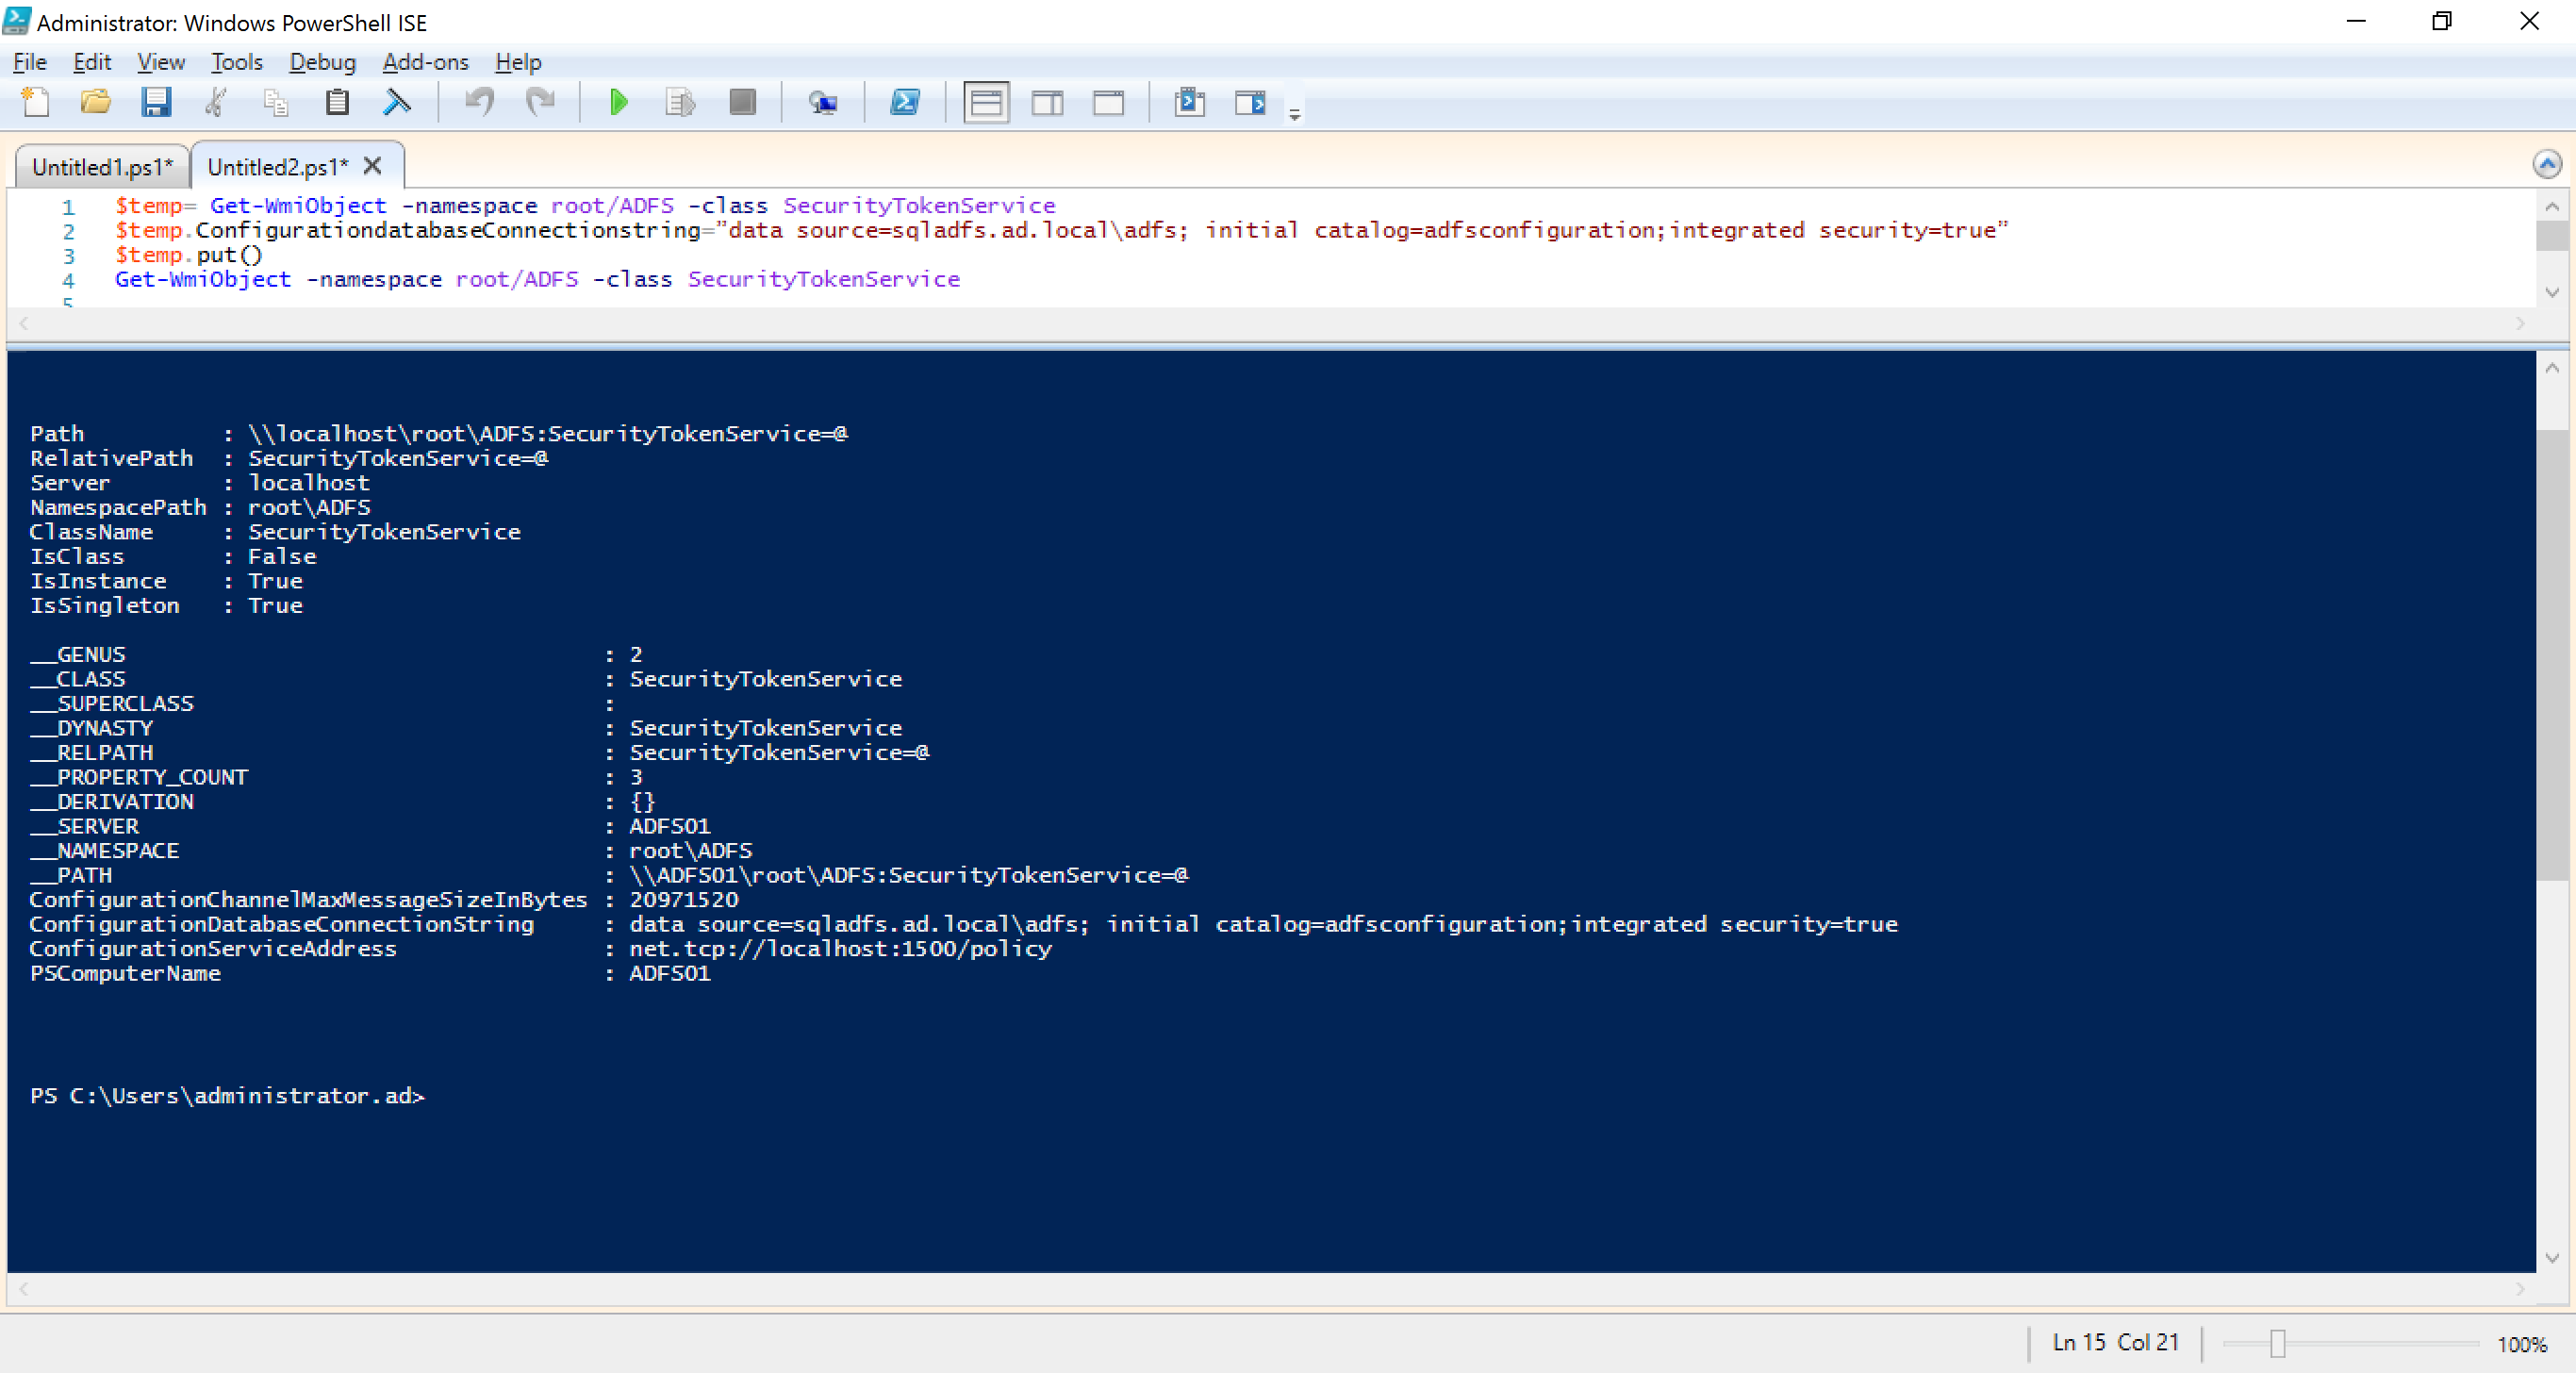
Change the Connection String at ADFS to connect to SQL server
Paste the following powershell script on ADFS server powershelll ISE (Modify data source server to SQL server before running it).
Paste the following code into the new script area
$temp= Get-WmiObject -namespace root/ADFS -class SecurityTokenService

$temp.ConfigurationdatabaseConnectionstring=”data source=sqladfs.ad.localADFS,11433; initial catalog=adfsconfigurationV3;integrated security=true”

$temp.put()

Get-WmiObject -namespace root/ADFS -class SecurityTokenService
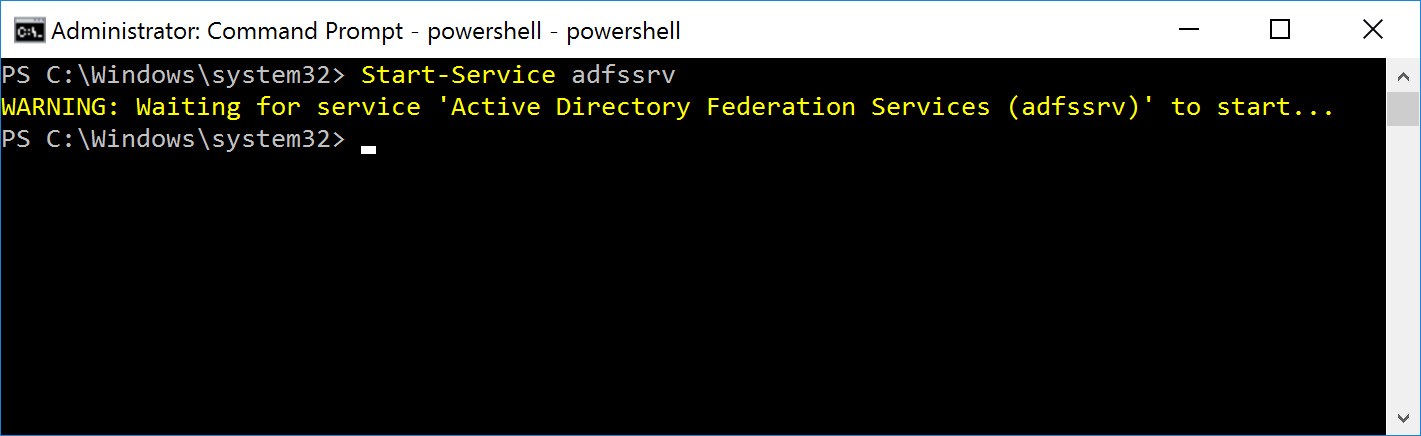
Start the AD FS service
Start AD FS Service with the command:
Start-Service adfssrv
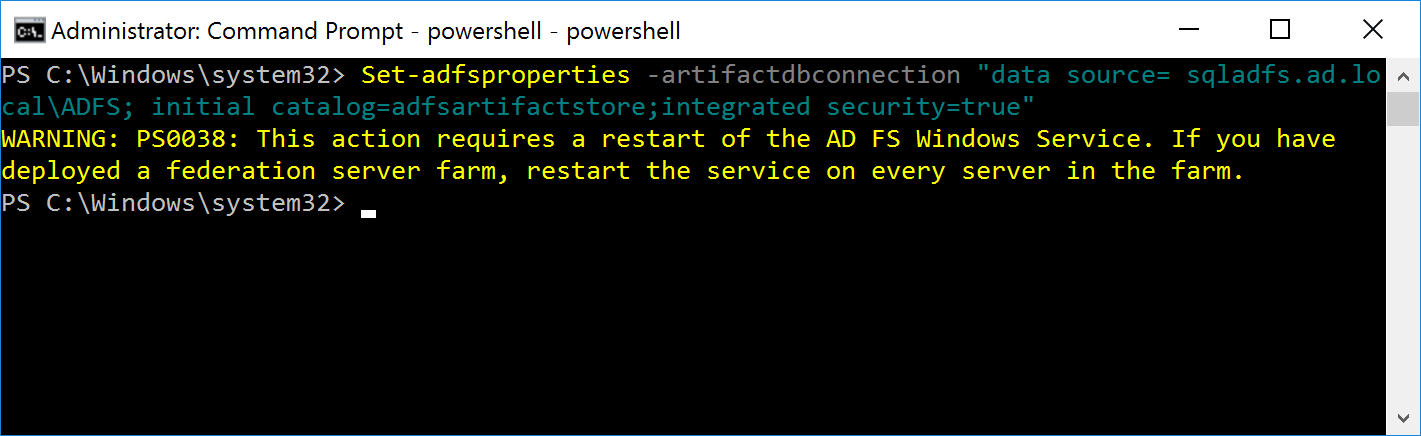
Connect the AD FS Server to the Artifact Database
Open PowerShell as an administrator.
Execute the following command:
Set-adfsproperties –artifactdbconnection “data source= sqladfs.ad.localADFS,11433; initial catalog=adfsartifactstore;integrated security=true”
Restart the AD FS service
Restart the AD FS Service by executing
Restart-Service adfssrv
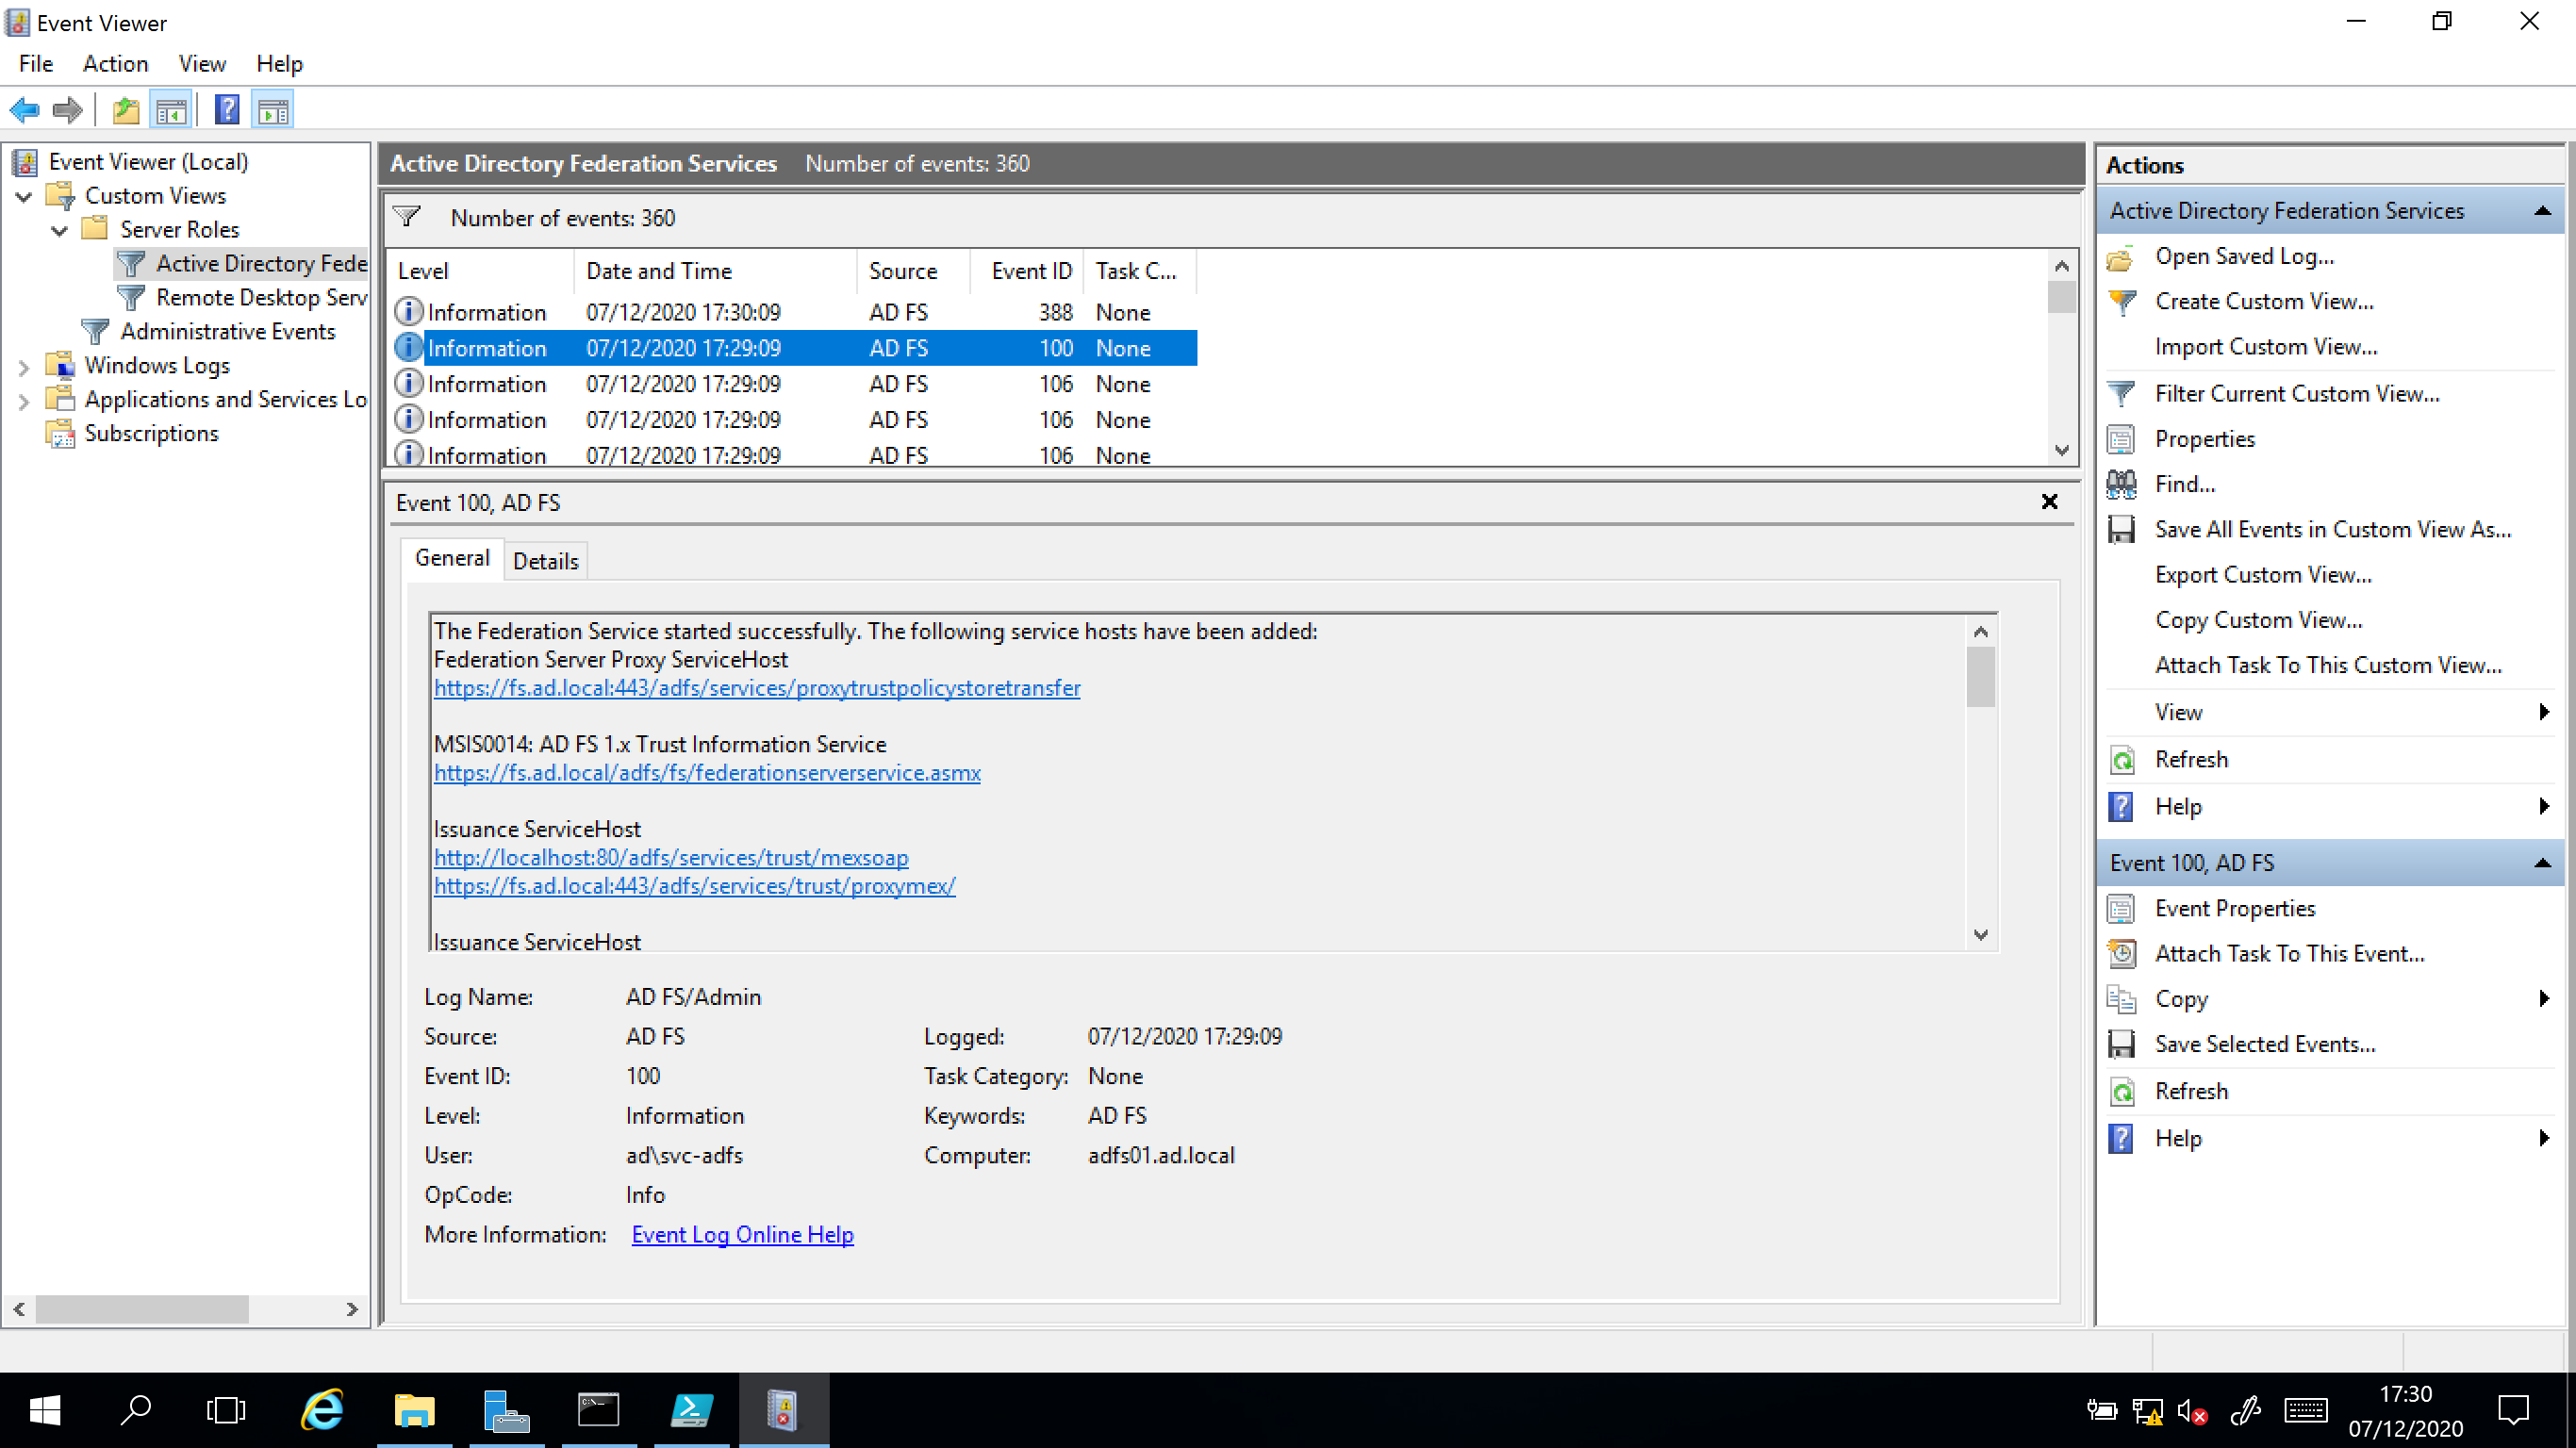
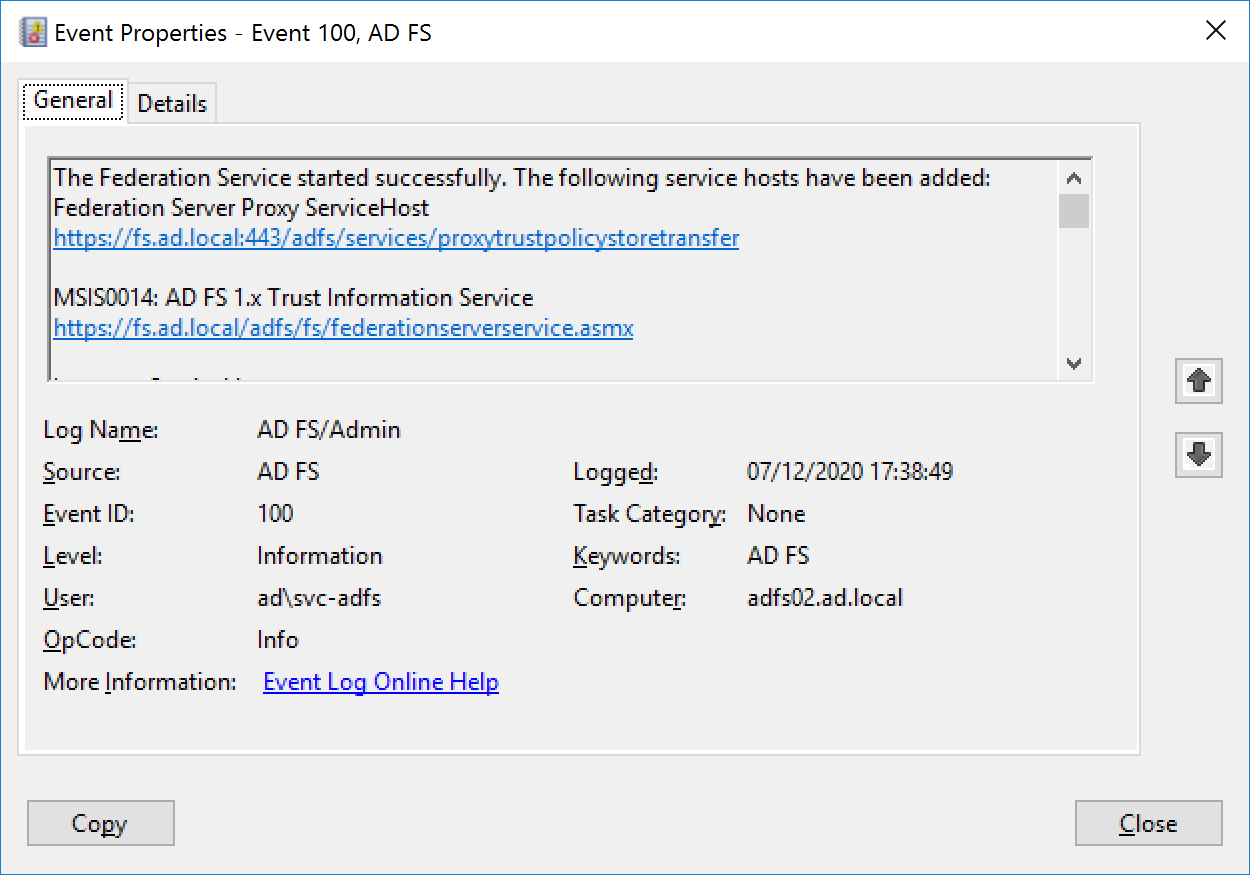
 Check the event log
On ADFS server, open Event Viewer.
Open ‘Application And Services Logs’ and navigate to the AD FS Admin event log.
Look for Event ID 100 showing the AD FS service started successfully.
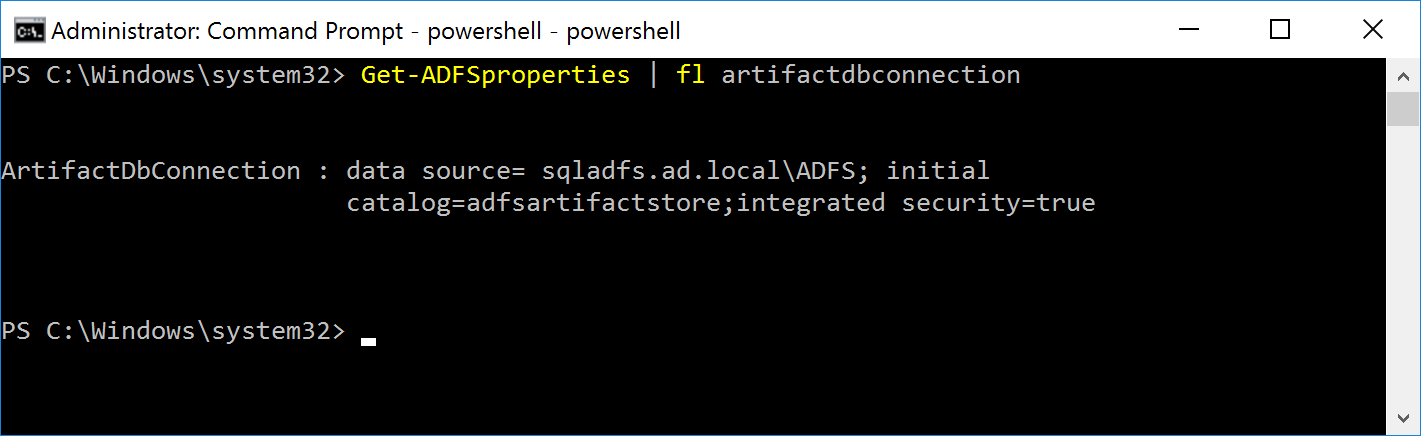
Check ADFS SQL connection
Run below command to check database surce on ADFS:
Get-ADFSproperties | fl artifactdbconnection
Migrate another server in the farm
Stop ADFS service
Stop AD FS Service with the command:
stop-servervice adfssrv
Change the Connection String at ADFS to connect to SQL server
Paste the following PowerShell script on ADFS server powershelll ISE (Modify data source server to SQL server before running it).
Paste the following code into the new script area
$temp= Get-WmiObject -namespace root/ADFS -class SecurityTokenService

$temp.ConfigurationdatabaseConnectionstring=”data source=sqladfs.ad.localADFS, 11433; initial catalog=adfsconfiguration;integrated security=true”

$temp.put()

Get-WmiObject -namespace root/ADFS -class SecurityTokenService
Start the AD FS service
Start AD FS Service with the command:
Start-Service adfssrv
Connect the AD FS Server to the Artifact Database
Open PowerShell as an administrator.
Execute the following command:
Set-adfsproperties –artifactdbconnection “data source=sqladfs.ad.localADFS,11433; initial catalog=adfsartifactstore;integrated security=true”
Restart the AD FS service
Restart the AD FS Service by executing
Restart-Service adfssrv
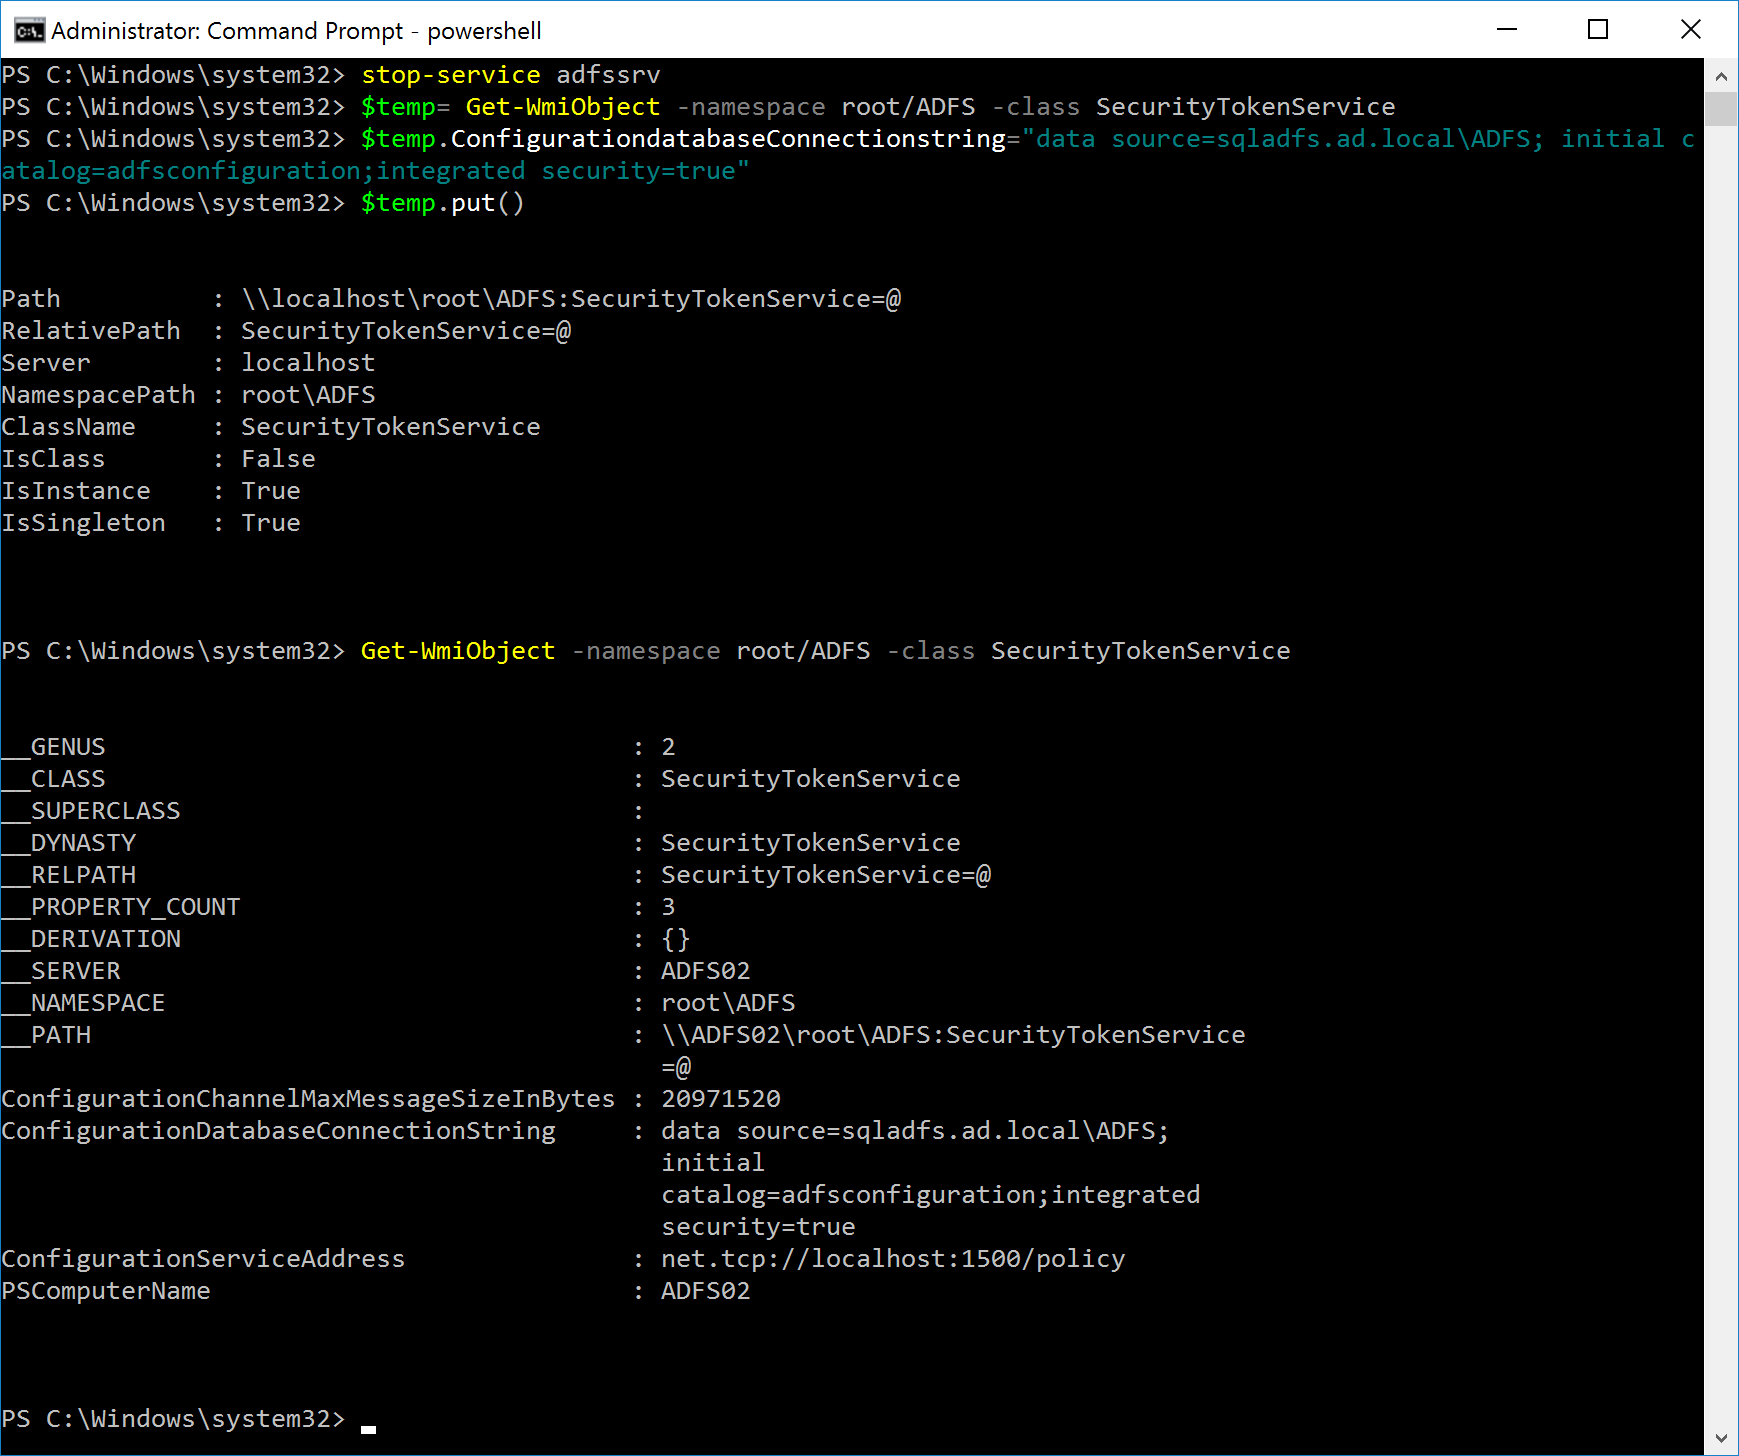
 Make sure your migration is done correctly
Watch the events logs
Make sure the ID 100 event is present after a server or service restart.
Check DB connections
Configuration DB
Get-WmiObject -namespace root/ADFS -class SecurityTokenService
__GENUS : 2
__CLASS : SecurityTokenService
__SUPERCLASS :
__DYNASTY : SecurityTokenService
__RELPATH : SecurityTokenService=@
__PROPERTY_COUNT : 3
__DERIVATION : {}
__SERVER : ADFS02
__NAMESPACE : rootADFS
__PATH : \ADFS02rootADFS:SecurityTokenService
=@
ConfigurationChannelMaxMessageSizeInBytes : 20971520
ConfigurationDatabaseConnectionString : data source=sqladfs.ad.localADFS,11433;
initial
catalog=adfsconfiguration;integrated
security=true
ConfigurationServiceAddress : net.tcp://localhost:1500/policy
PSComputerName : ADFS02
Artifact DB
Get-ADFSproperties | fl artifactdbconnection
ArtifactDbConnection : data source= sqladfs.ad.localADFS,11433; initial catalog=adfsartifactstore;integrated security=true
Uninstall WID DB sources
When all operations are done, you need to uninstall all composents of WID db on the farm servers ADFS.