Implementing Citrix Provisioning Services (PVS) is very common nowaday when it’s about deploying Shared Desktops (XenApp) or Pooled, Private or Personal Desktops (XenDesktop). If there are still some debate around about using TFTP+PXE vs using BDM (Boot Device Manager) I still observe a large number of deployment made using TFTP+PXE rather than BDM. Both of these two solution have Pro and Cons (Check Wilco’s website here) and this is an architectural choice you need to plan ahead the project.
Using TFTP and PXE bring several spof along the line and need to be consider and design as the most resilient as the high availability require. TFTP is not redundant by design, using the DHCP 66 options (Boot Server Host Name) allow the use of only one IP address. and there is no redundance behind that. With Citrix Netscaler, Citrix gave us the ability to bring high availability to this spof and address this issue. With Netscaler previous version (prior 10.x) that wasn’t that easy to setup and the understanding of Netscaler feature like Layer 2 Mode, DSR etc… And if you didn’t understand exactly everything what you were doing, all the PVS traffic was going through the Netscaler and believe me, that was really pain in the ass… I saw that kind of mistake a number of time…
With Netscaler 10.1 then 10.5 things are a lot more easy… So I just jump on the occasion I had at one customer’s place to load balance 4 Citrix PVS servers (TFTP + PVS) to deliver this simple and fast how to.
Information you need to gather :
- IP Adresses and name of all PVS servers (with TFTP)
- One IP Adress for the Virtual Server (VIP)
- One or more Netscaler 10.5 (I made this configuration with 10.5.51.10.nc)
Here is a basic architecture overview of component we are impacting :
- Netscaler #1 and #2 : This is were the configuration will take place
- PVS Servers #1, #2, #3 and #4 : All the PVS / PXE / TFTP servers we will use in this example
- DHCP Servers #1 and #2 : This is where we will configure the 66 option by using the Load Balanced IP Address (VIP)
- VMs : All these Virtual Machines will use PXE to boot get the Load Balanced TFTP address to launch the ARDBP32.bin file.

Let’s got for the Netscaler configuration, first you need to login, if you’re using a multi Netscaler architecture you need to connect on the Primary one.
In the Traffic Management / Load Balancing / Servers menu we will add the PVS servers (4 in my case)

You can add PVS servers by clicking on Add at the top of the main windows and follow the next screenshot
 Enter the PVS server name and its IP Address and click on create, just do the same for every PVS server
Then in the Traffic Management / Load Balancing / Monitors we will add a TFTP monitor and to do so click on Add :

And fill as follow :

Chose a name everyone can understand like tftp_LB-IPADDRESS_monitor and change the Type to USER. Don’t forget to put everything regarding time in second (I don’t know why value on the Netscaler I use were not set)
Once you’re done click on the Special Parameters tab :
Chose nstftp.pl and click on create
In the Traffic Management / Load Balancing / Services we will add new Services. To do so, click on Add at the top of the main window

And fill as follow :

Chose a name everyone can understand again and chose a PVS server using the Existing Server button list. Use the TFTP Protocol with the default network port (69). Click on Continue.
When the Service is created edit it and change the monitor bind by the one we created earlier :


And click on Save
These steps need to be repeated for each PVS servers.

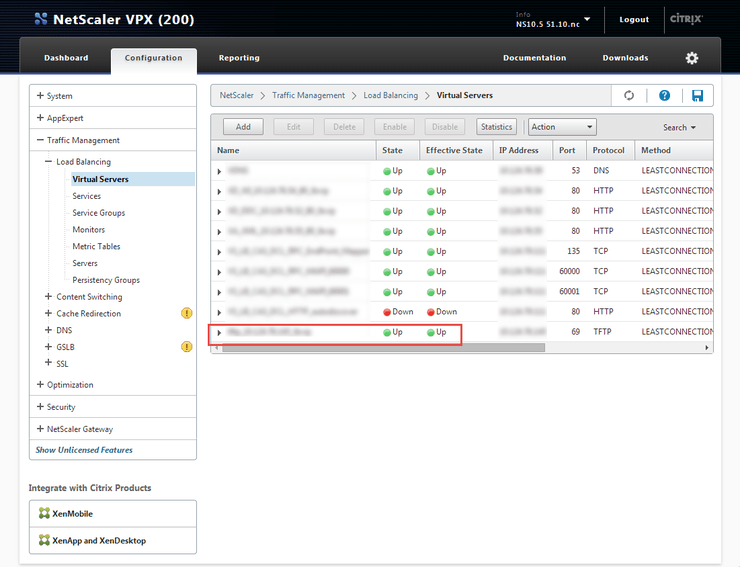
At last, go to the Traffic Management / Load Balancing / Virtual Servers and click on Add at the top of the main windows :

and fill as follow :

Using a cool name again, TFTP protocal and the Load Balanced IP Address you chose (VIP) the click on Continue and Edit the new Virtual Server to add Services :


Click on Save and Continue :


To finish click on Done.
If everything is green then you’re good to go and modify your DHCP with option 66 and Load Balanced IP Address. Boot up few vm to check if everything is ok !
