
My personal emails were hosted by OVH in their Exchange services since 2003 and this service didn't really evolve that much for the price I have to pay every month.
So I decided to move from OVH to Office 365 and this has been my first time so I documented it, it can maybe be useful for someone.
You need to have the Office 365 admin website : https://aka.ms/admincenter
you also need to have your OVH manager webpage opened : https://www.ovh.com/manager
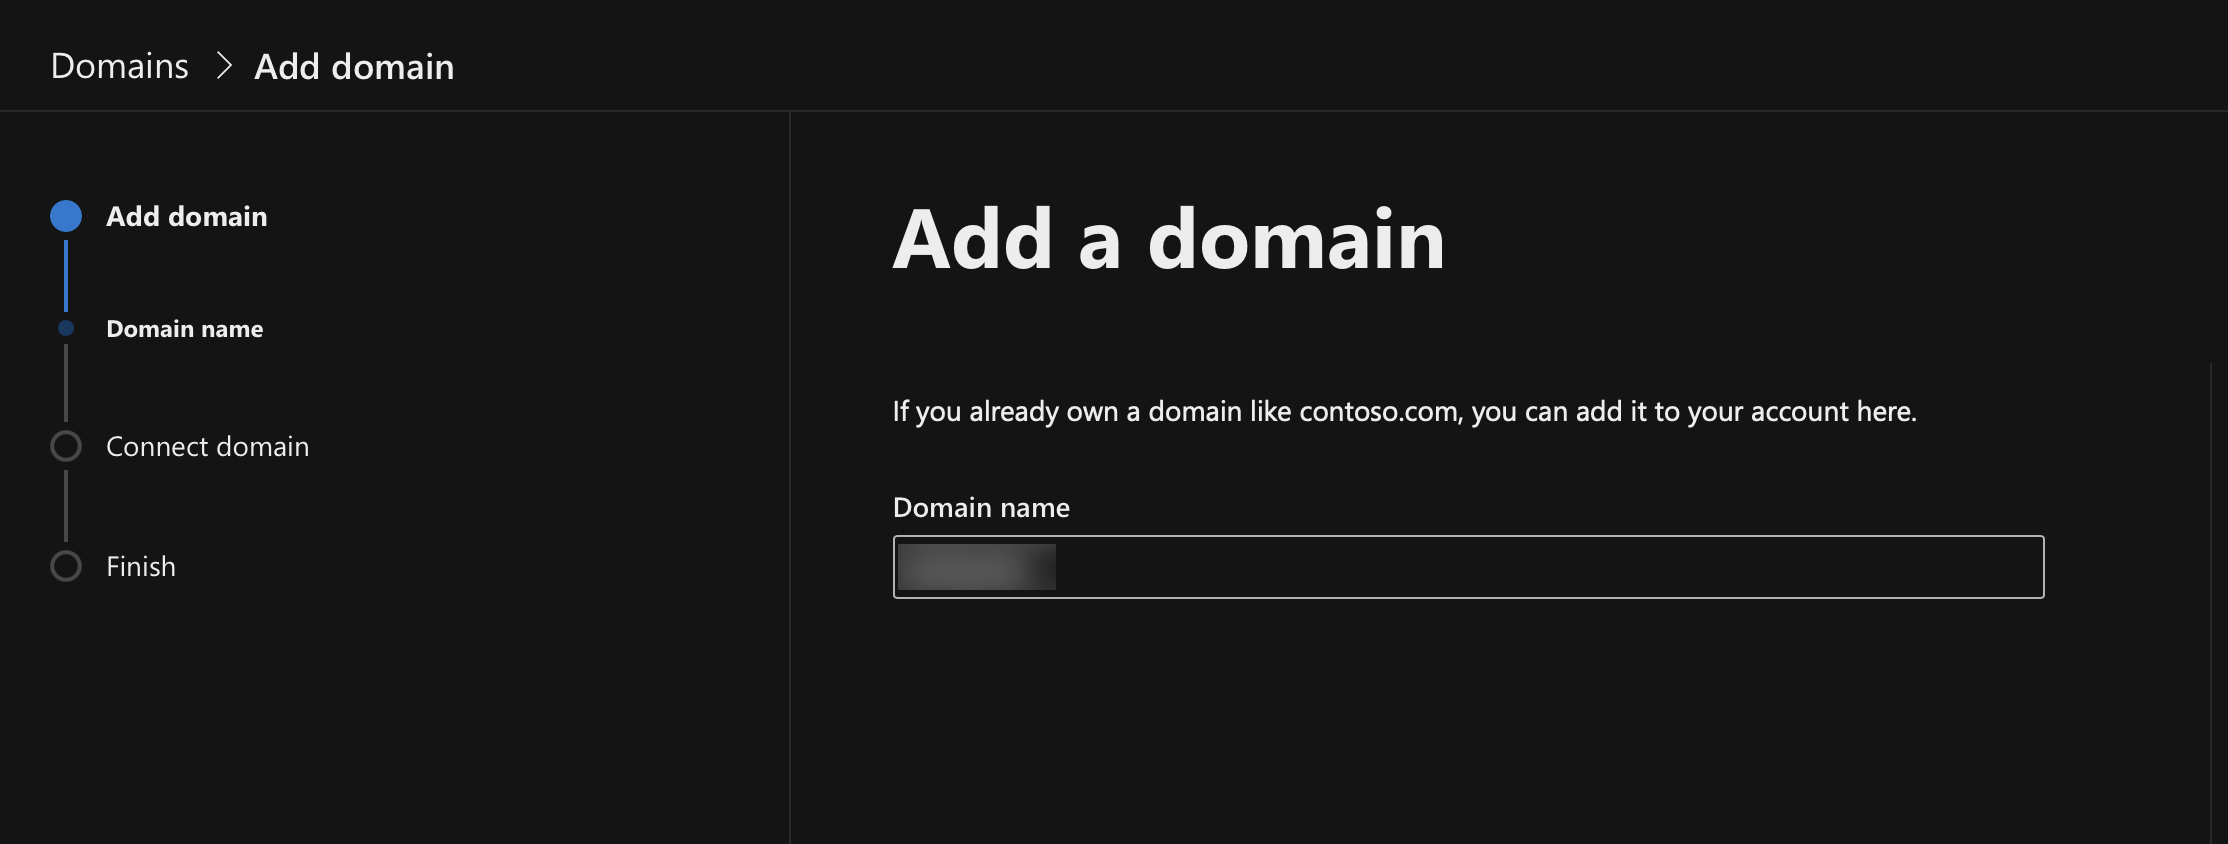
First in the Office 365 admincenter page, go to Settings / Domains and click Add Domain

Add you domain in the form domain.com
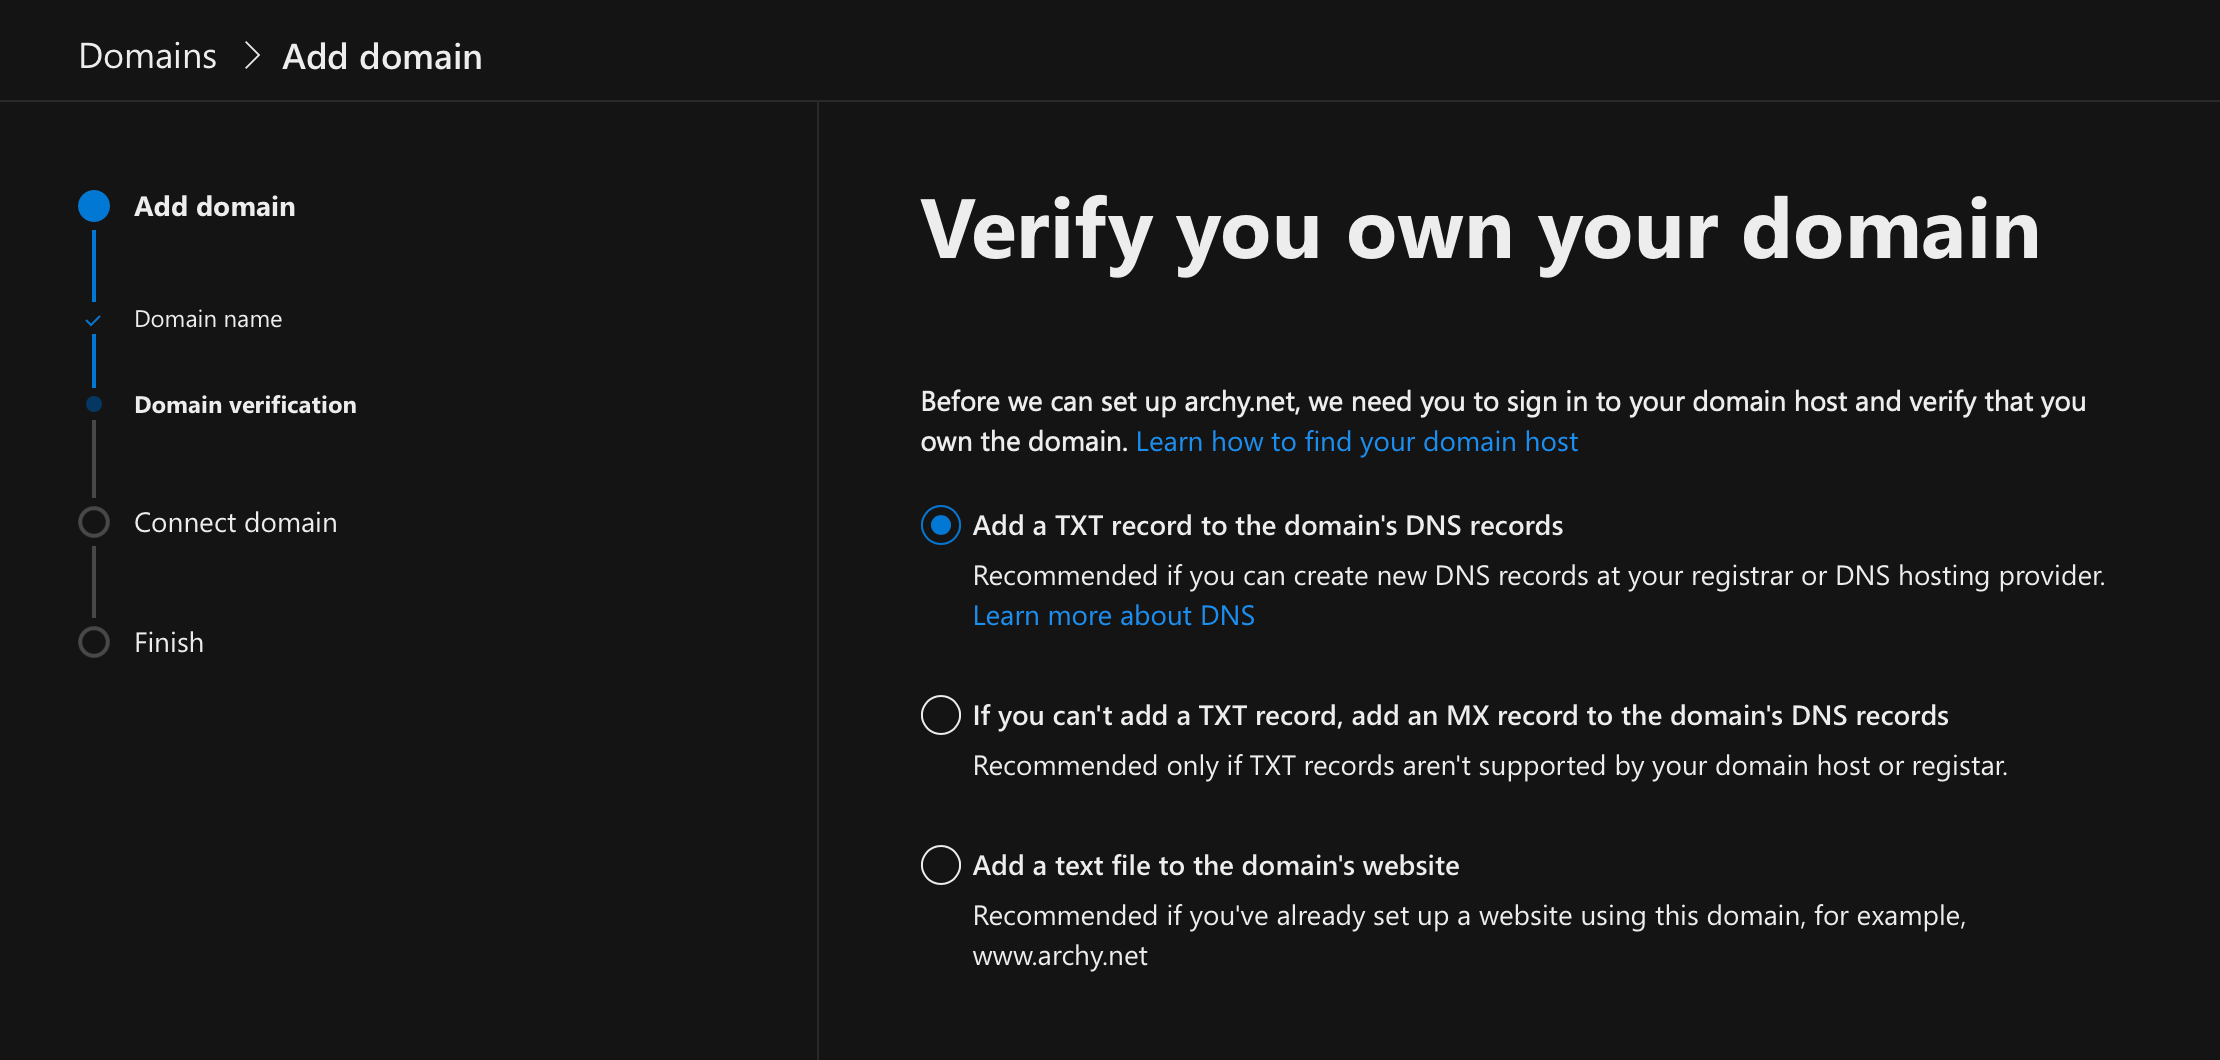
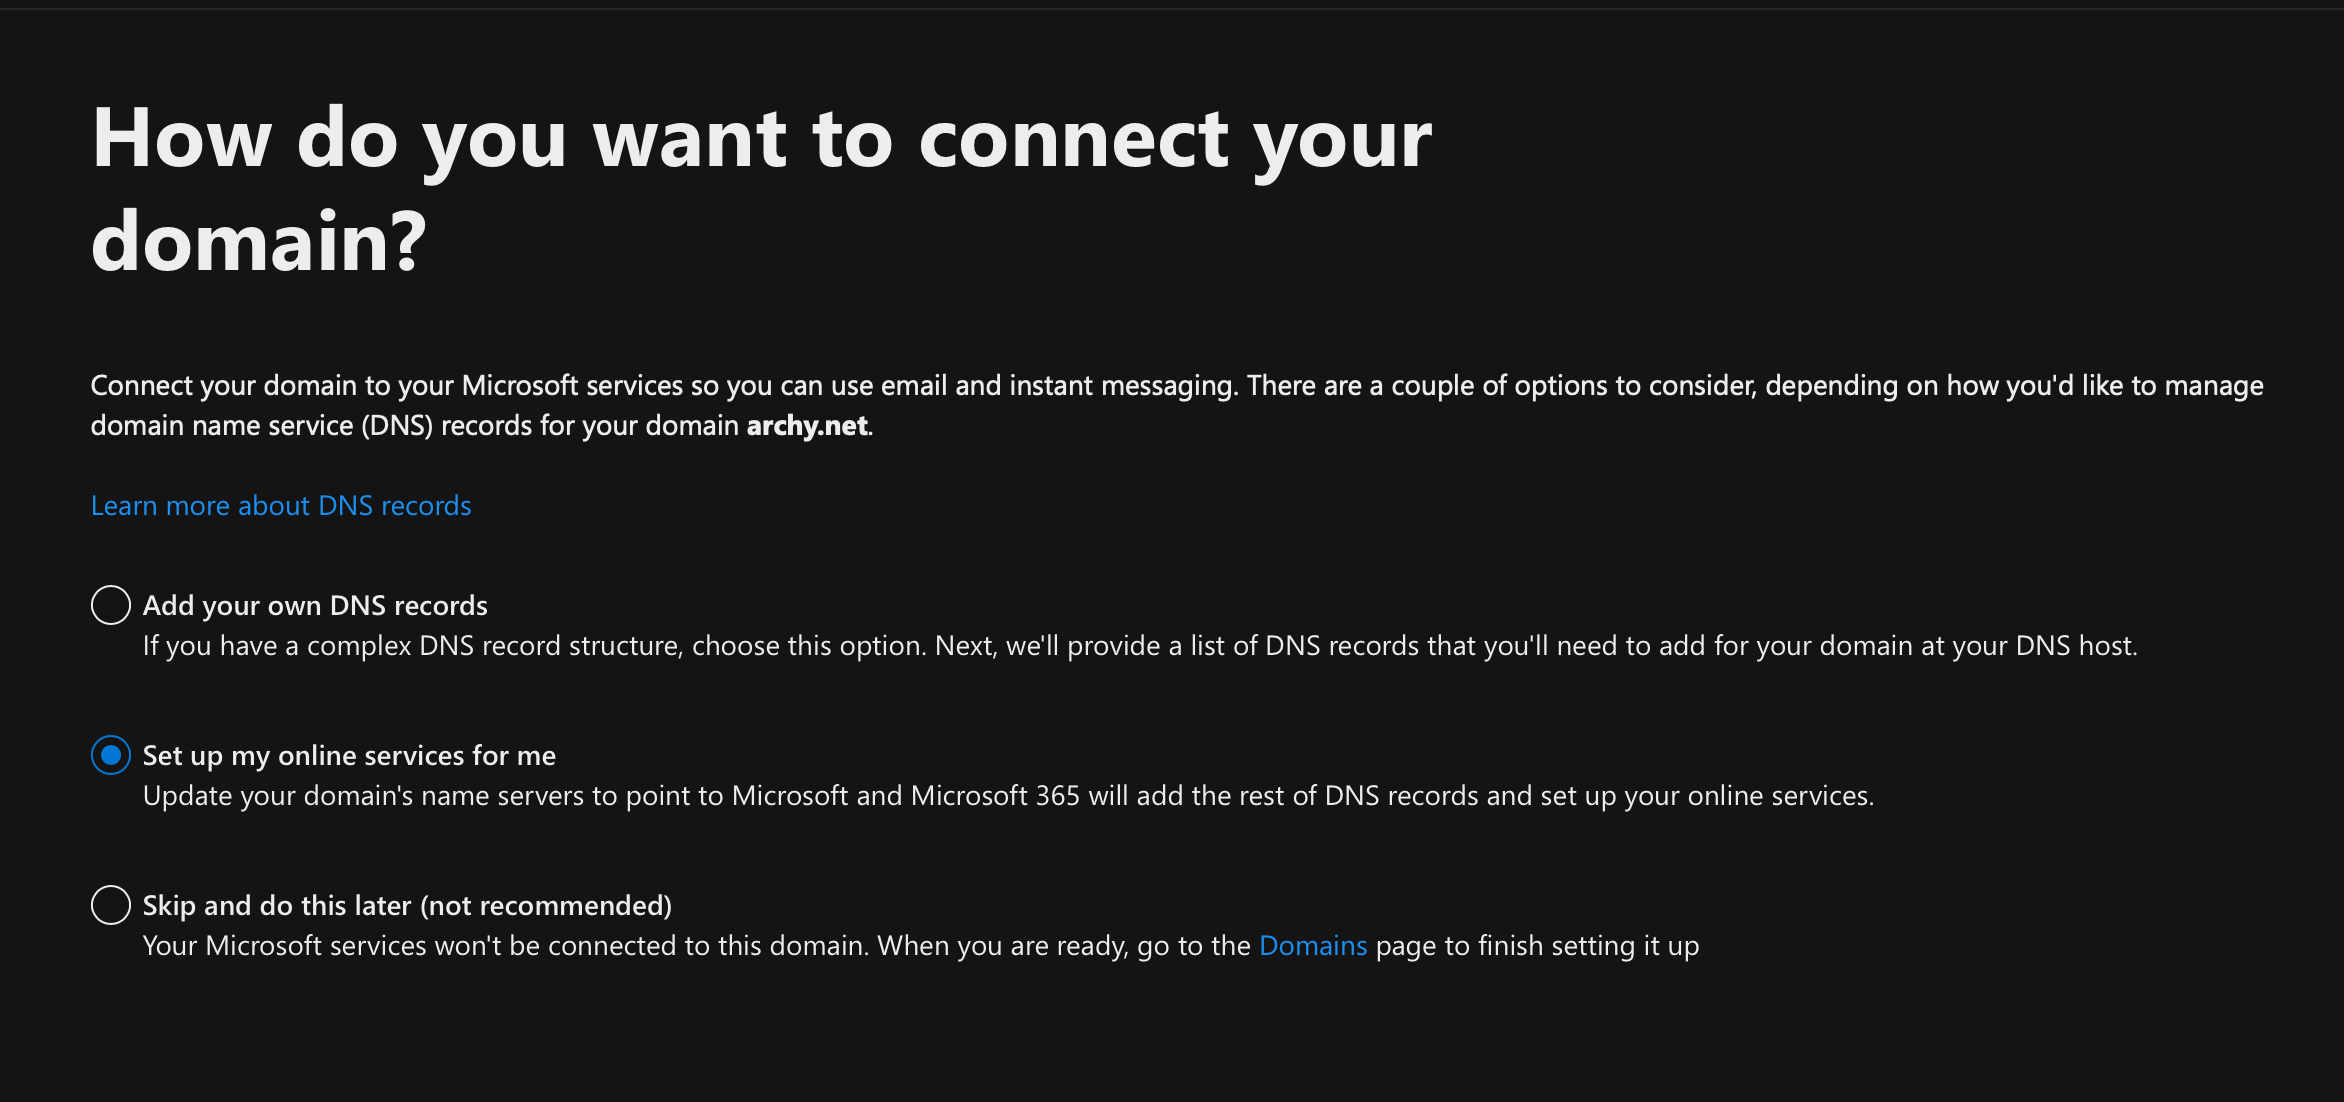
Then follow the process and chose the option suitable your usage.
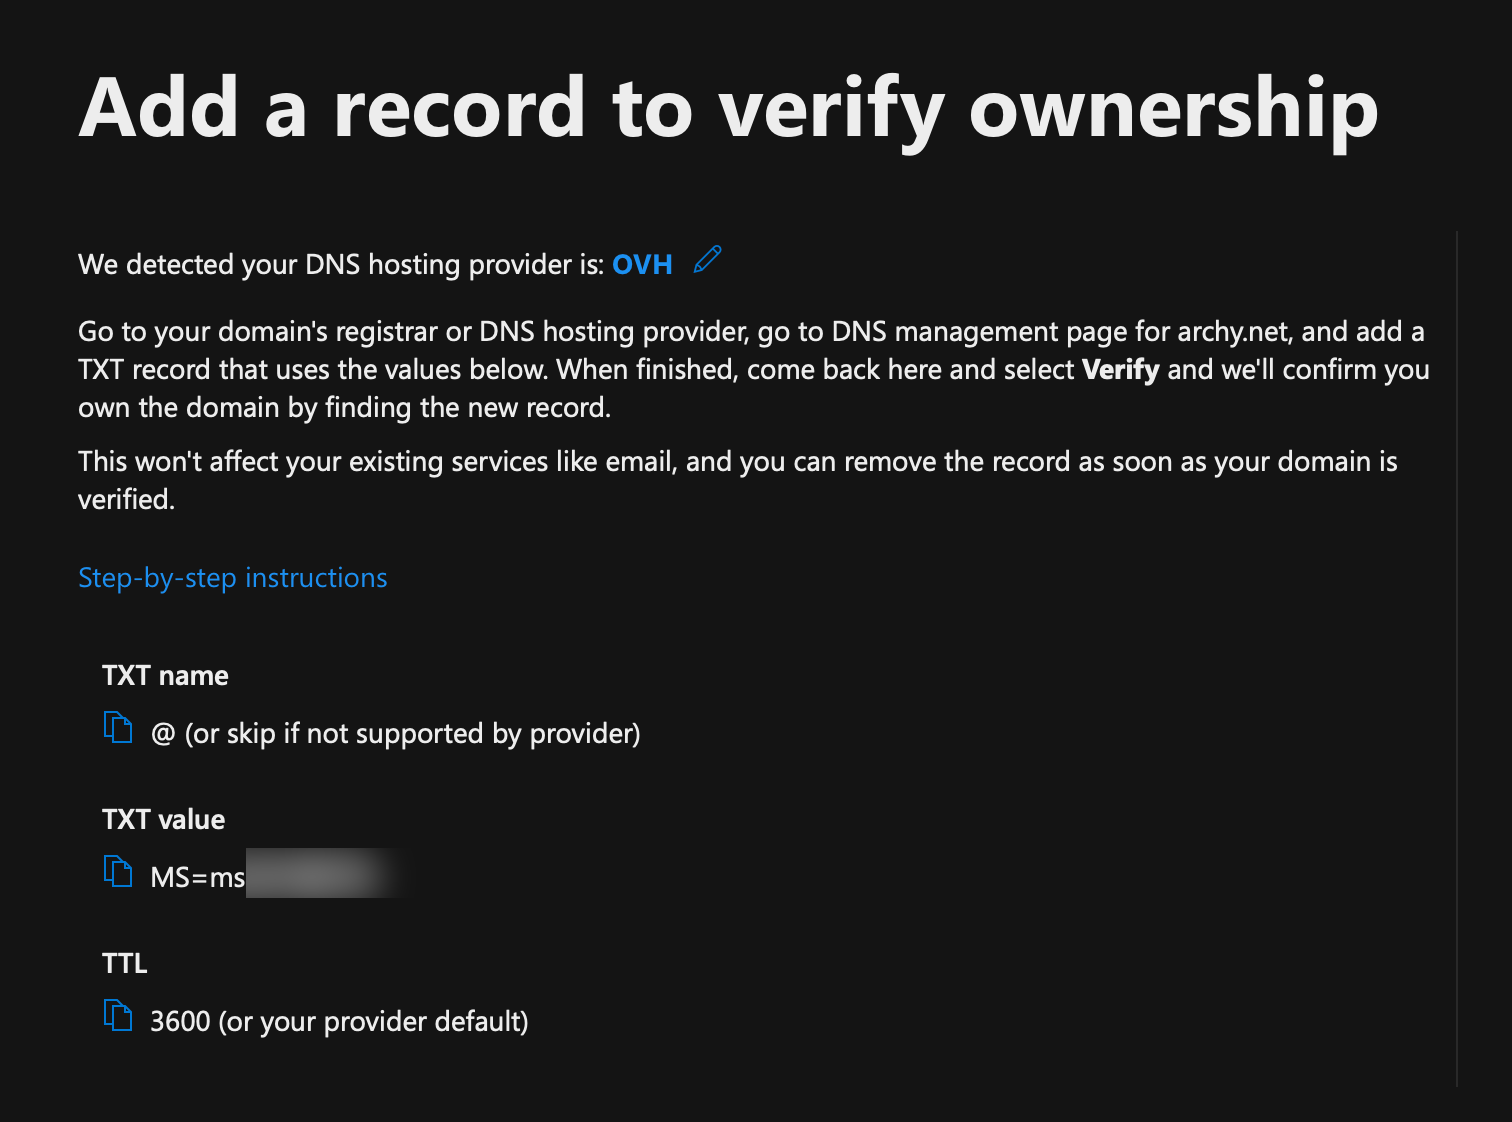
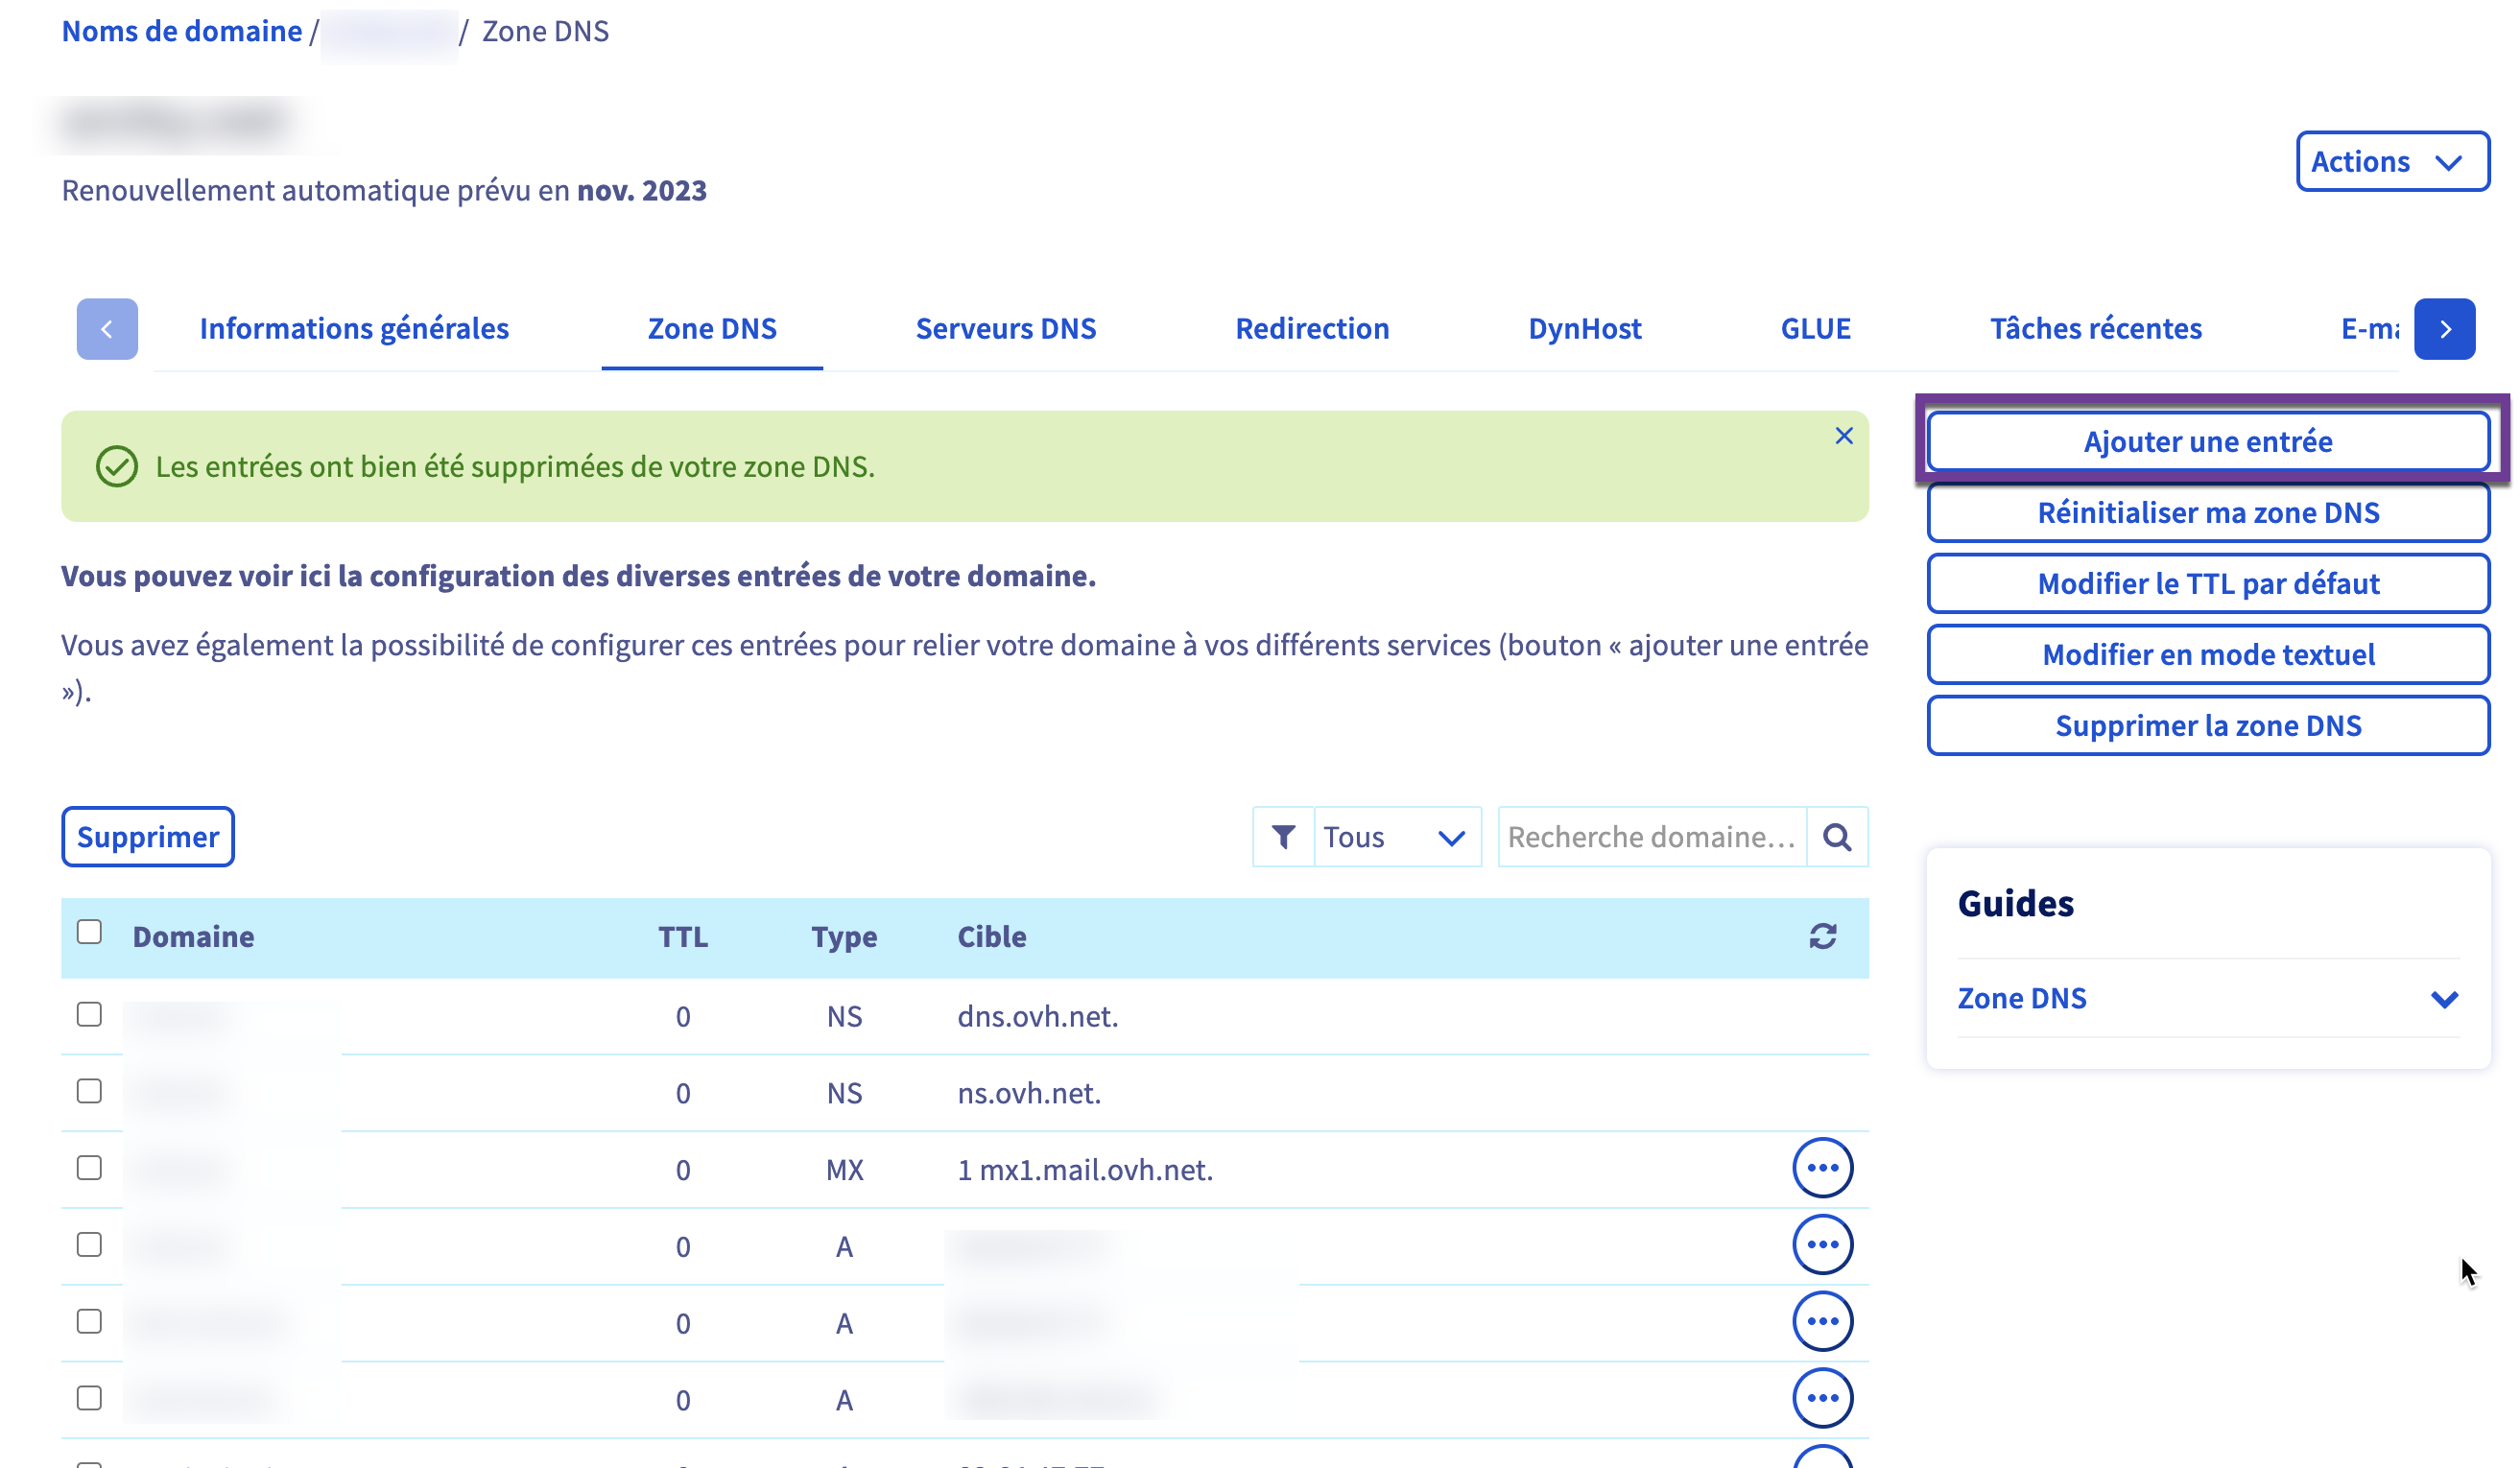
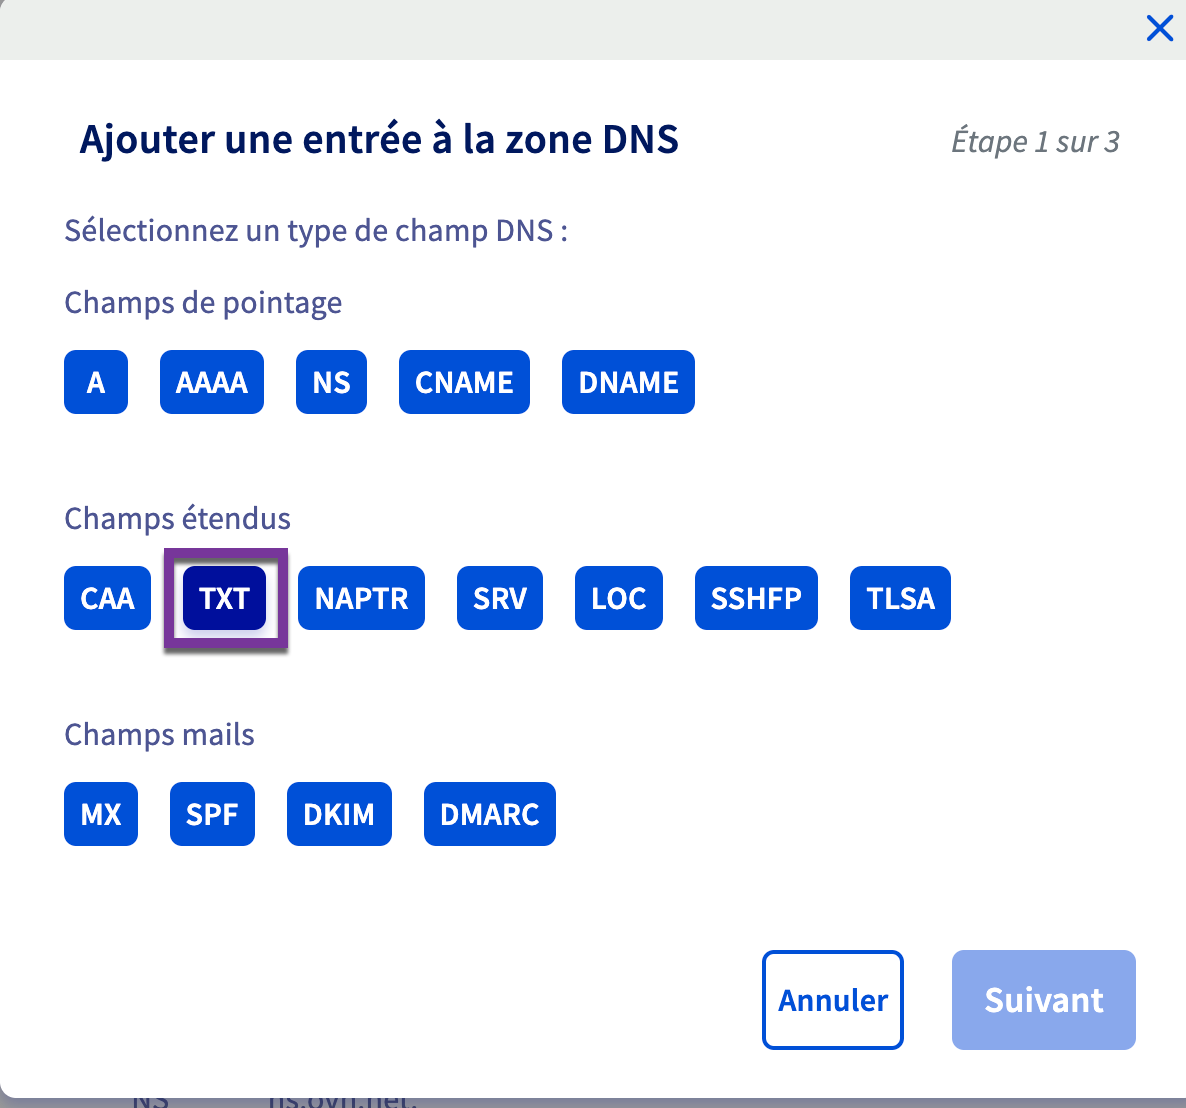
In the OVH manager, create the TXT entry as requested on the Office 65 admincenter
Chose TXT field
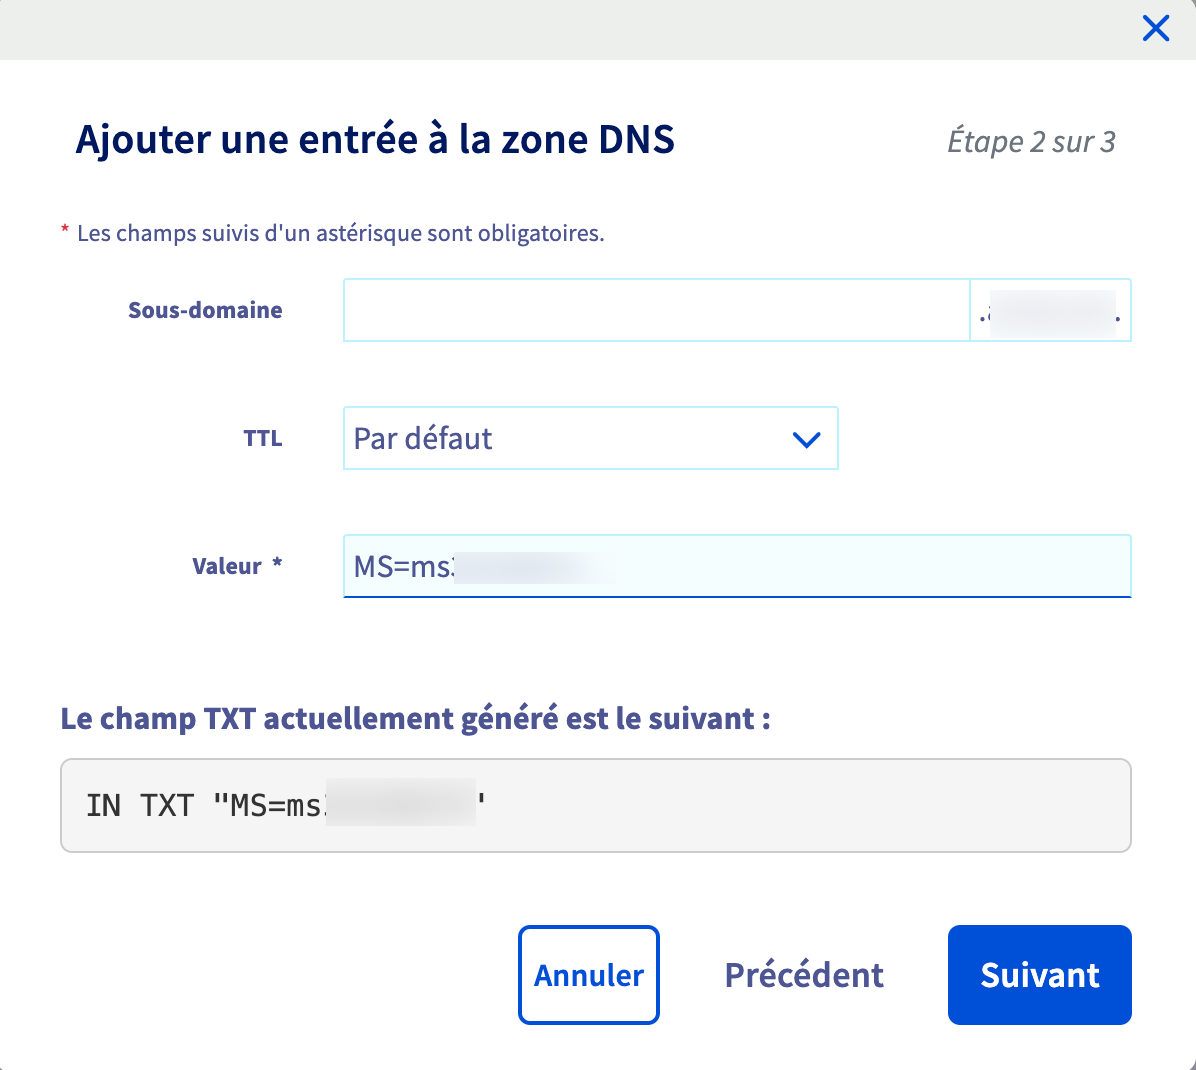
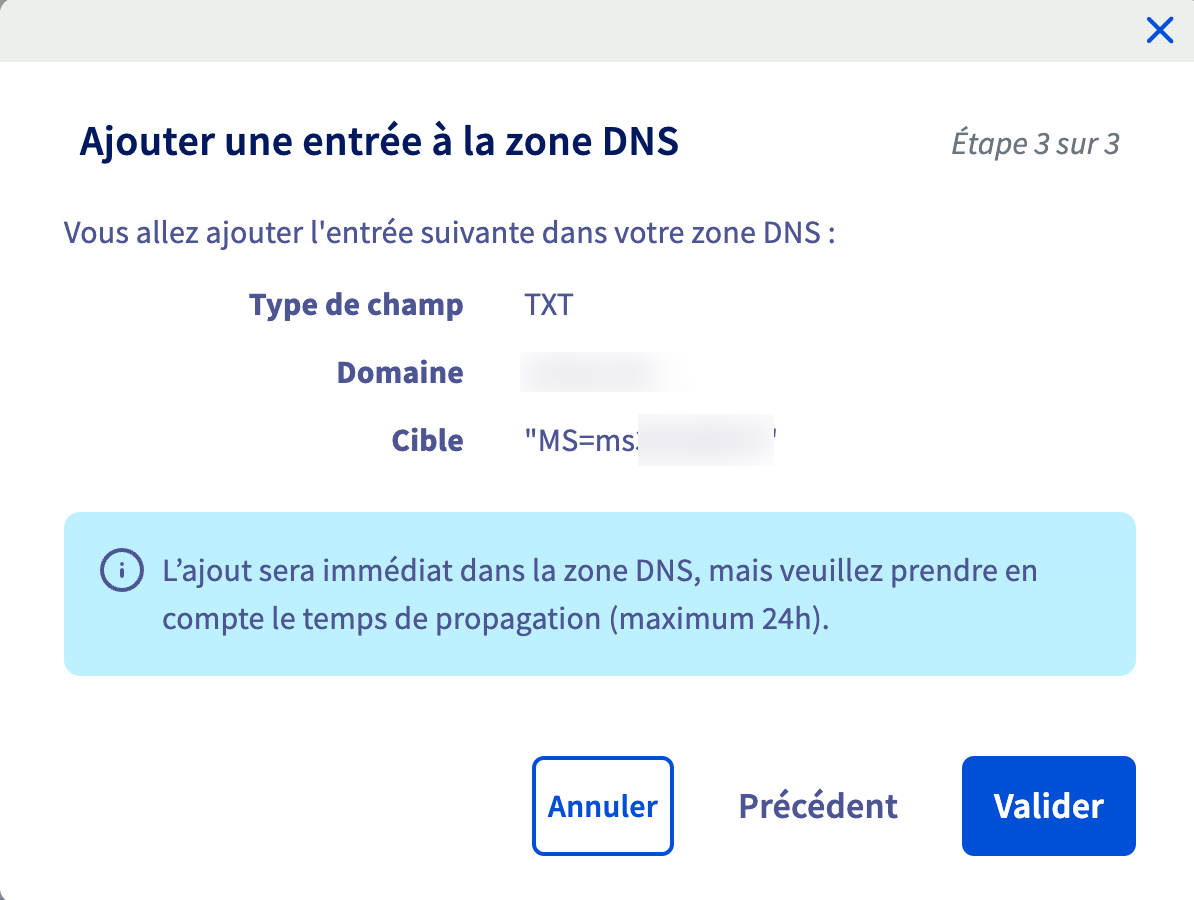
Enter the values you got in the Office 365 admincenter
Once it's done go back to the Office 365 admincenter and click on more option
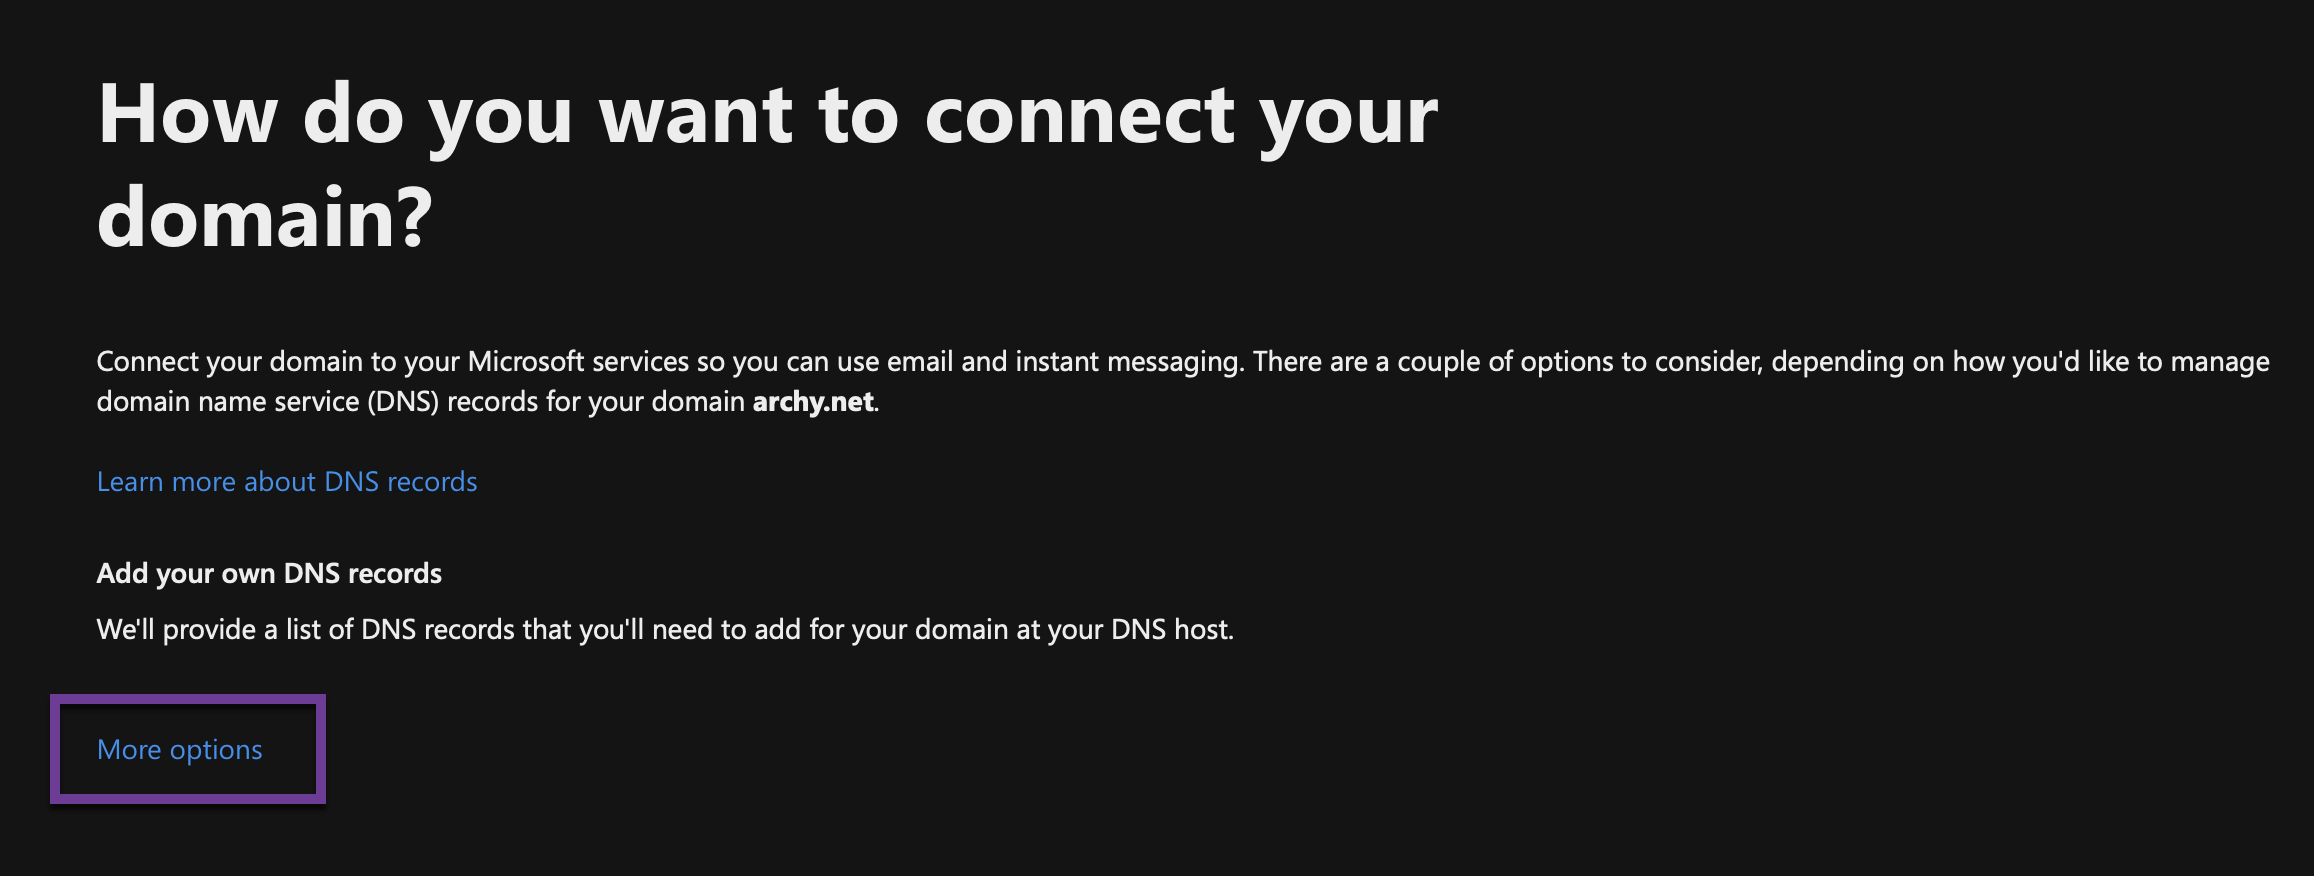
I chose the second option because I wanted to check it worked, and it did !
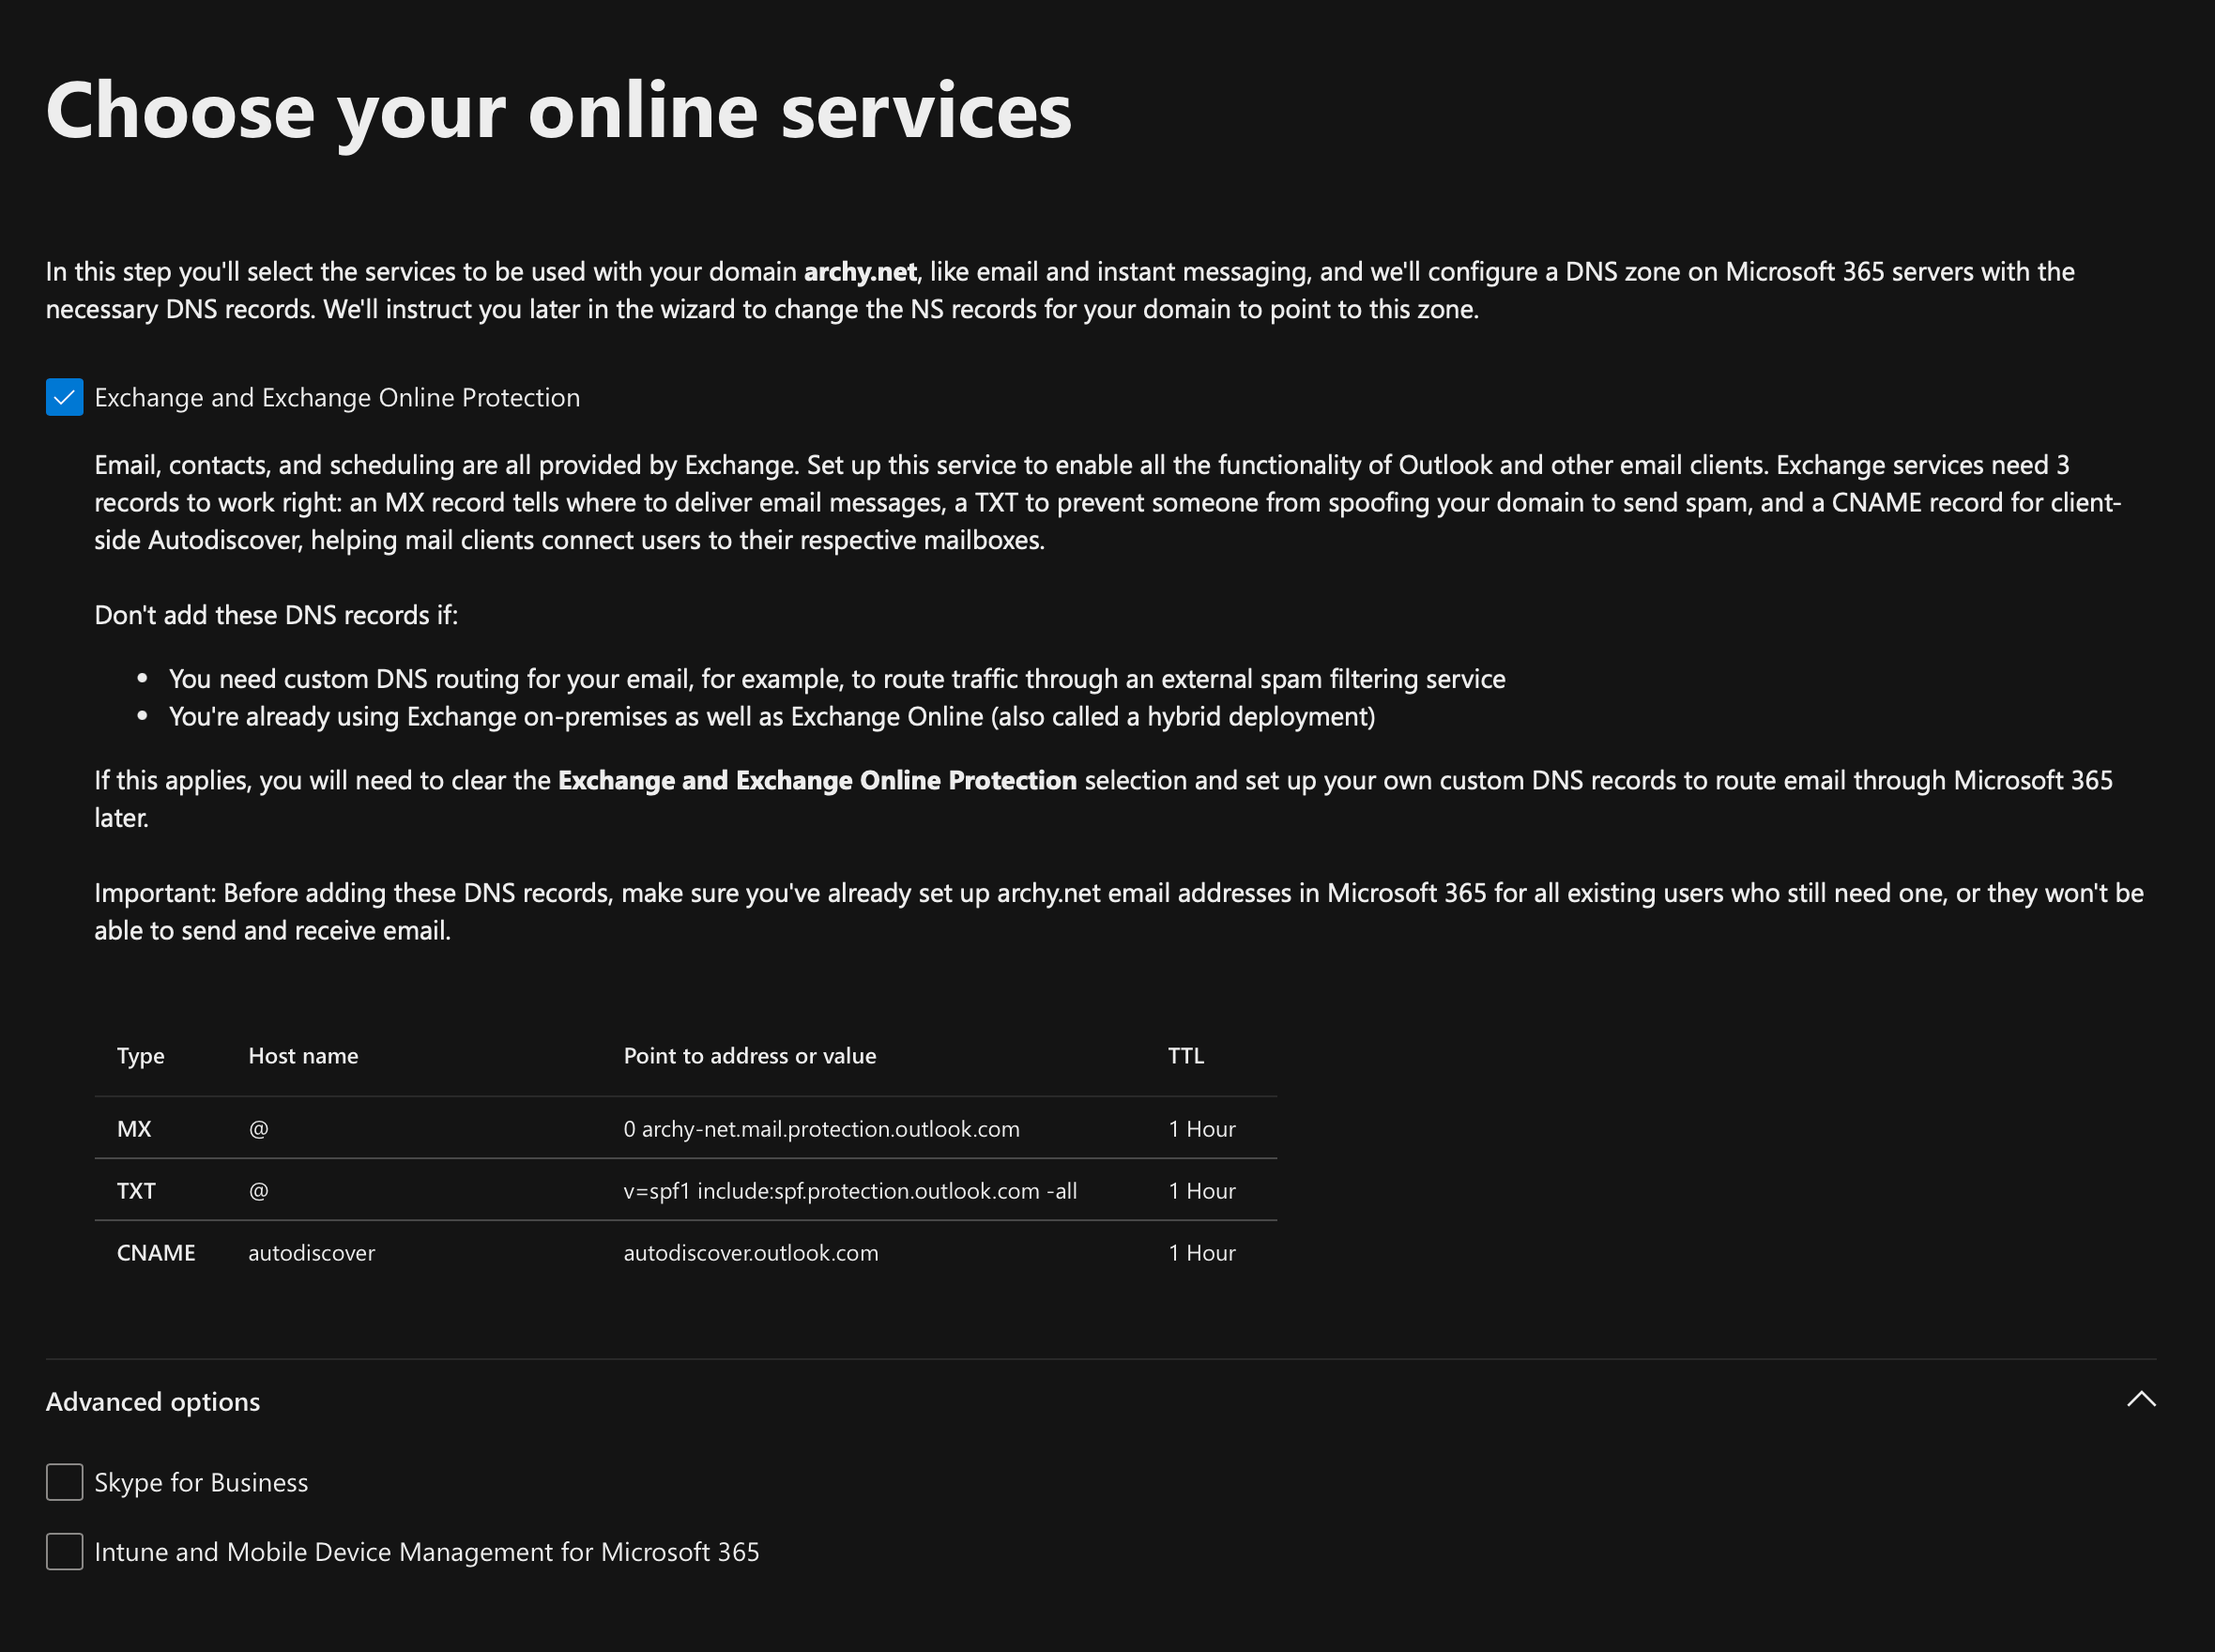
I didn't need the Skype for Business and Device Management as I just need the email services
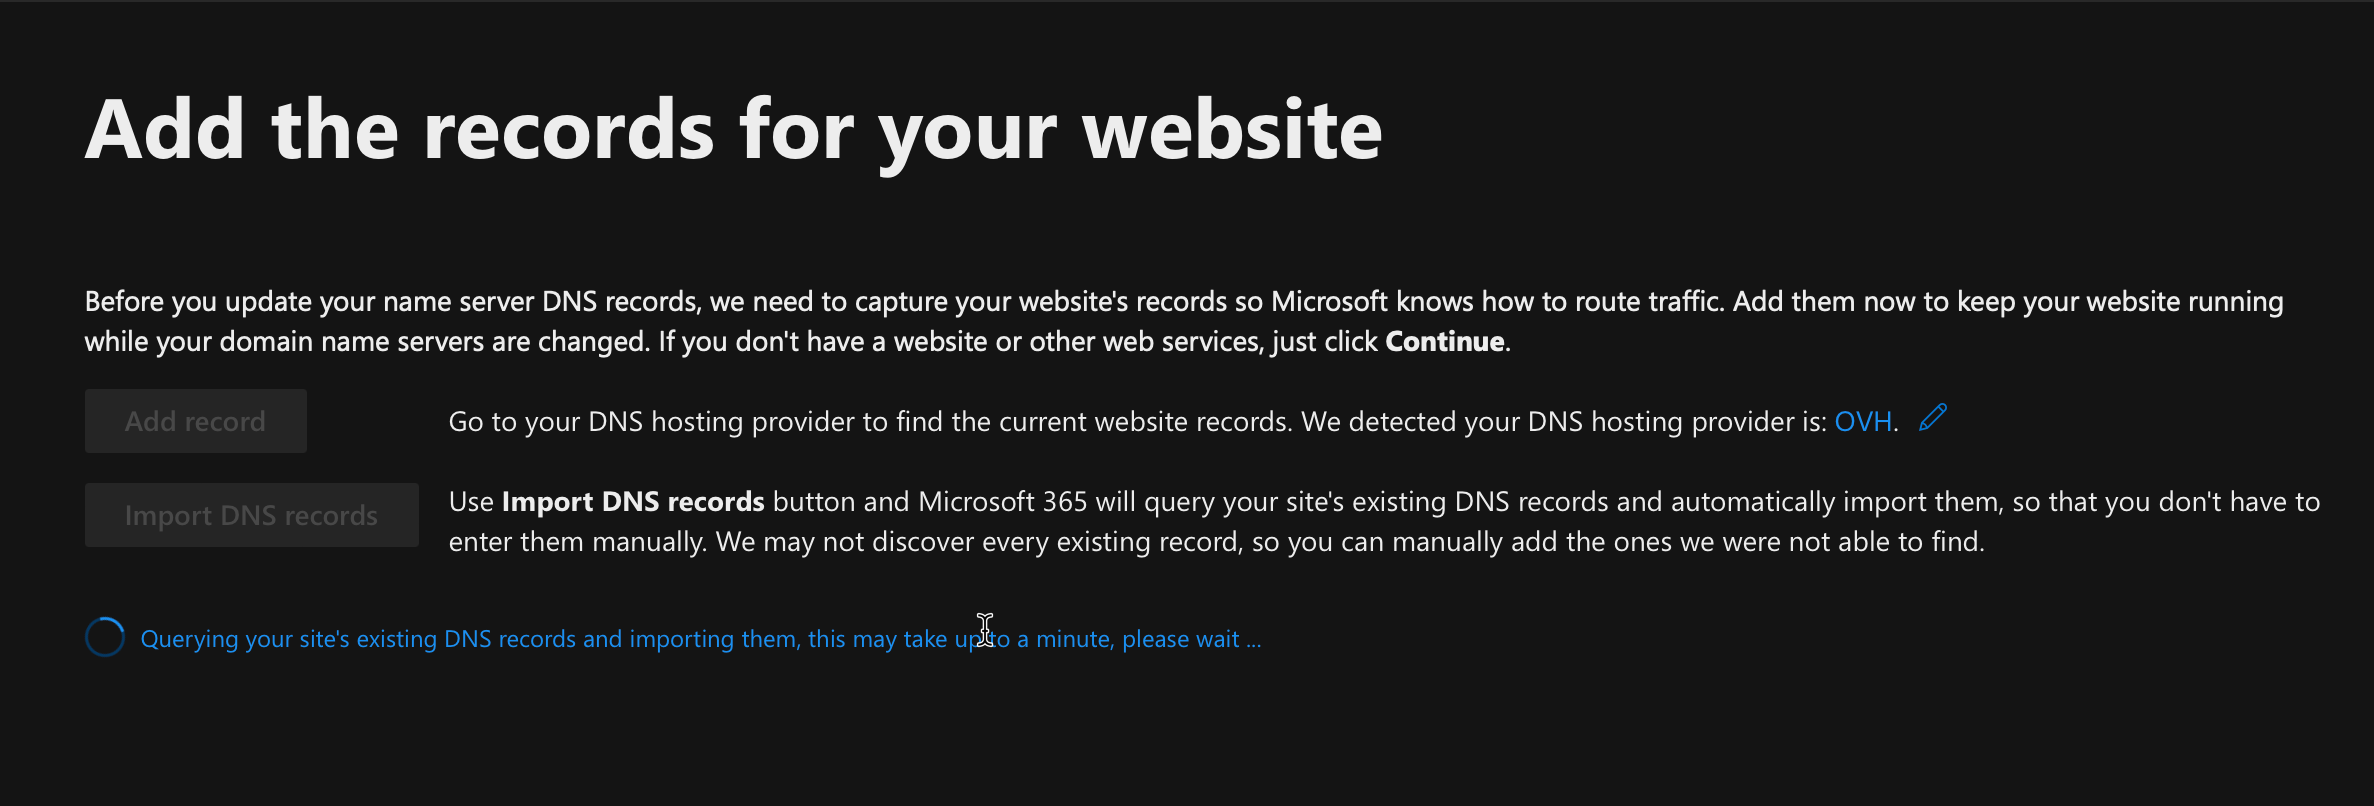
I chose to import the DNS entries from OVH
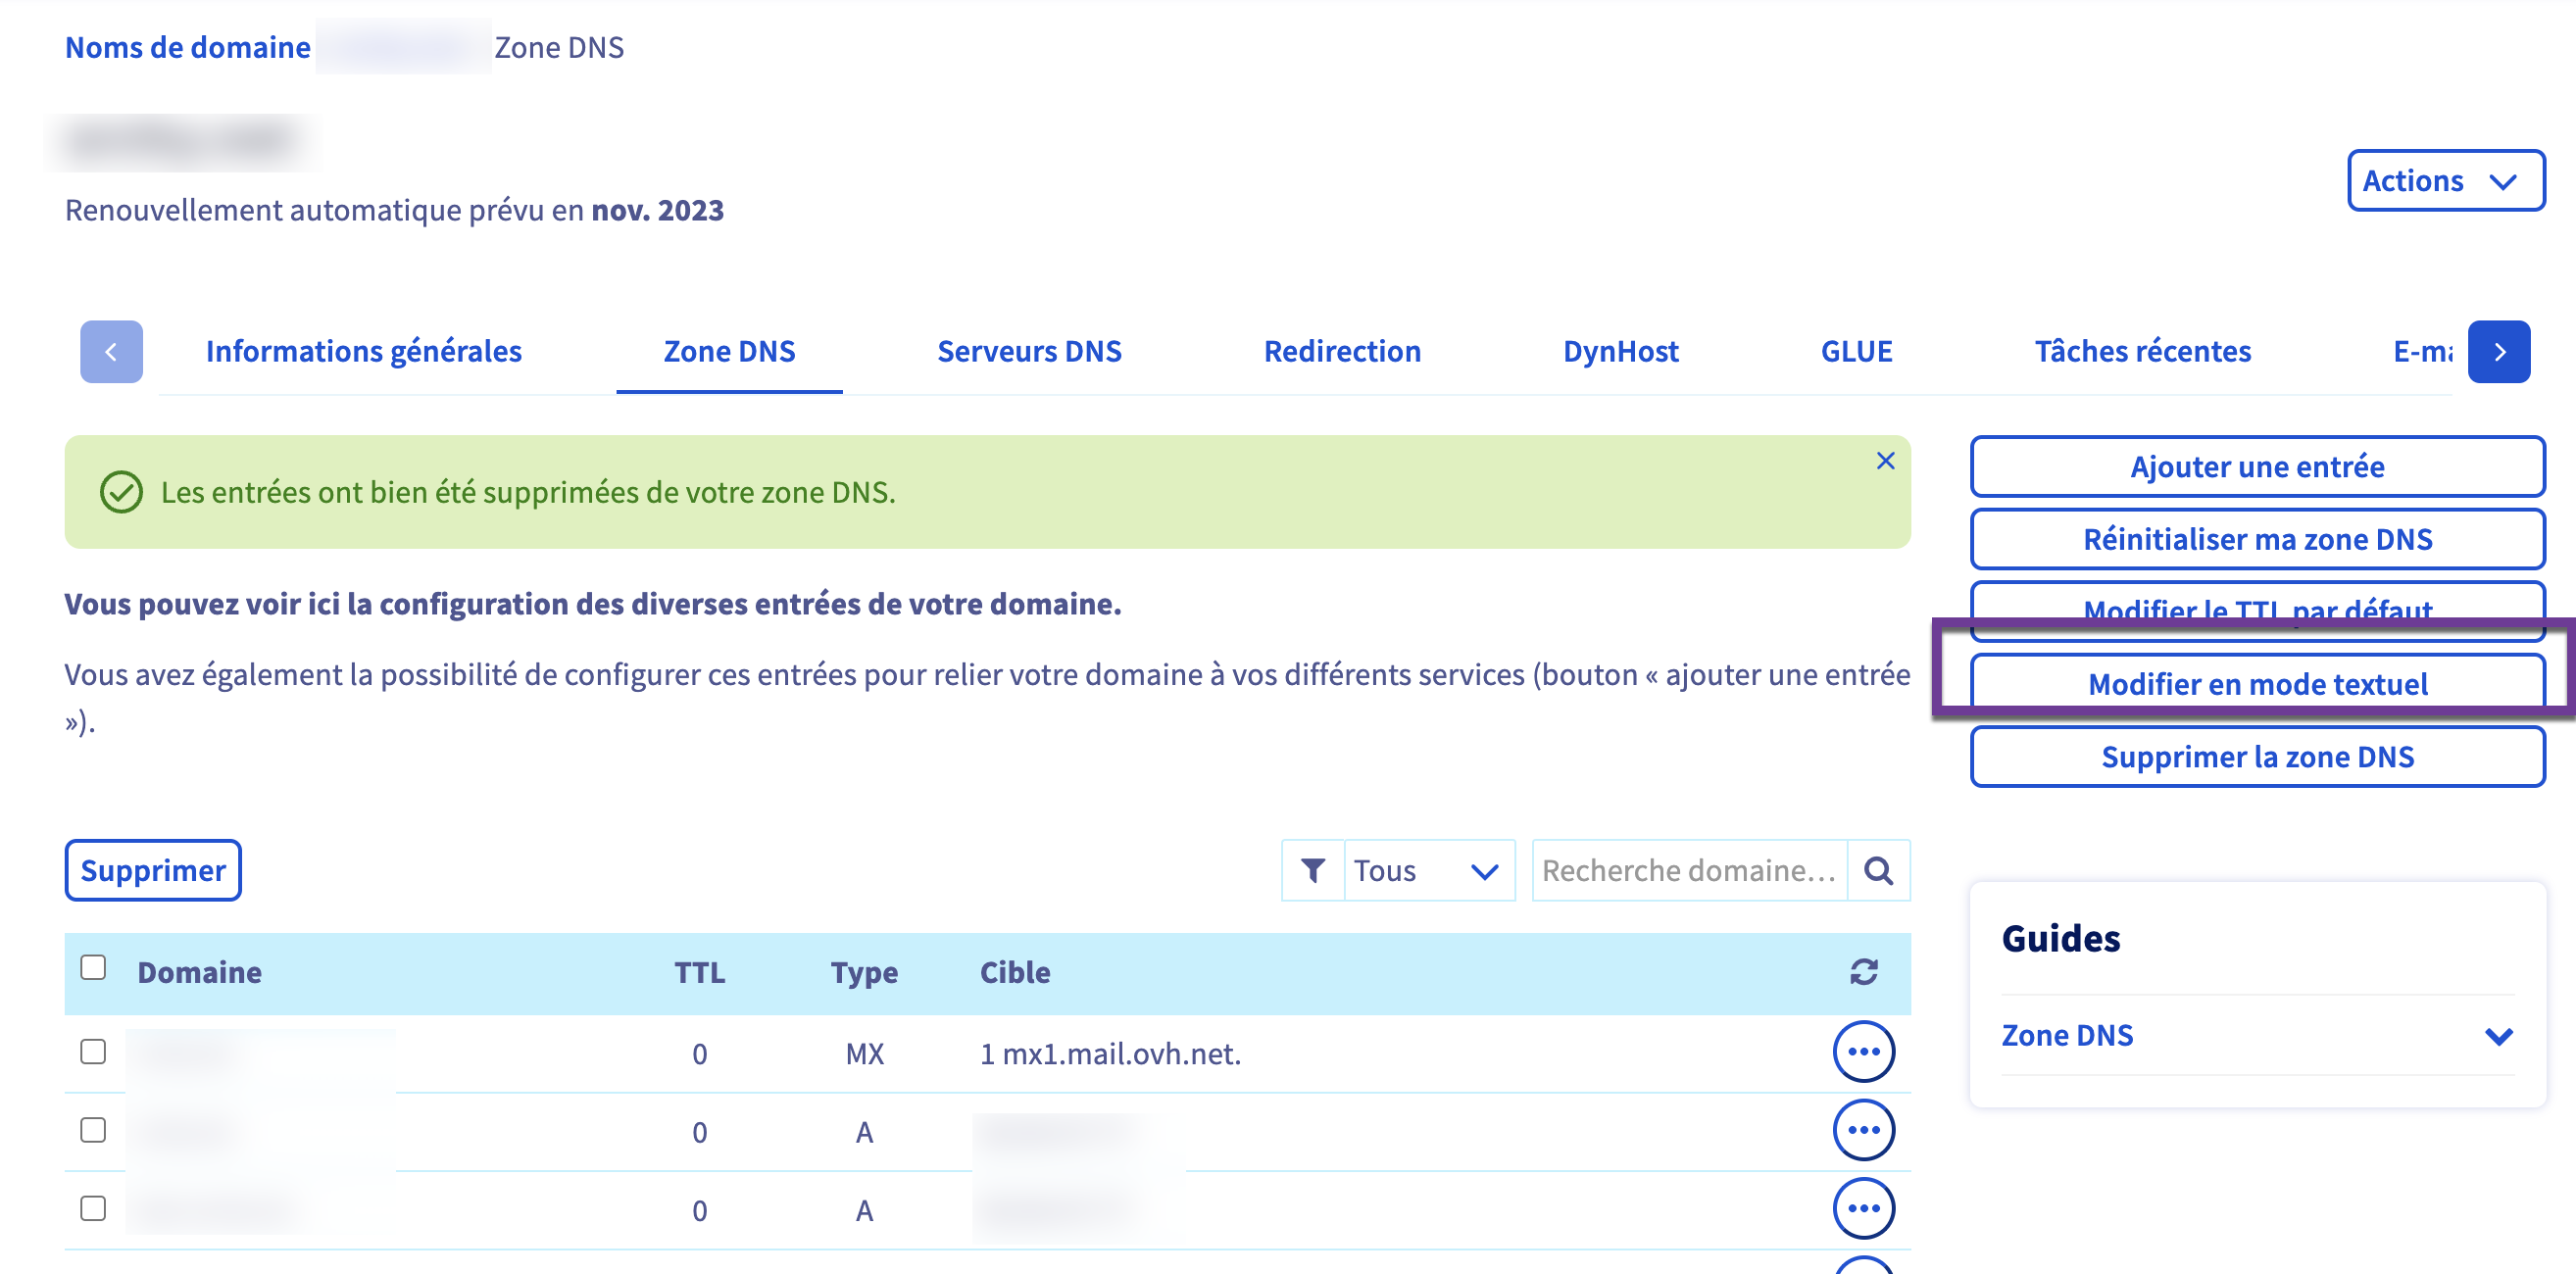
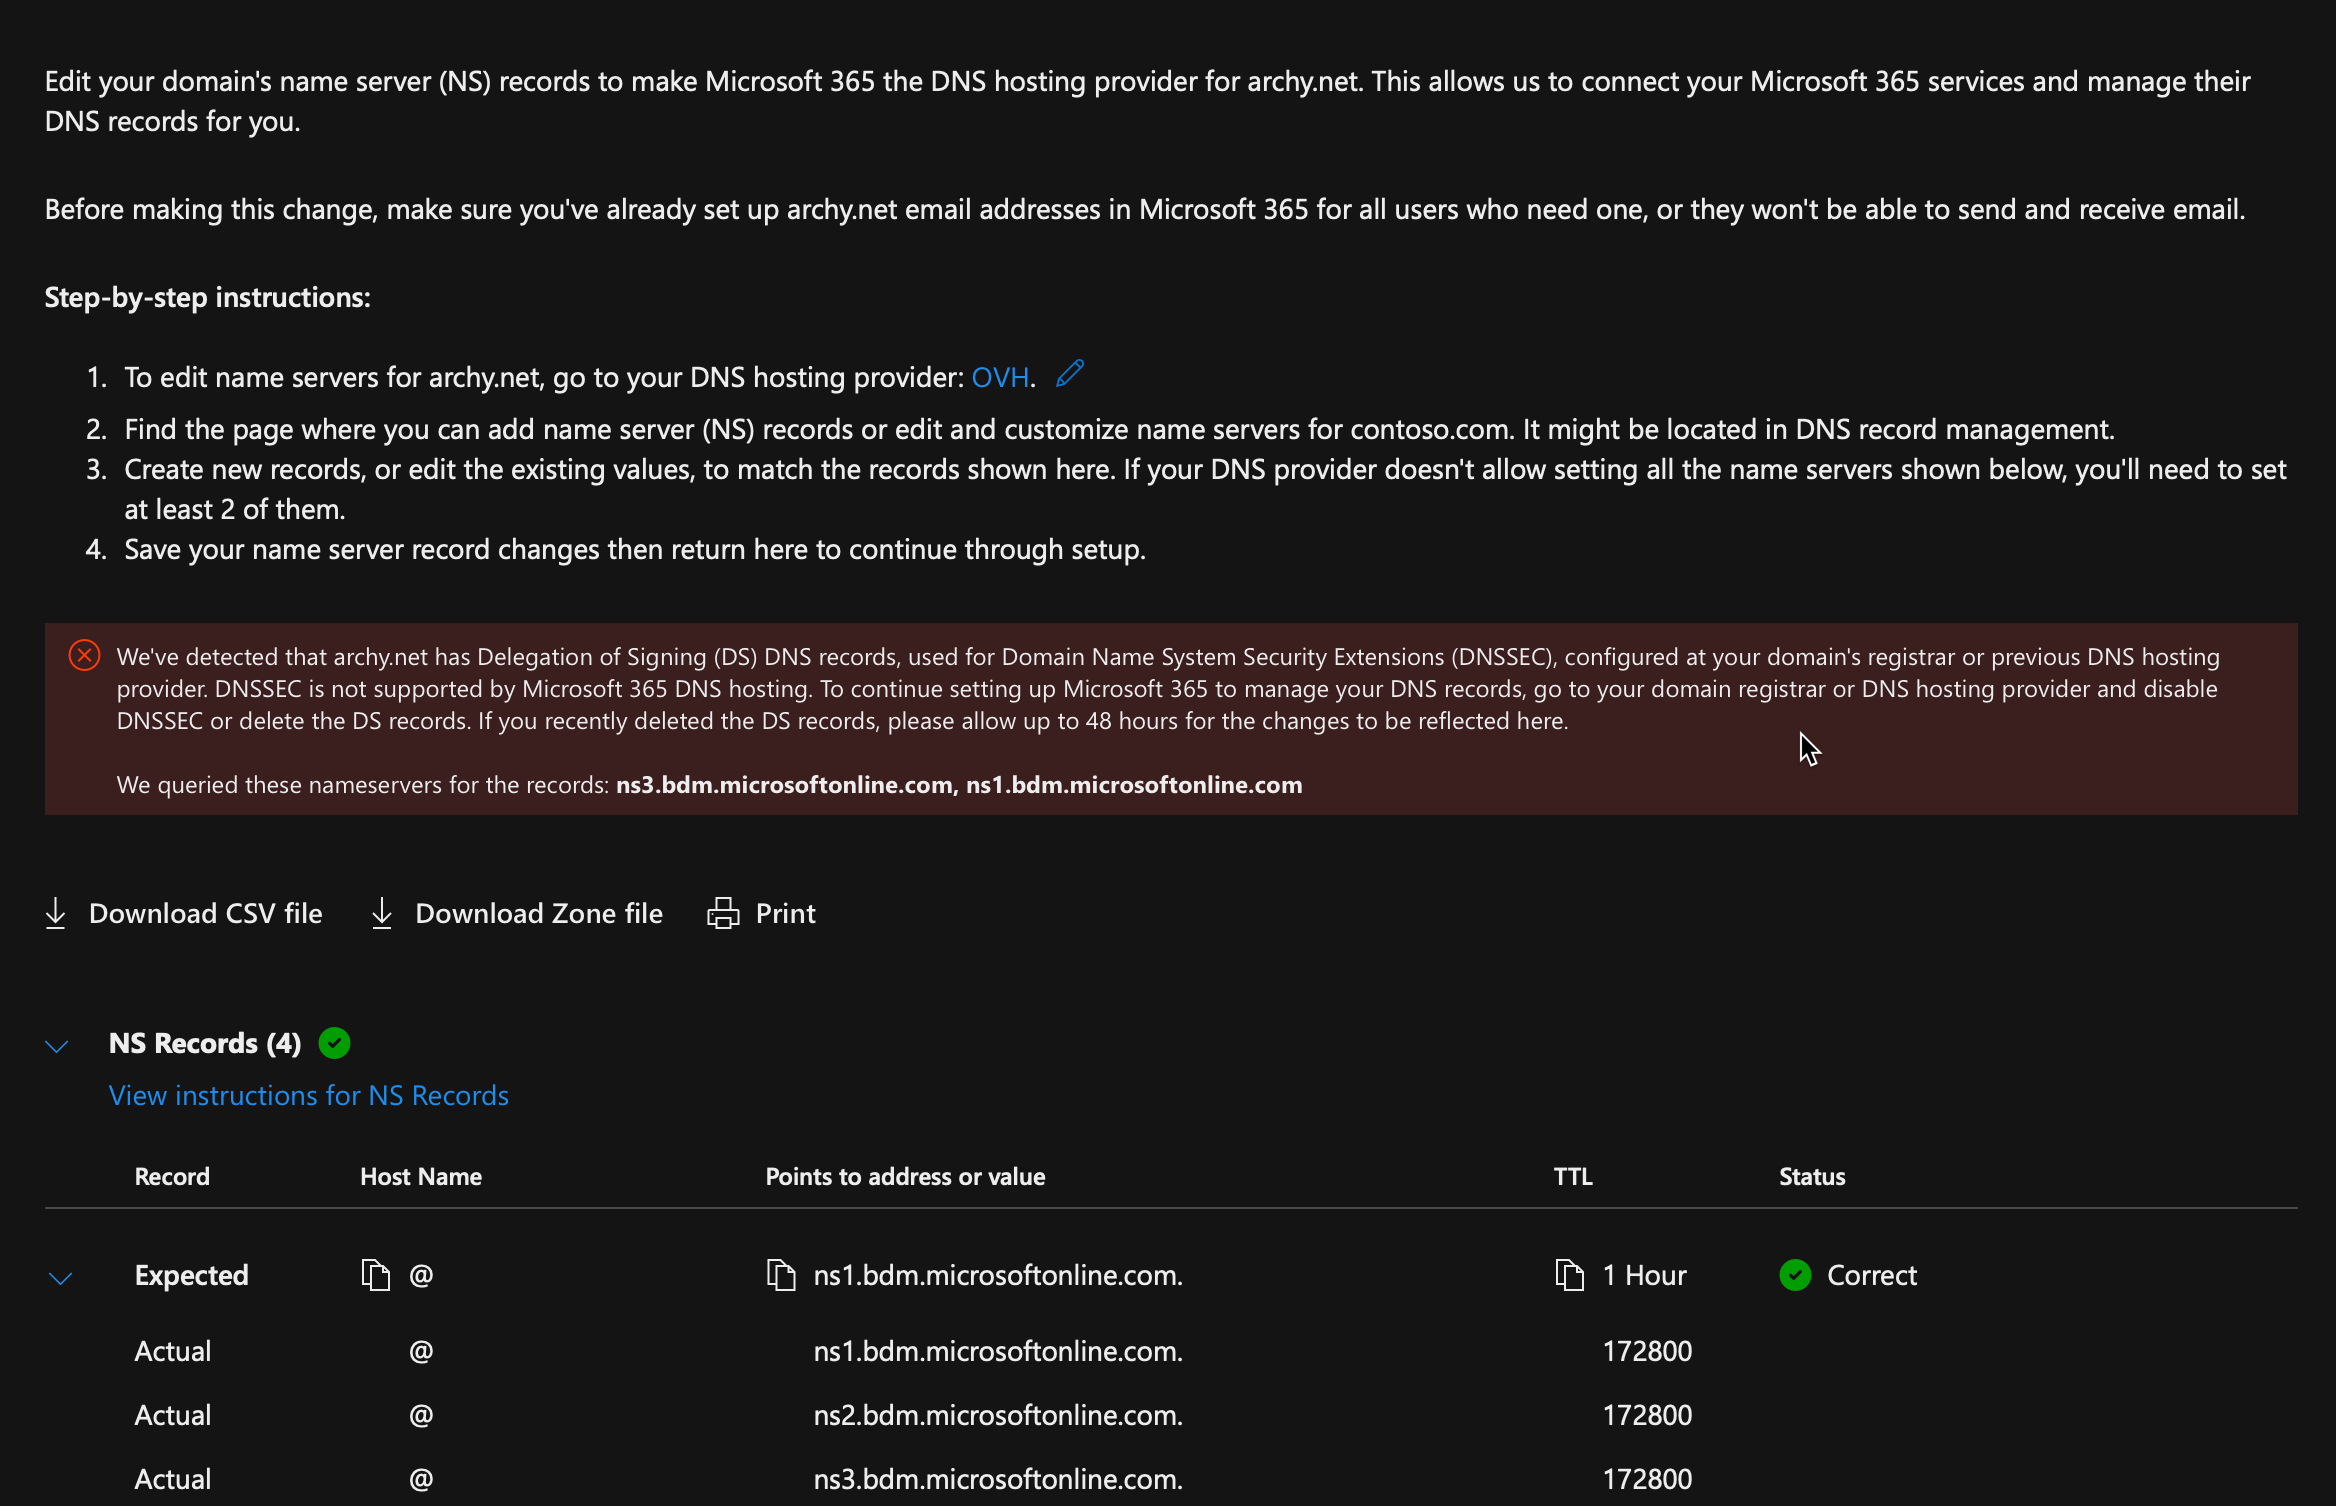
Next these are the DNS informations needed to be changed in OVH
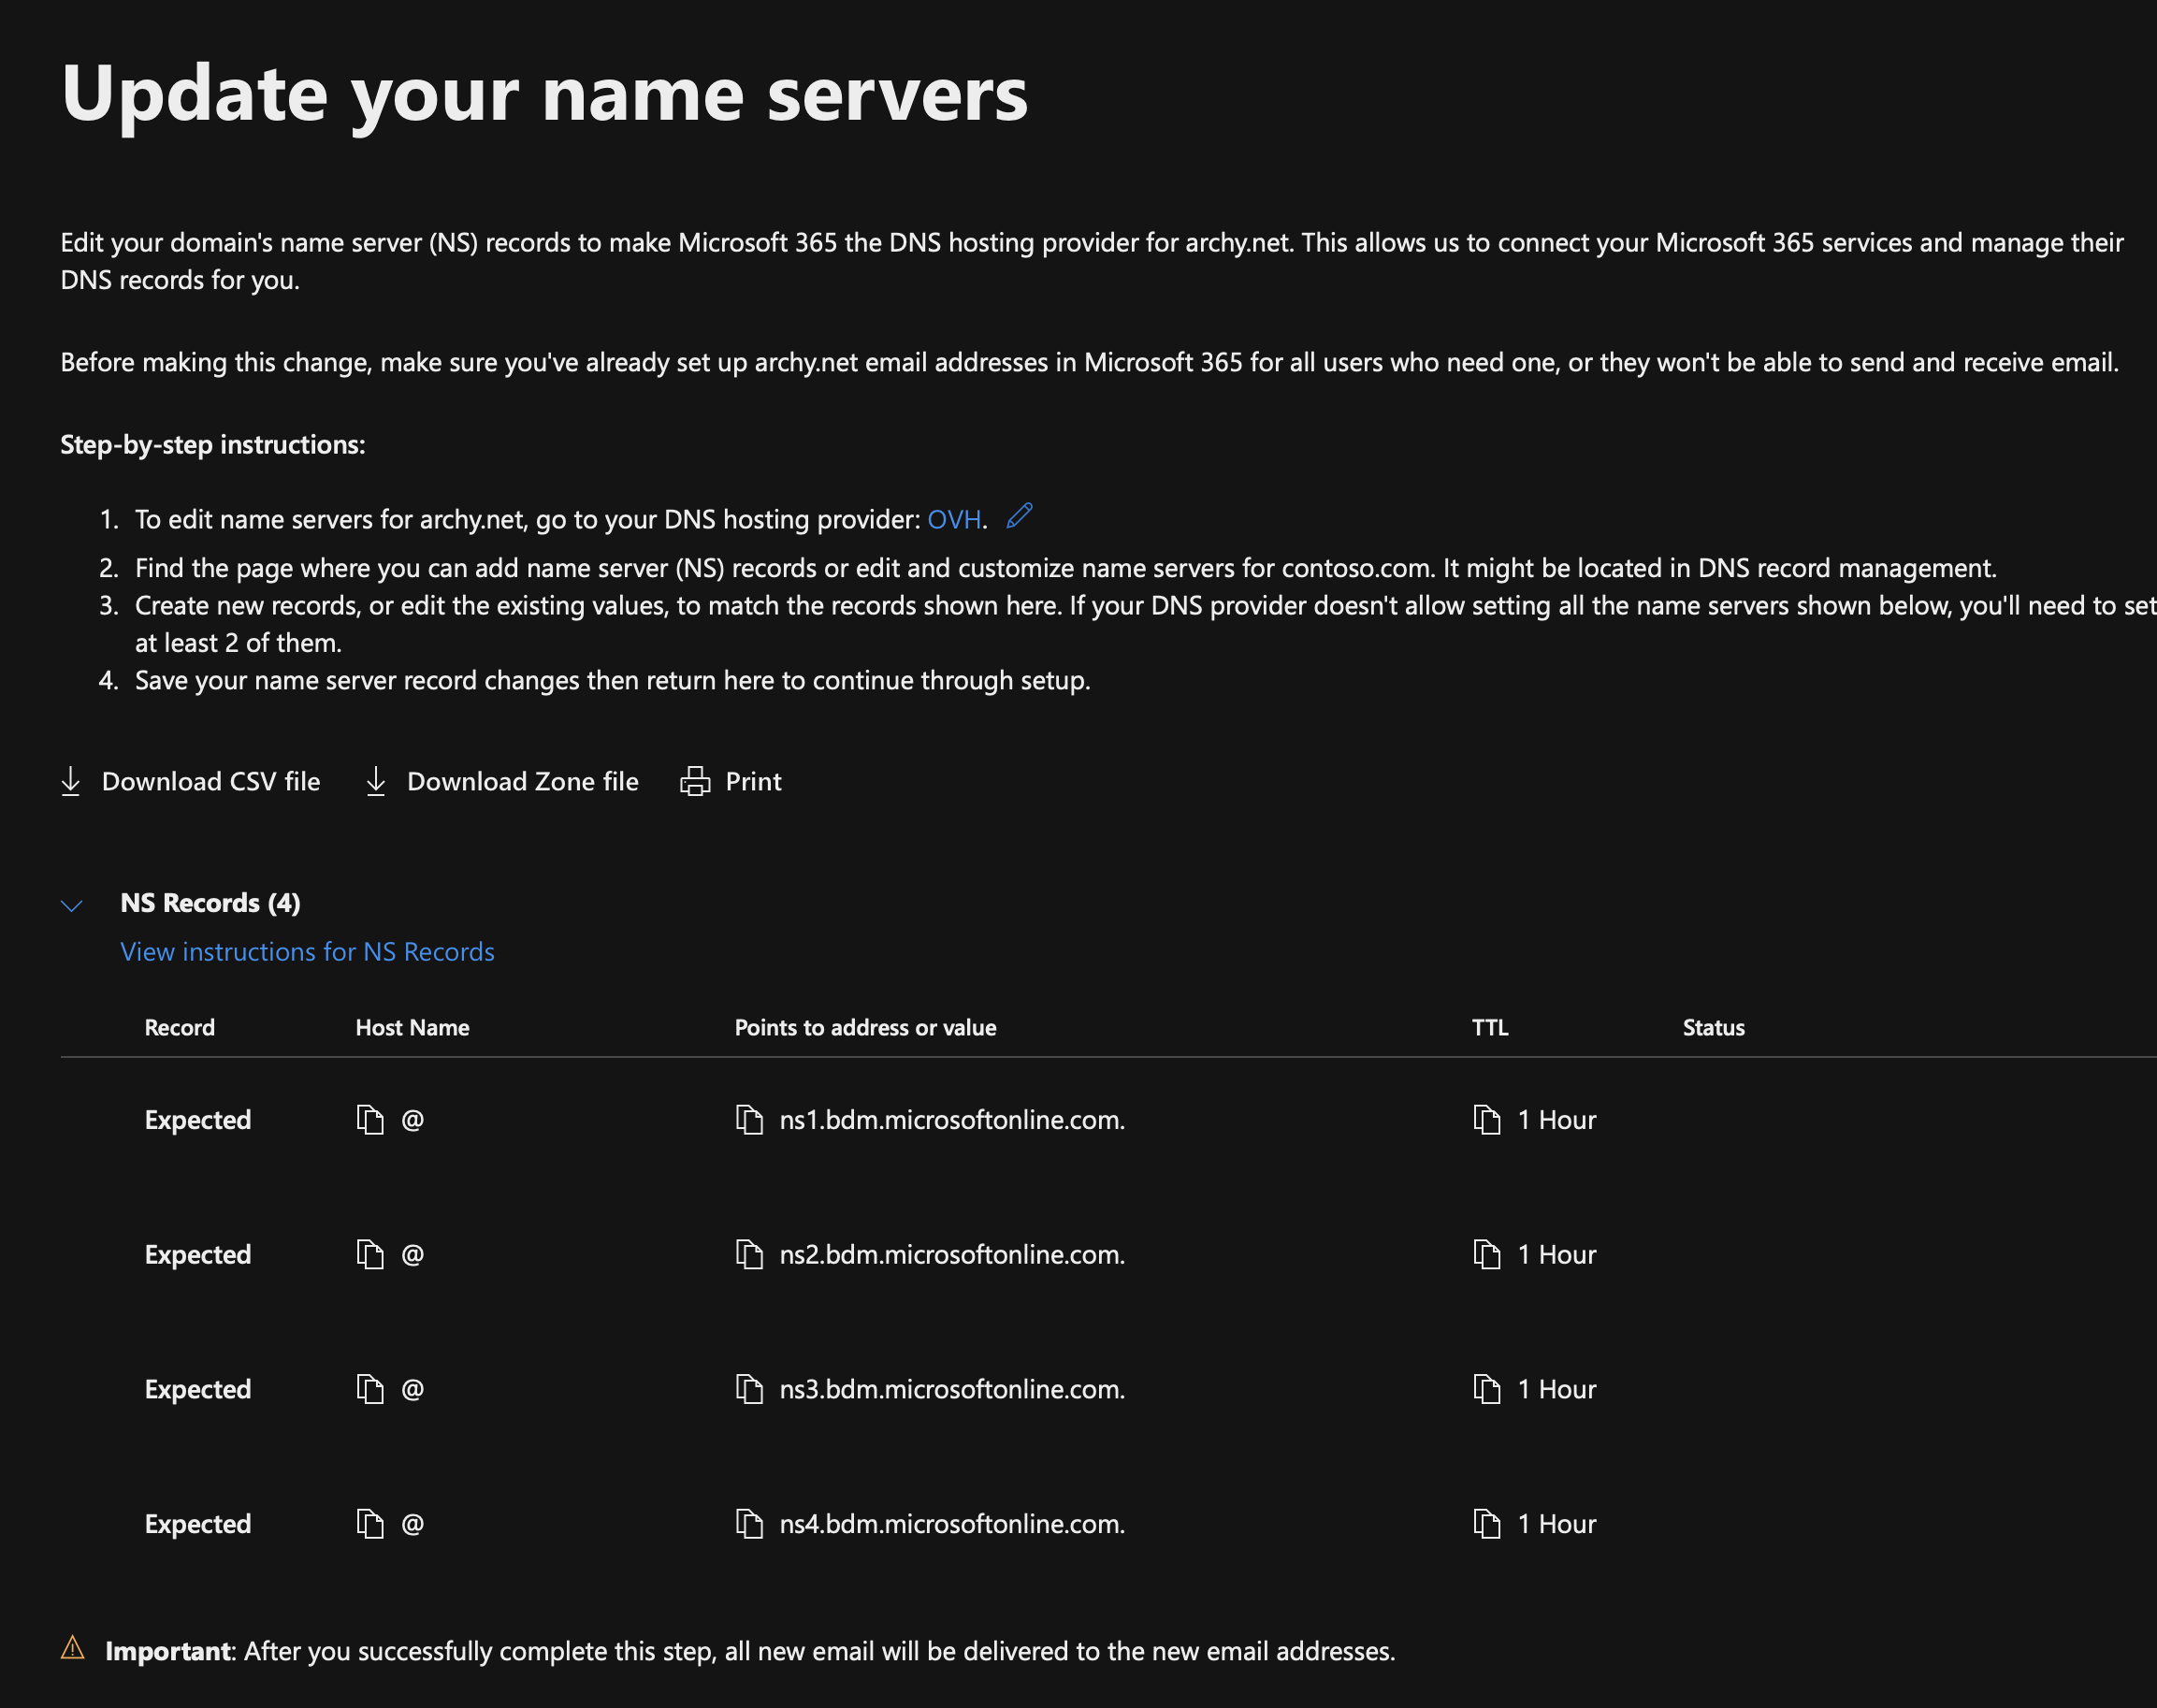
I had to modify in text mode
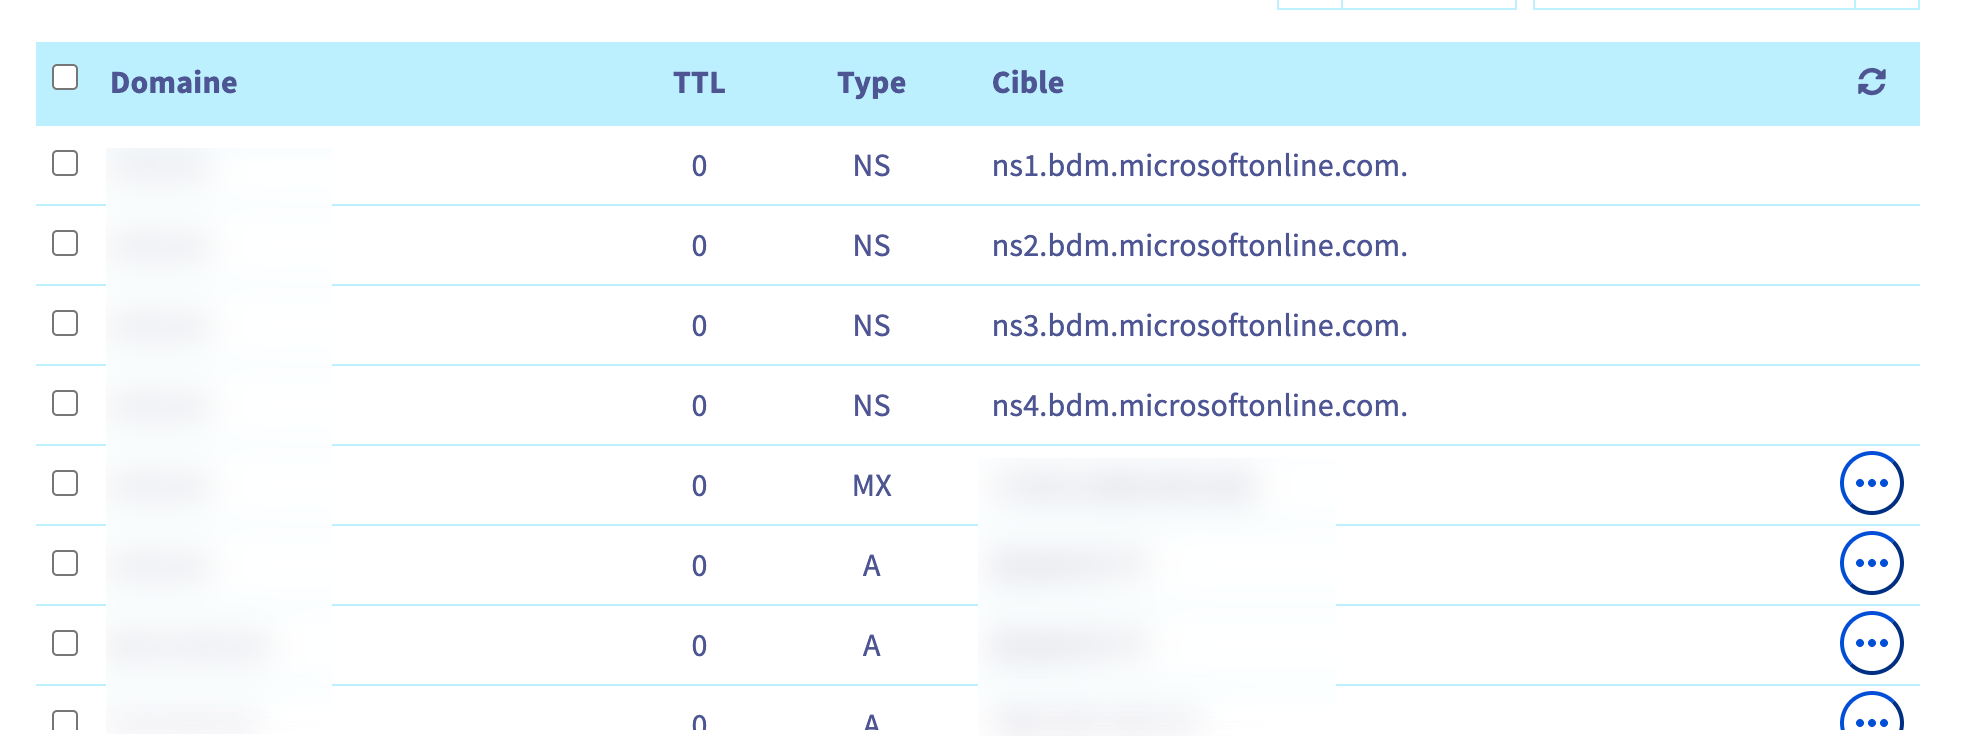
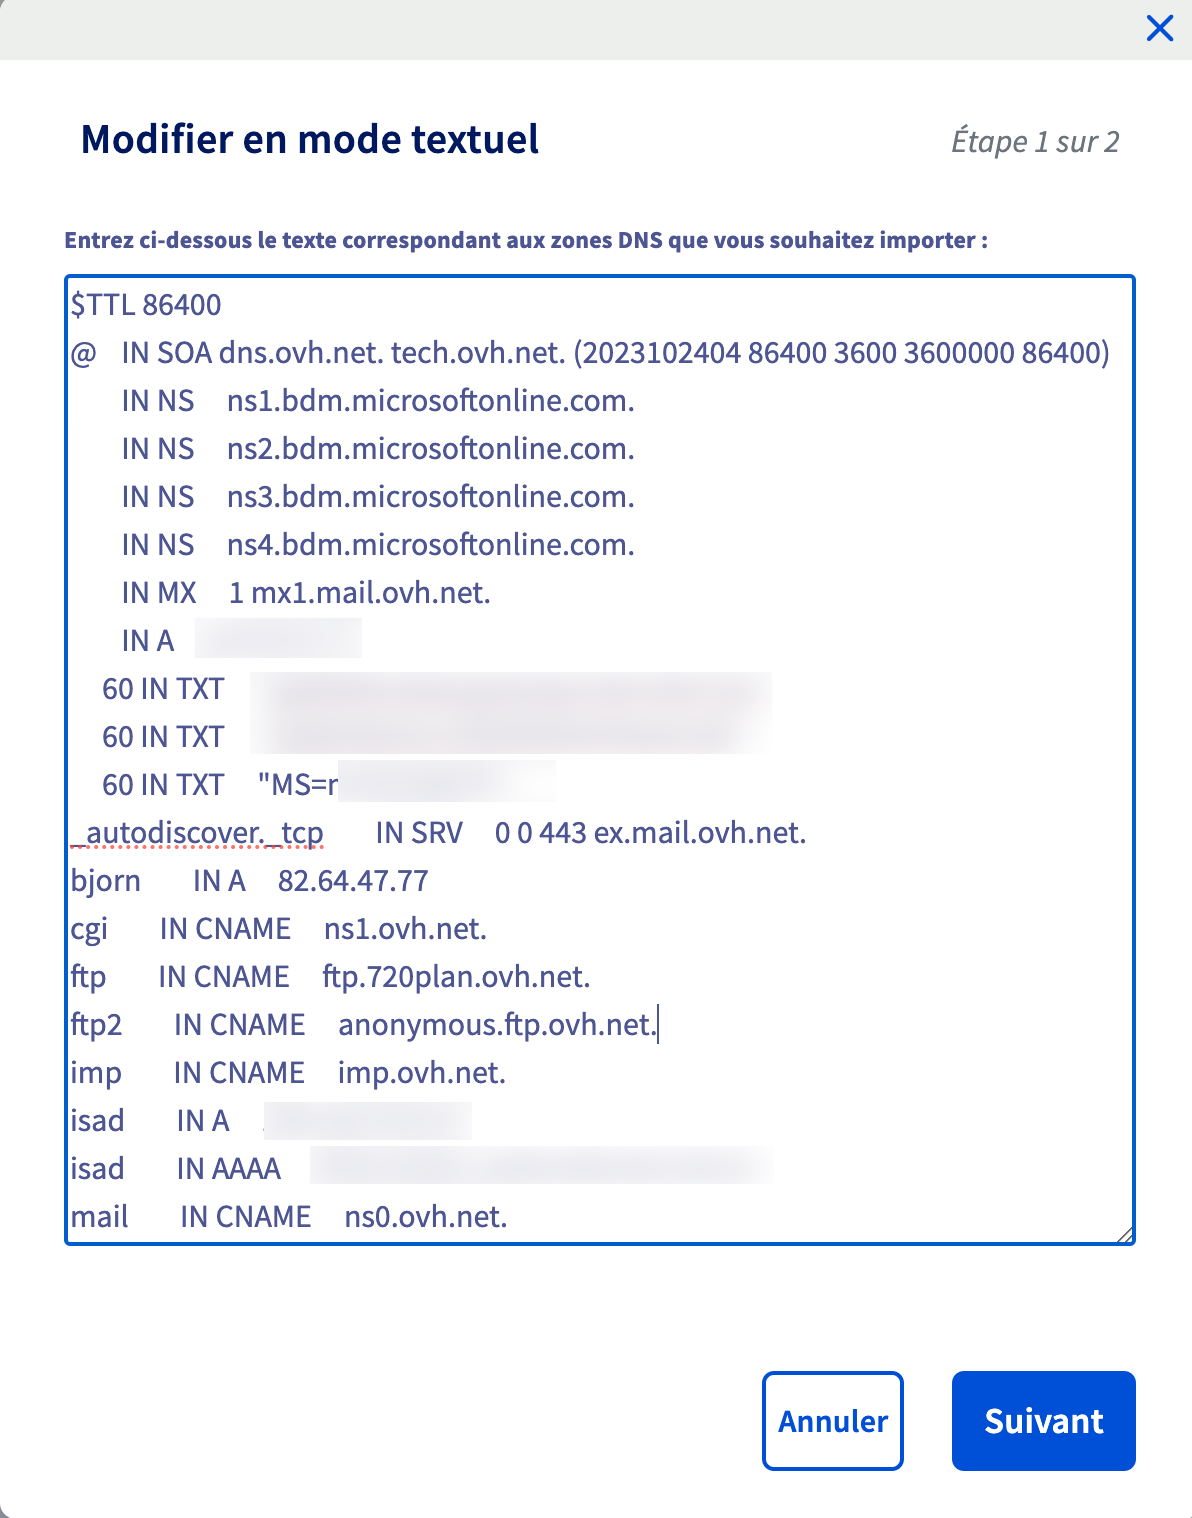
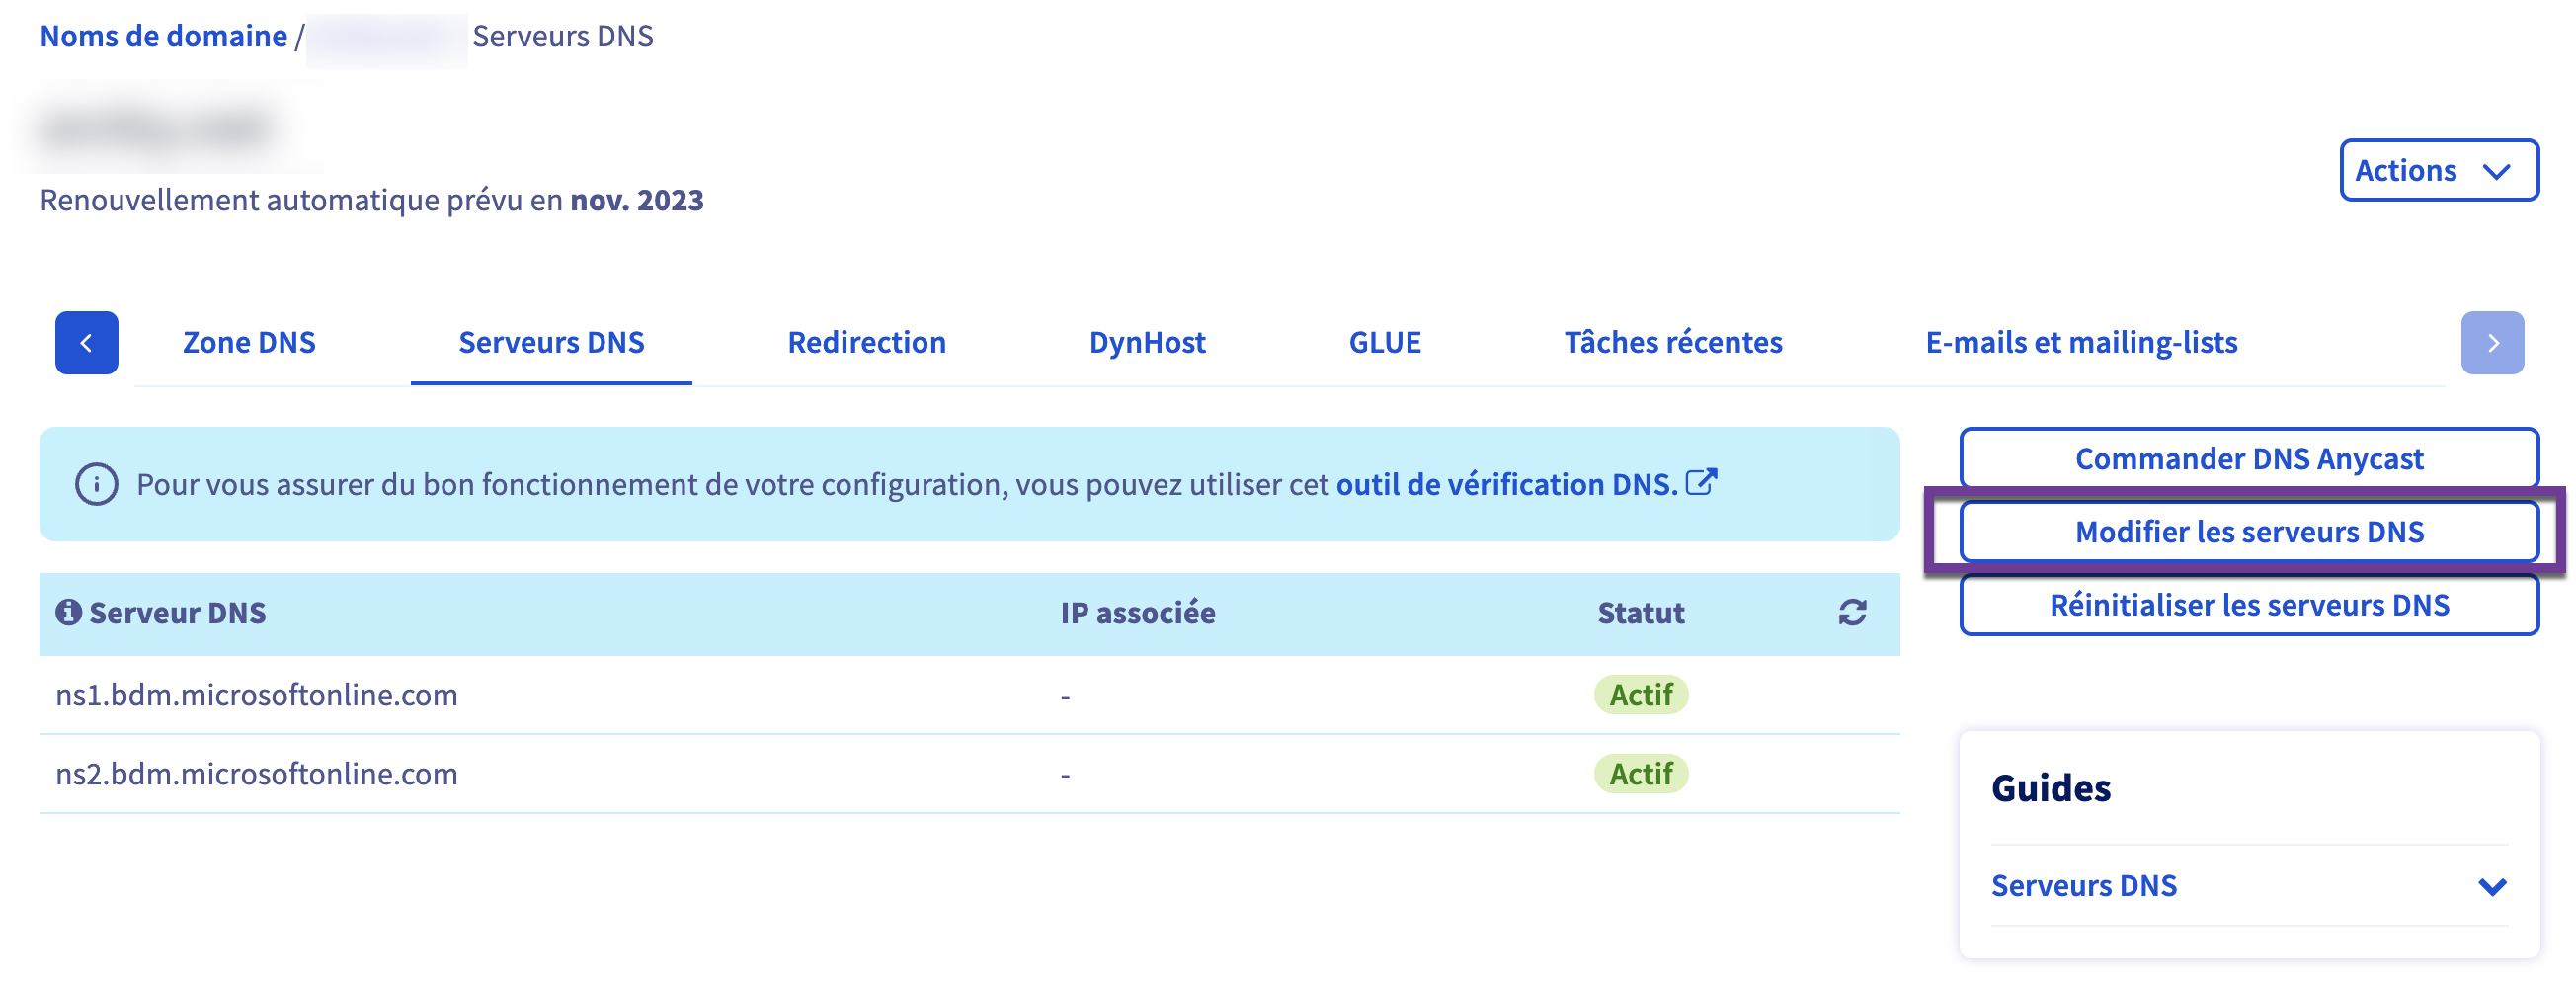
and change the DNS servers by the Microsoft ones
As I had DNS Sec enable, I have this error that stopped me to continue, once disabled I had to wait 6 hours before being able to move on and finish the process.
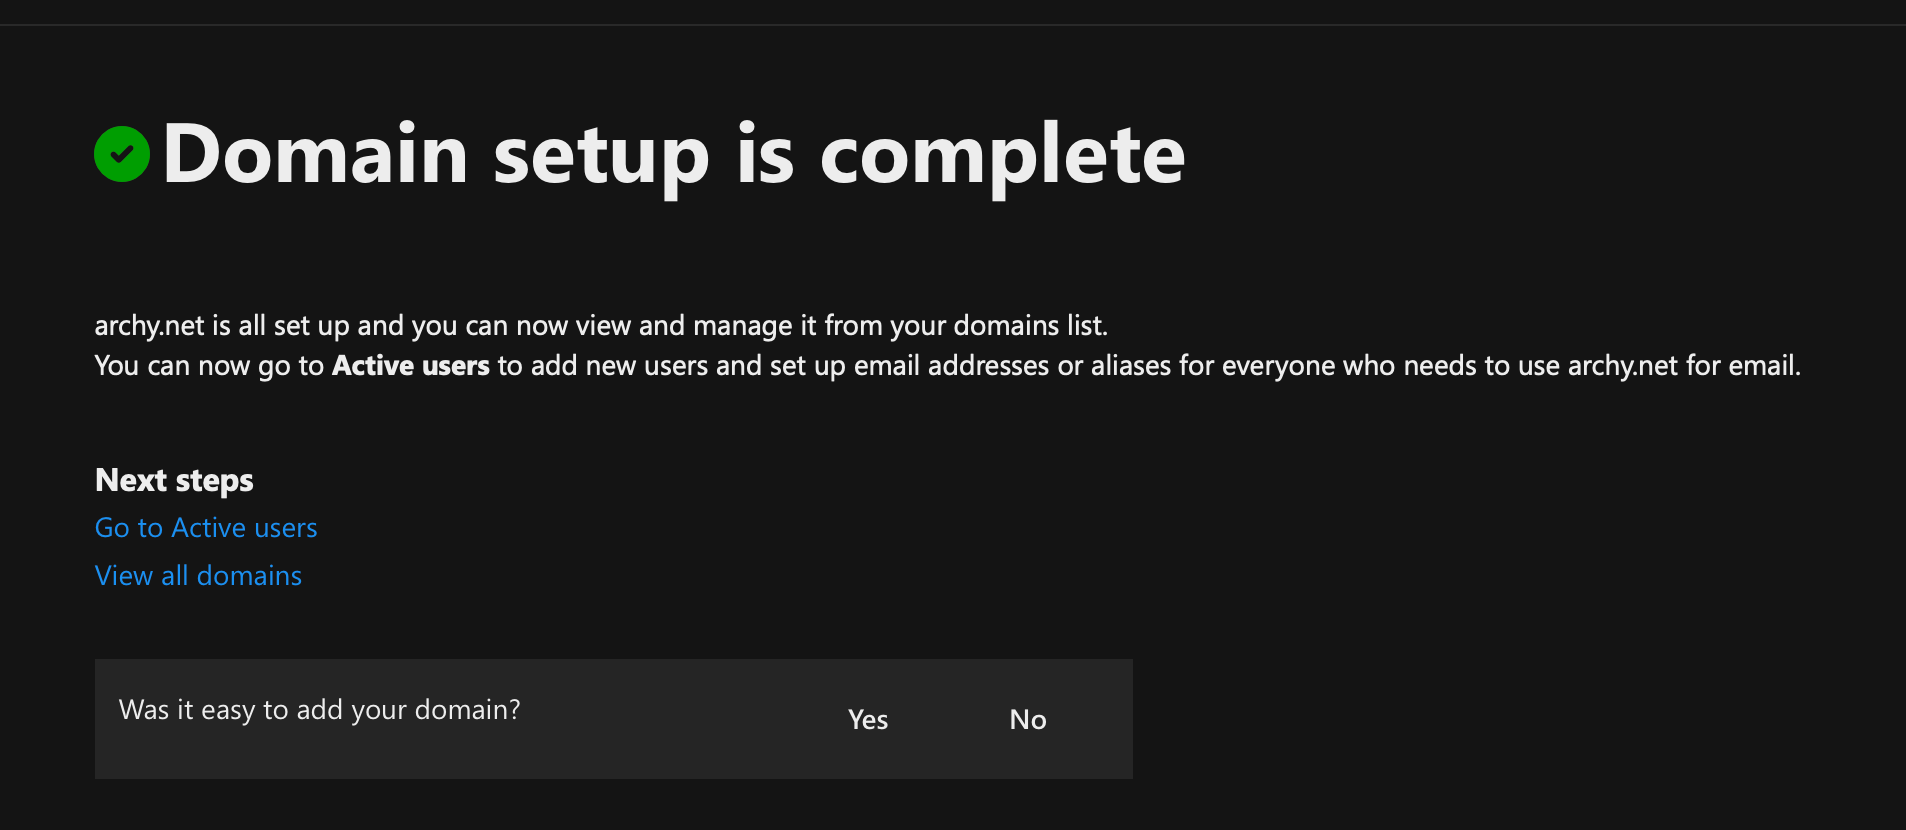
Here you go. Now you just need to create a new user with the right UPN to enable the mailbox.