3 years ago I wrote this blog Cloudify my lab with Microsoft Azure, since, many things moved on on the Microsoft side, more options, Netscaler available as well in Azure, I though it was time to update and extend this blog.
Here is what you will need if you want to do it by yourself, this is what I used Netscaler version should be all ok and whatever the hypervisor you have on-premise, you’ll be fine.
- Citrix NetScaler VPX (3000) (tested with NS11.1 50.10.nc)
- Windows Azure Access
- Homelab (running on Citrix XenServer 7 fully patched until update 23)
- XenApp / XenDesktop 7.12
- Your public IP address, your subnet
- Of course, you need licences for everything…
Considerations :
Before configuring a CloudBridge tunnel between a CloudBridge appliance in datacenter and Microsoft Azure, consider the following points:
- The CloudBridge appliance must have a public facing IPv4 address (type SNIP) to use as a tunnel end-point address for the CloudBridge tunnel. Also, the CloudBridge appliance should not be behind a NAT device. (or you’ll have to setup a route for your LAN computers, I’m explaining how to at the end of this blog)
- Azure supports the following IPSec settings for a CloudBridge tunnel. Therefore, you must specify the same IPSec settings while configuring the CloudBridge appliance for the CloudBridge tunnel.
- IKE version = v1
- Encryption algorithm = AES
- Hash algorithm = HMAC SHA1
- You must configure the firewall in the datacenter edge to allow the following.
- Any UDP packets for port 500
- Any UDP packets for port 4500
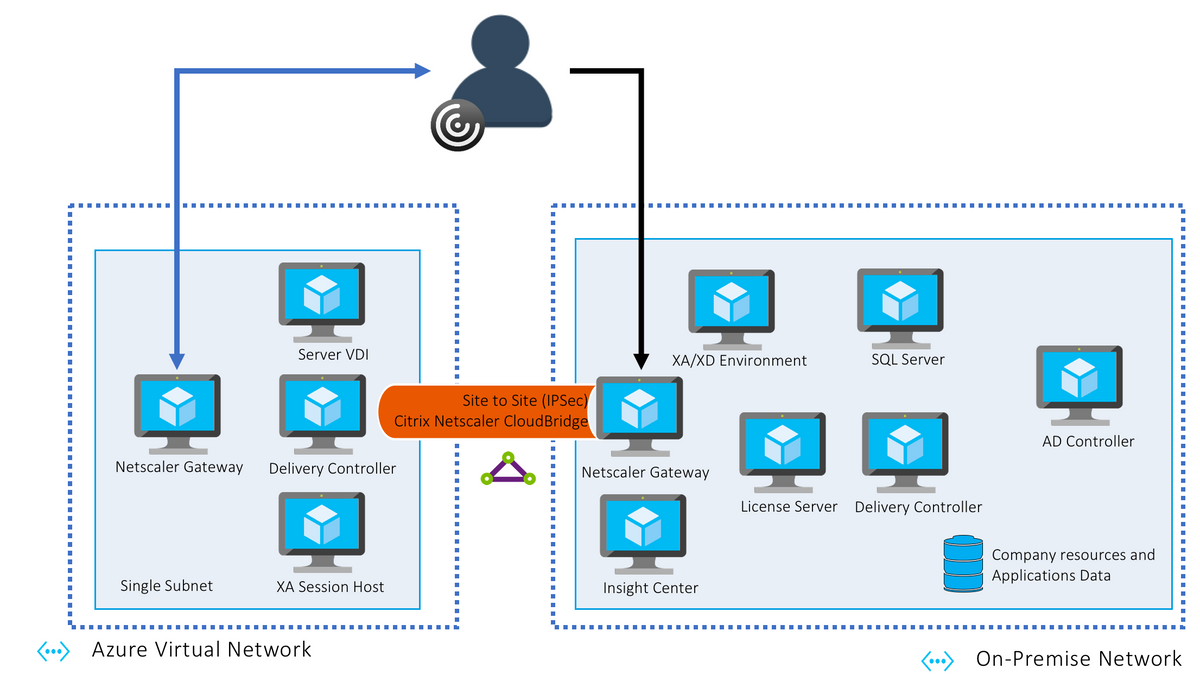
The goad of this experience is to connect my lab (on-premise) to Azure and build a tunnel to have both side communicating through it. So the architecture will look like that :
Simple hybrid deployment – With Optimal Gateway

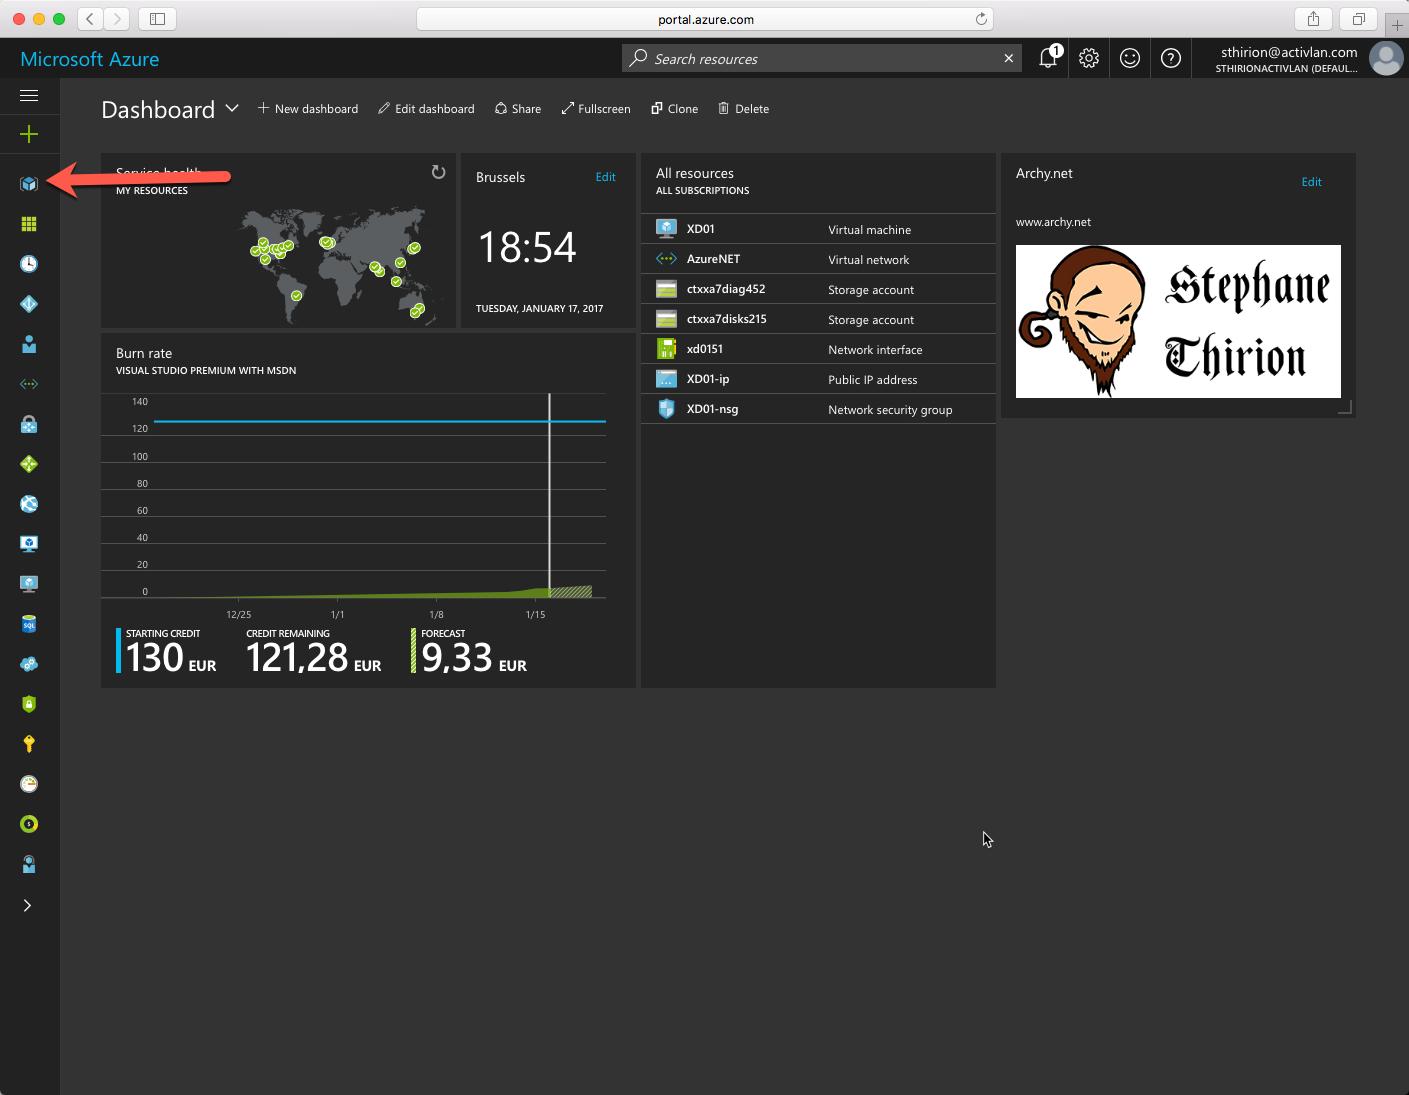
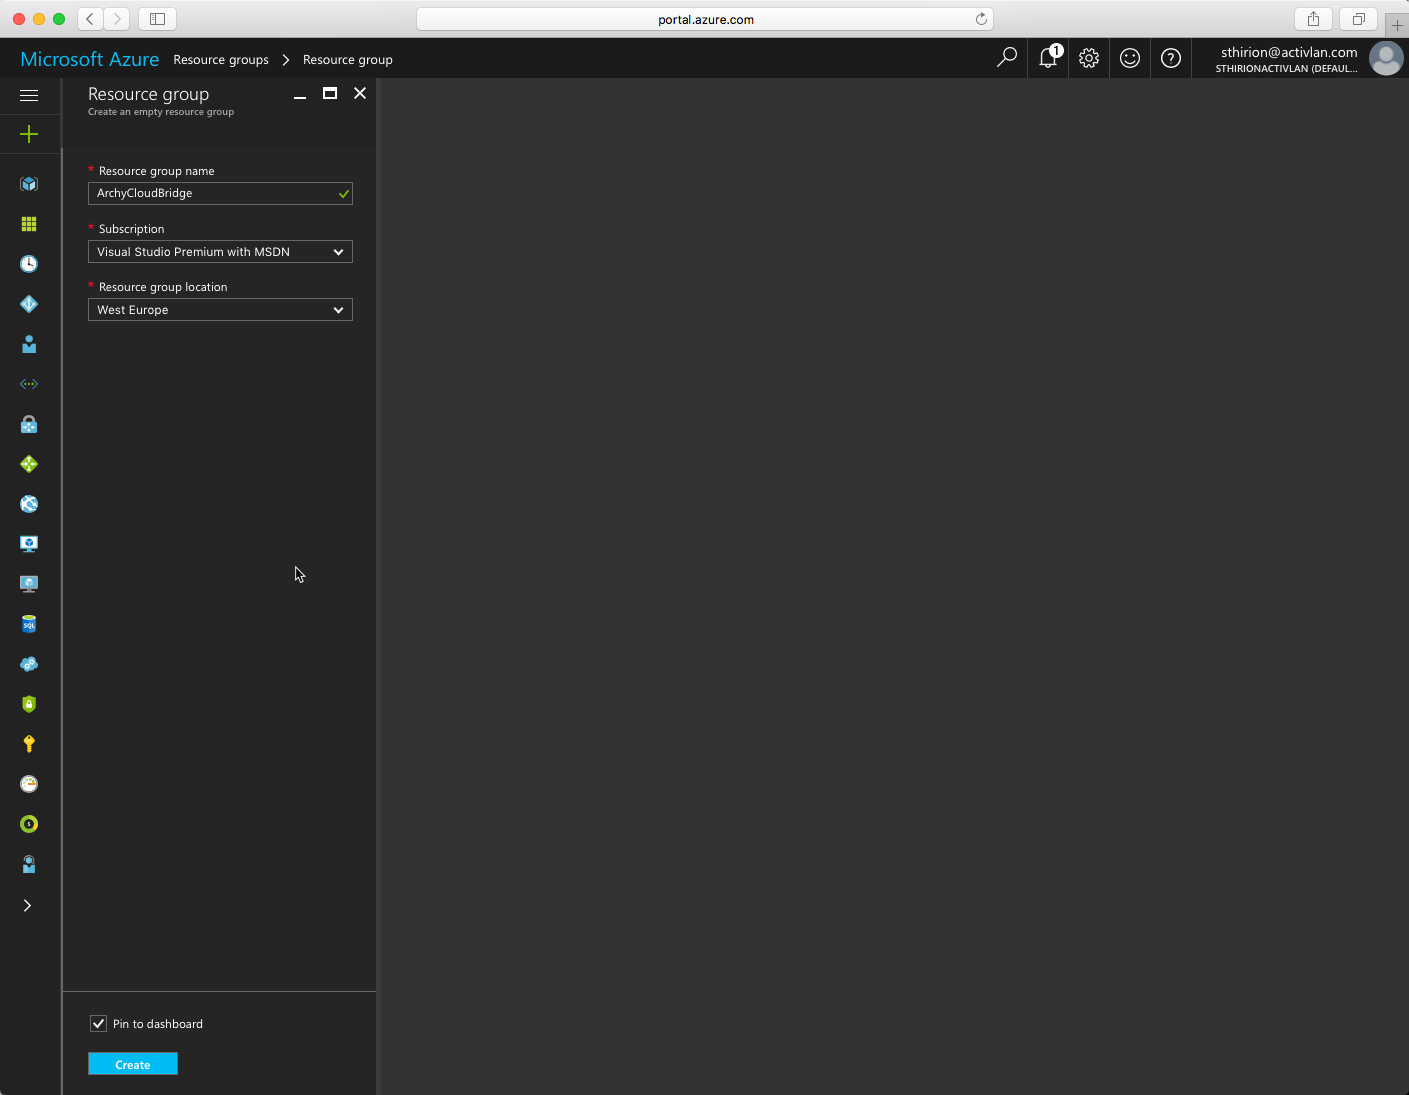
Let’s do this, connect to the Azure portal and create a new Resource Group. Keep a logical naming choice so you’ll know what you click on later.
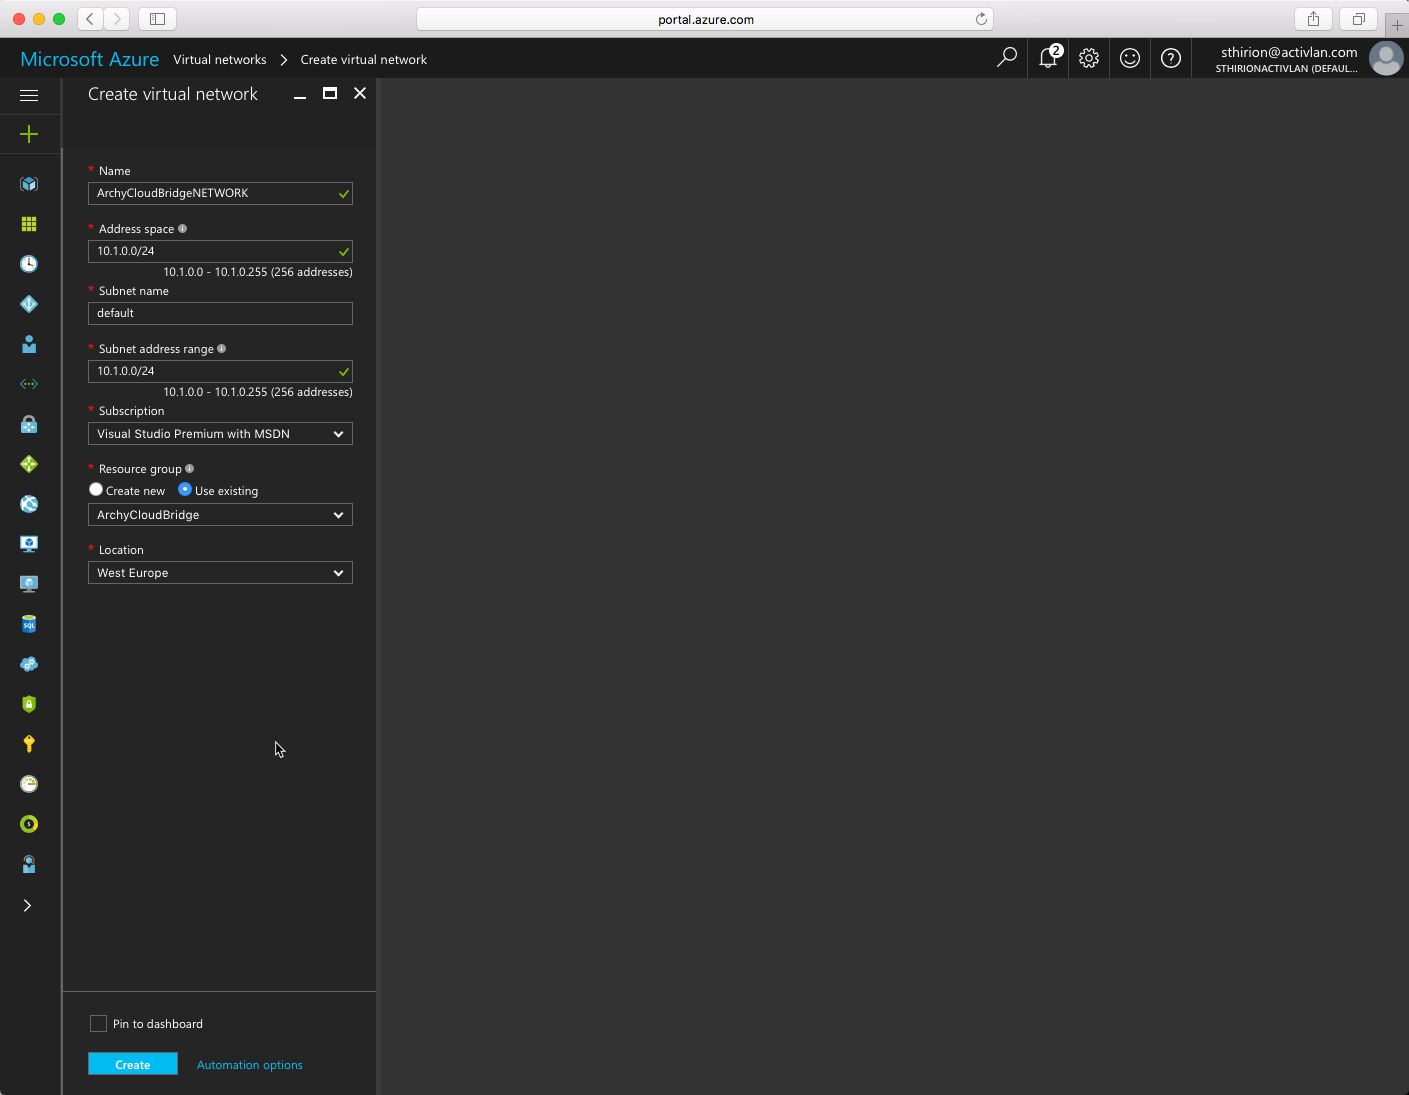
After, we need to create a Virtual Network, I chose the Address space 10.1.0.0/24 (this is the one that was by default, I kept it) Use the Resource Group we just created and click Create.
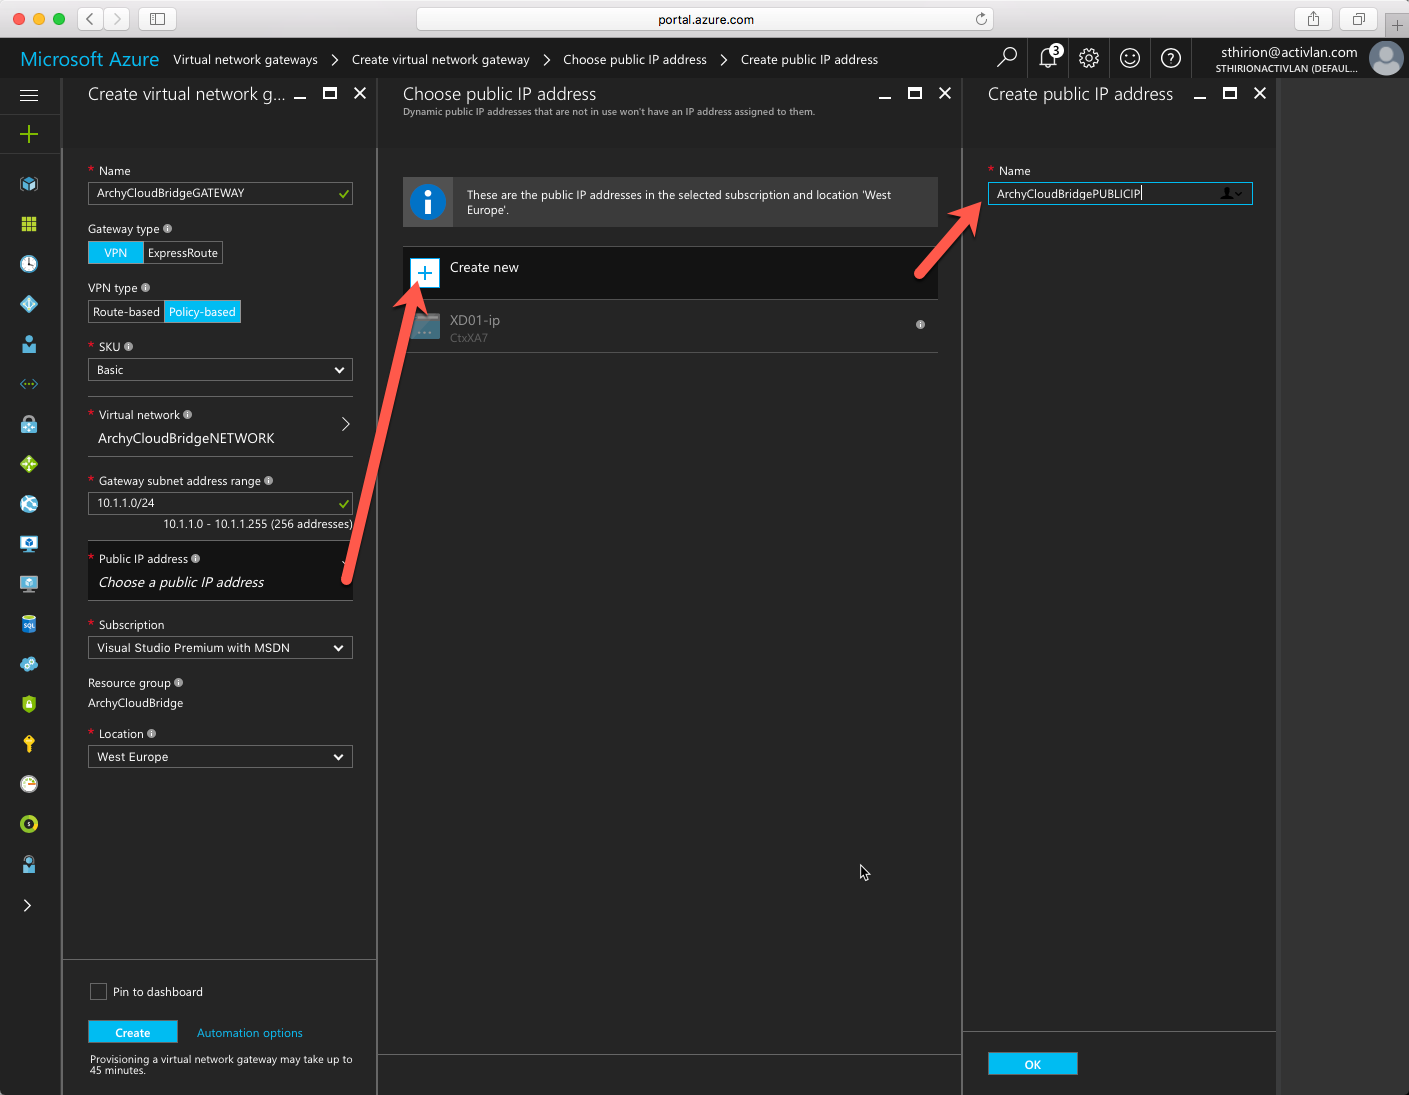
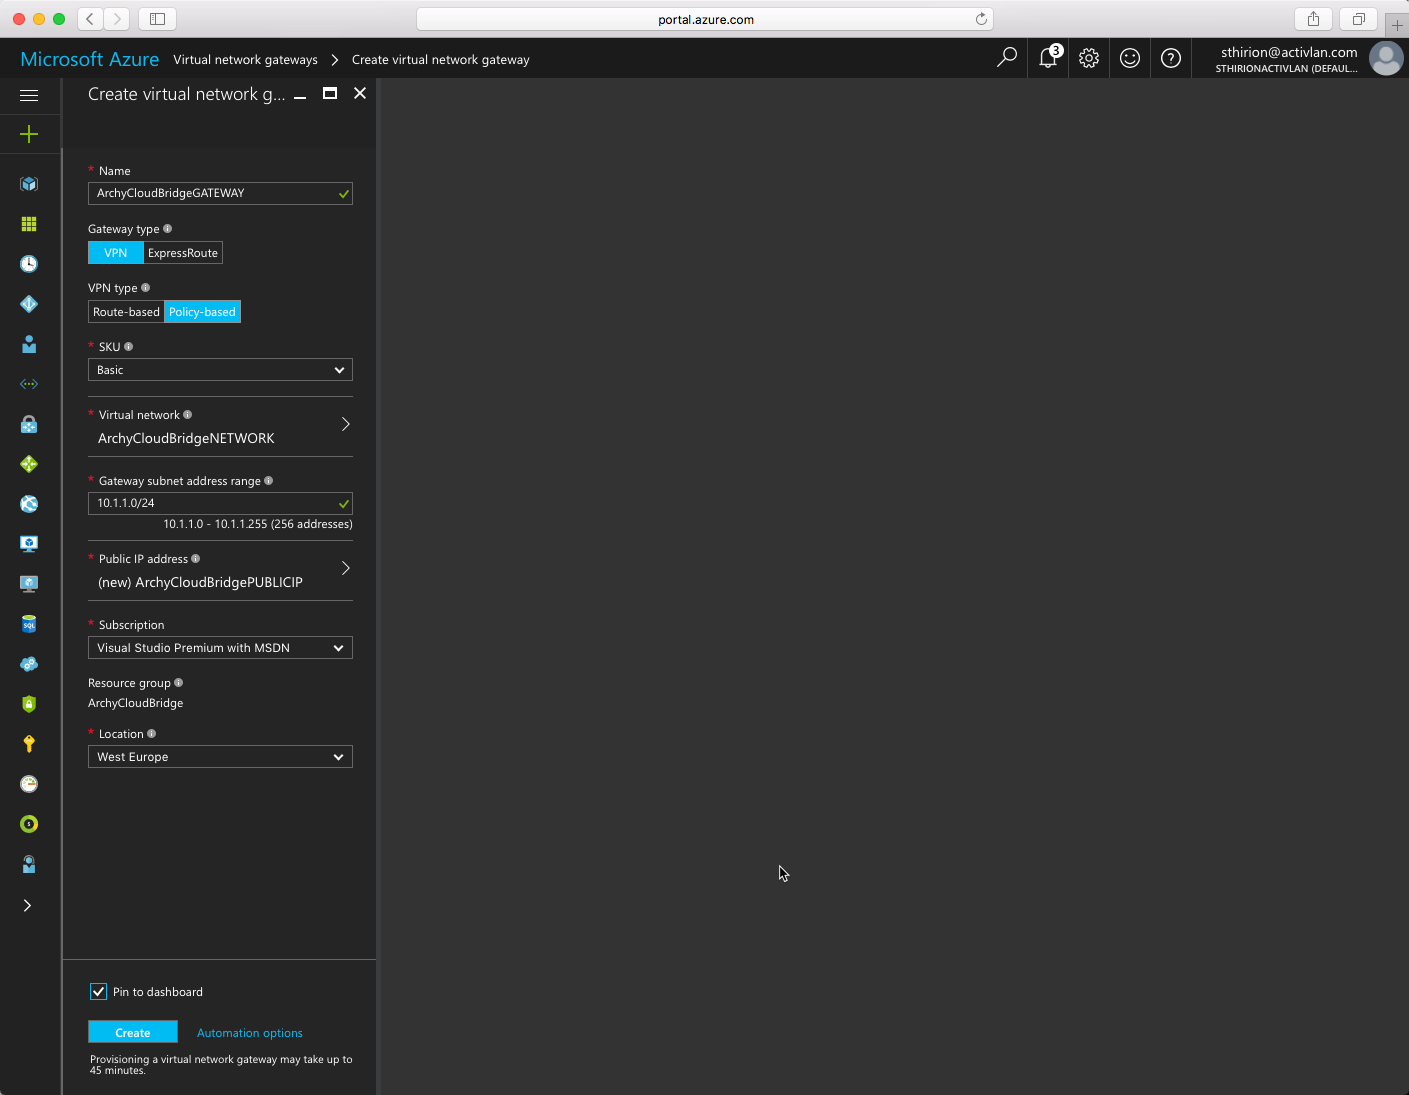
Now we need to create a Virtual Network Gateway with a new Public IP address (if you already have an available one in your Azure subscription, you can use it) That will be the public IP address we will use to communicate with the Netscaler on-premise. Click on OK to create the public IP address and create the Virtual Network as follow. Don’t forget to chose VPN type to Policy Based, click Create.
This may take a while, like 20 minutes at least.
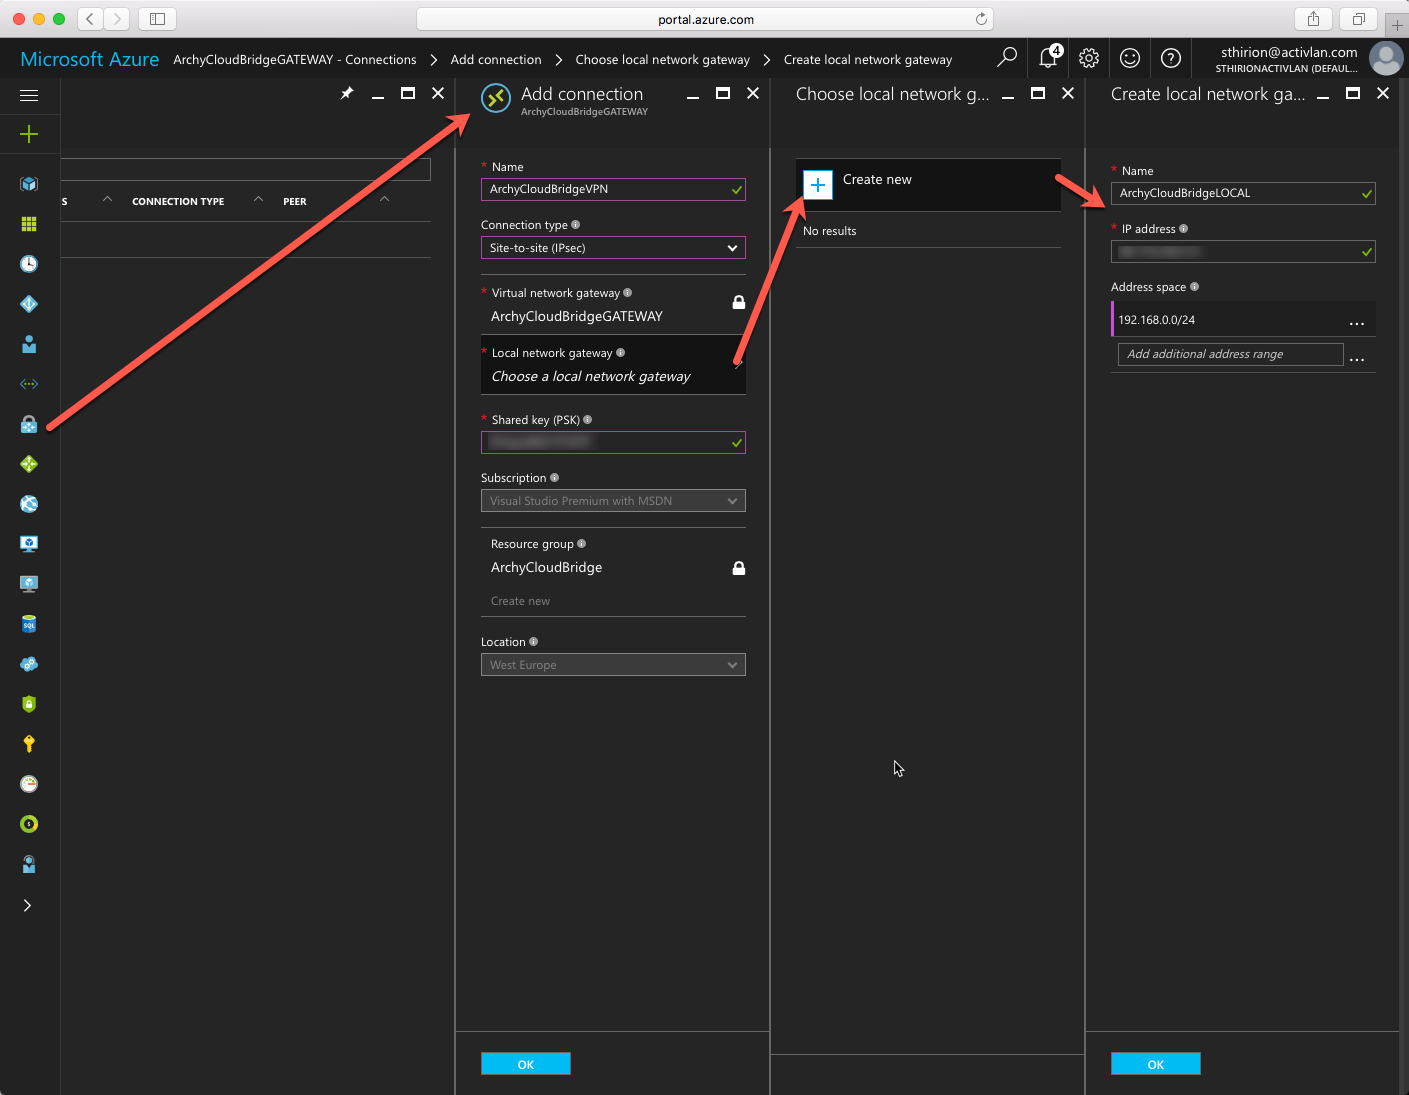
Then you need to click on the Virtual Network Gateway we just created, on Connections and click to add a new connection. change the connection type to Site to Site (IPSec) and in the Local Network Gateway, enter the information of your on-premise network (subnet) and its public IP ( to reach the on-premise Netscaler) Remember the Shared Key we will need it on the Netscaler side. Click on OK and on Create
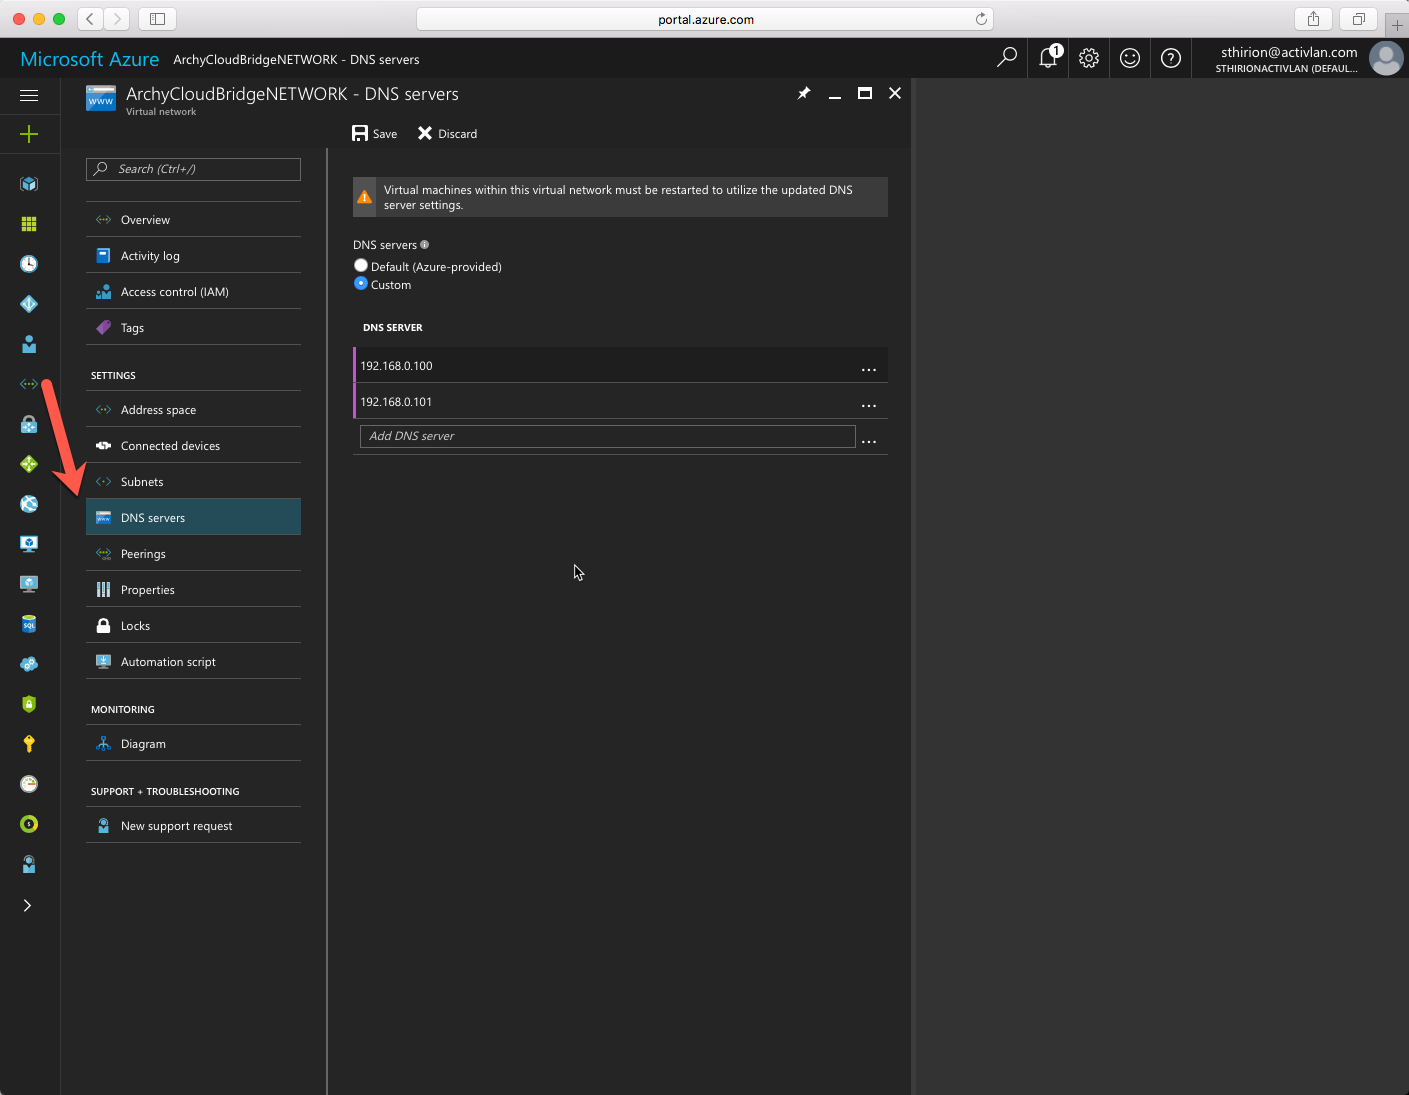
Now we will add the on-premise DNS servers. To do so click on Virtual Network, chose the one we create and the click on DNS Servers, enter the correct information click on Save.
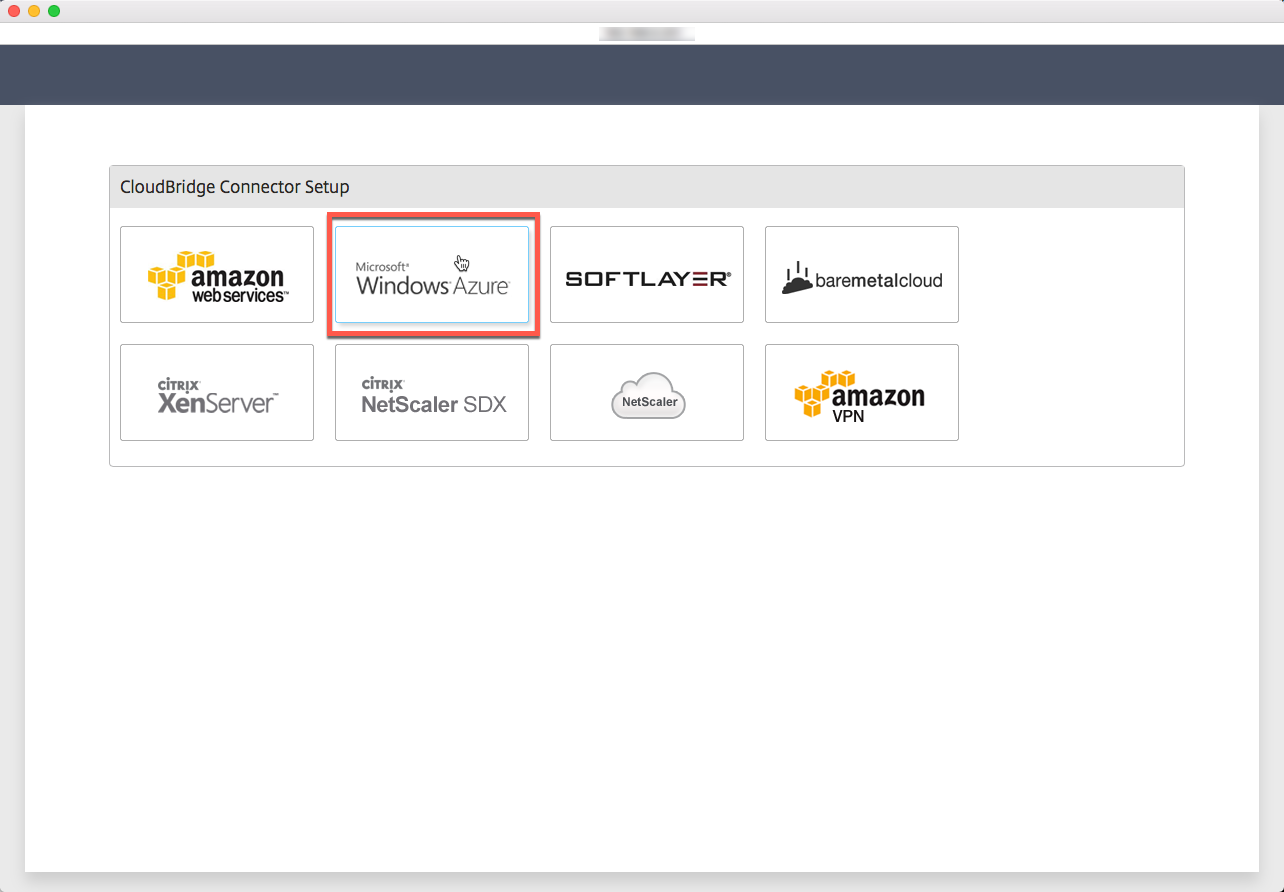
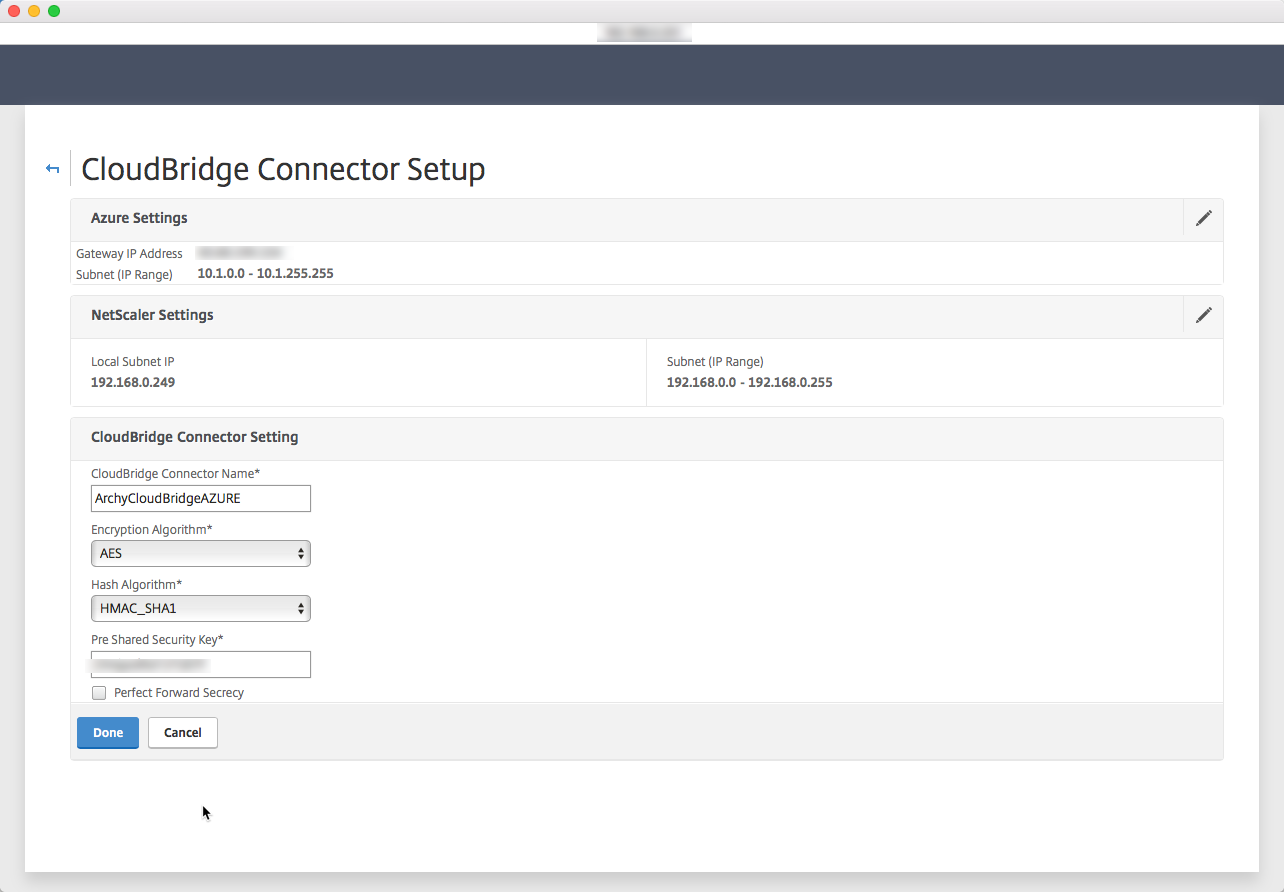
Now we switch on-premise to the Netscaler side. Logon into the Netscaler and go to the CloudBridge node :System / CloudBridge Connector and Create/Monitor CloudBridge Connector. Time to Get Started
Chose Microsoft Windows Azure
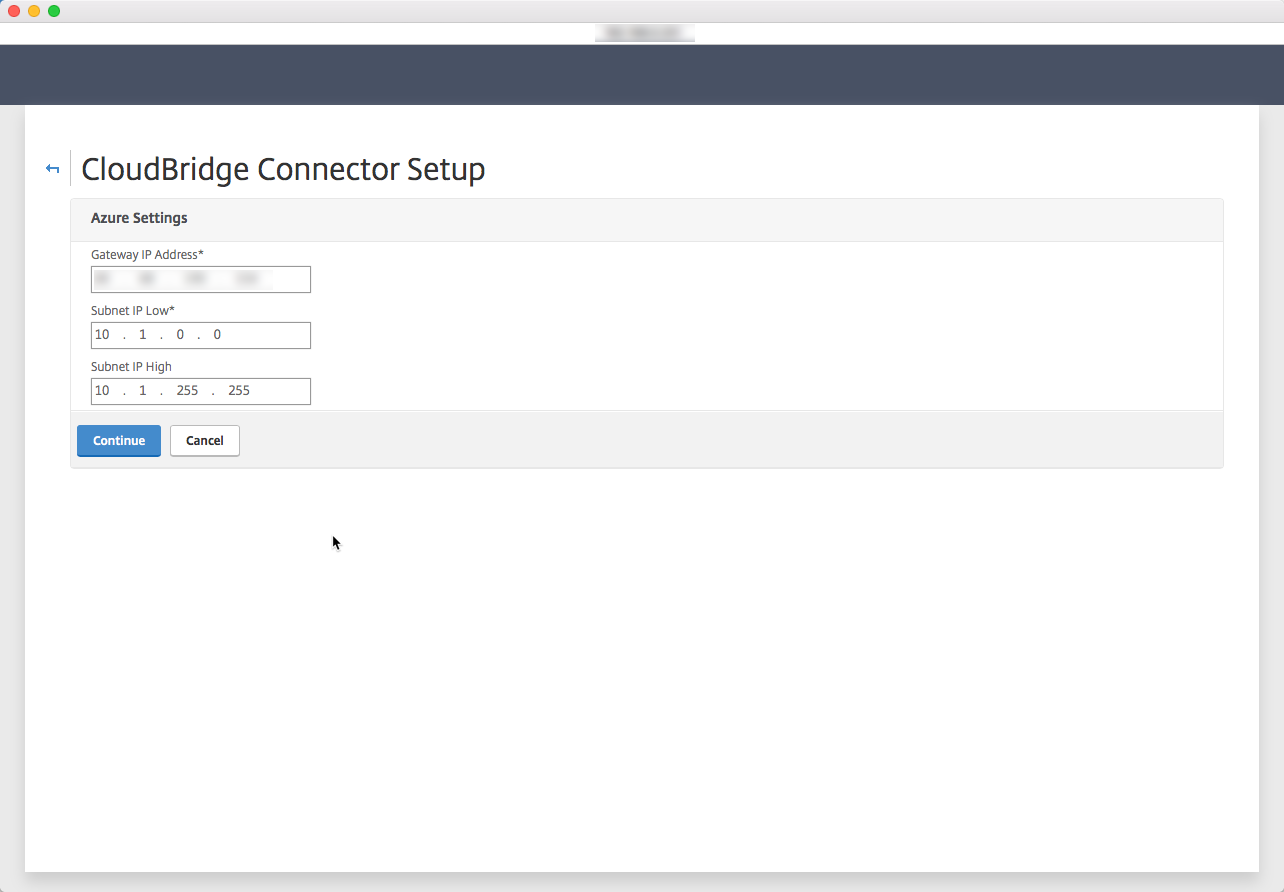
Enter your Azure informations here, Public IP address and subnet informations we filled in Azure. Click on Continue
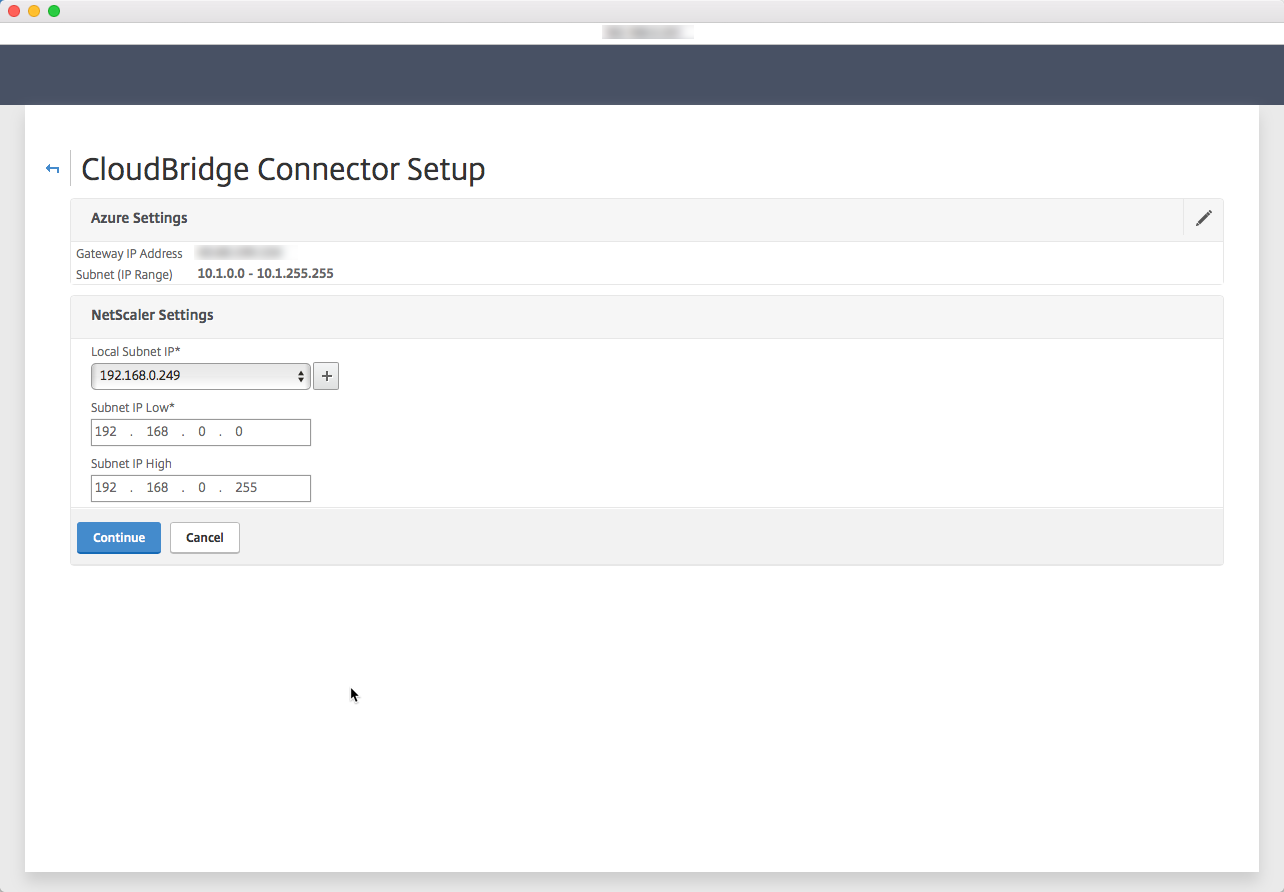
Do the same but with the on-premise information, click on Continue
Enter a name for this CloudBridge Connector and the Pre Shared Security Key we used on the Azure VPN connection we created. Click on Done
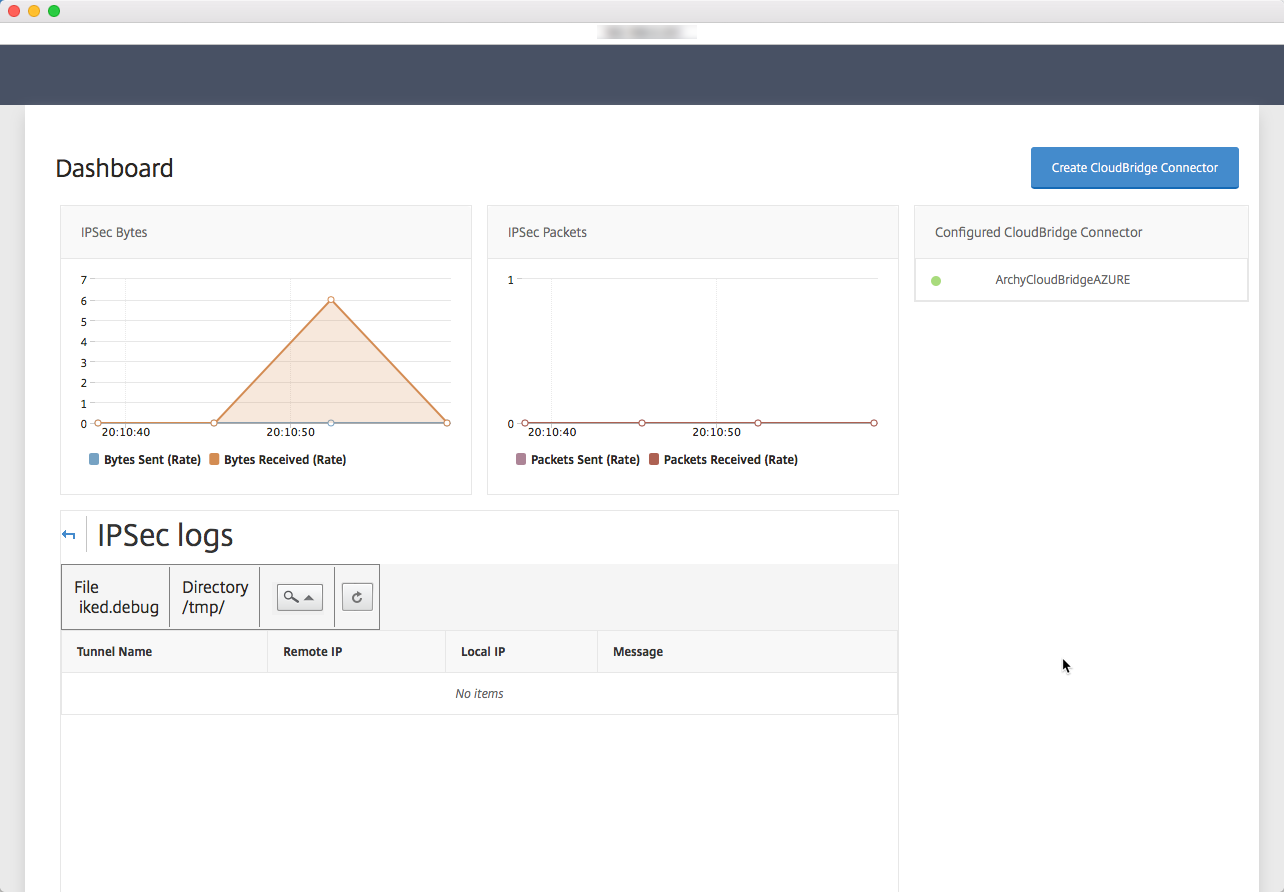
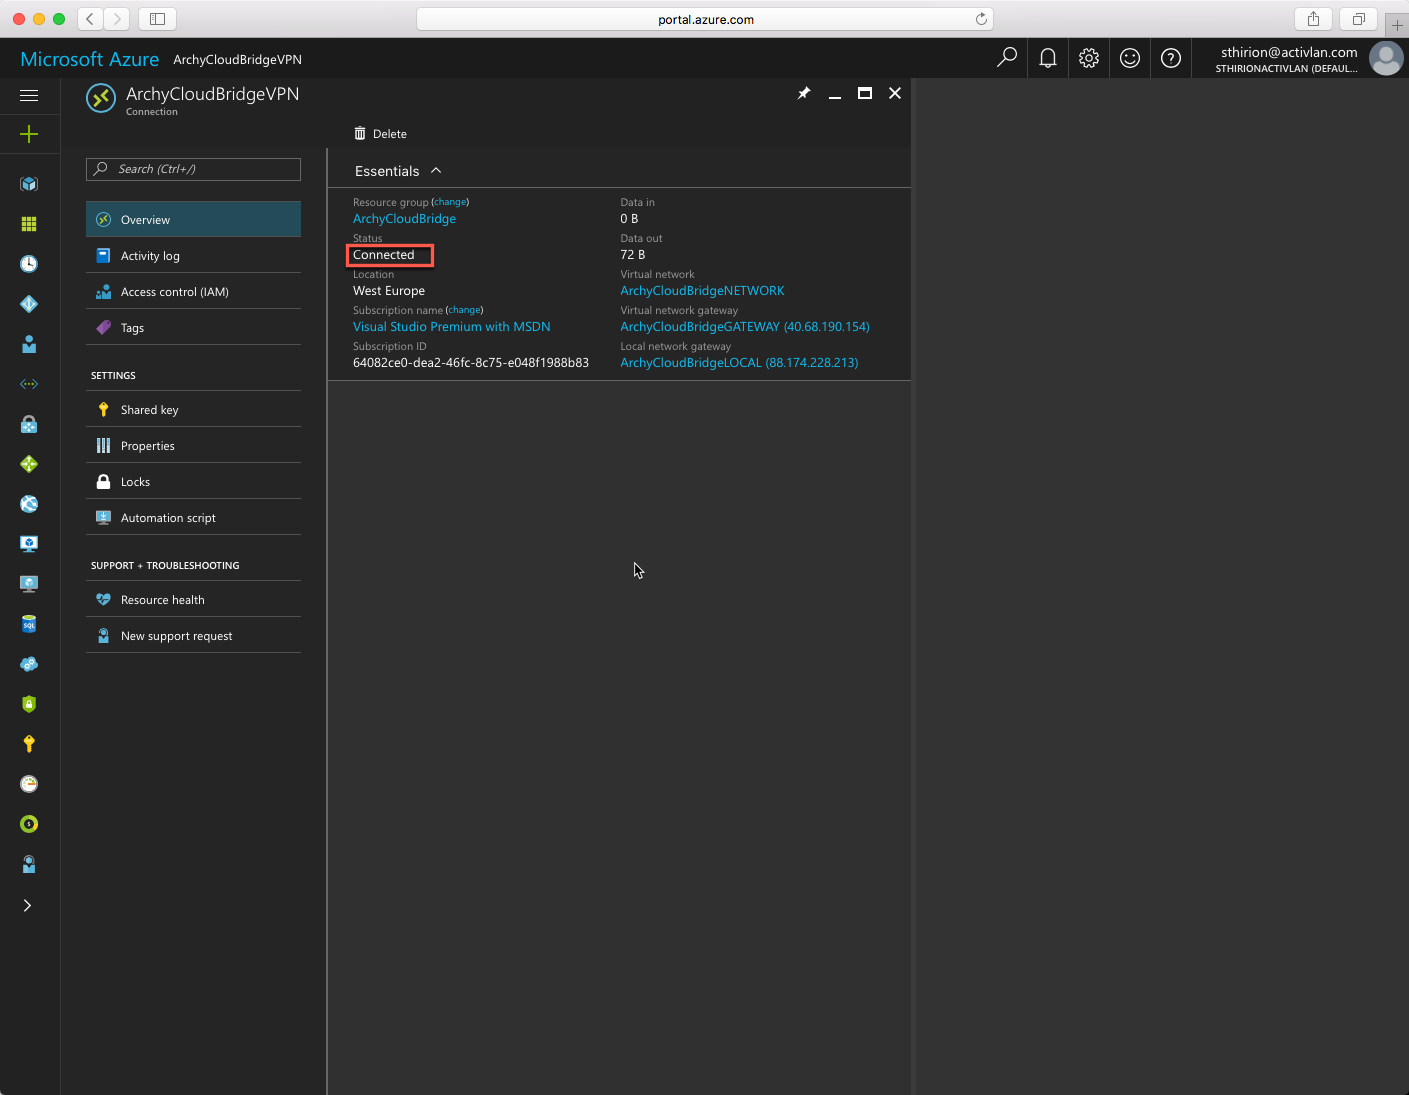
This is it, my Datacenter (Lab) is connected to Azure.
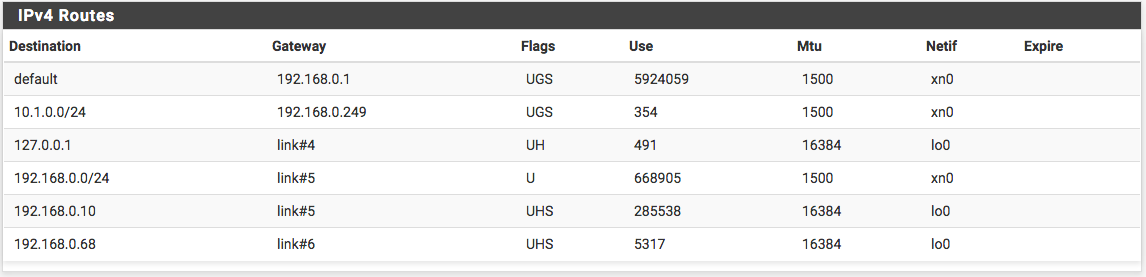
To make machine communicate from both side, here is the quick and dirty route add that needs to be done :


route add 10.1.0.0 mask 255.255.255.0 192.168.0.249
          ^Azure Sub      ^Azure Mask   ^NetScaler SubnetIP
To add a route on my Mac I had to run this command :
route -n add 10.1.0.0/24 192.168.0.249
             ^Azure Sub    ^NetScaler SubnetIP
To avoid modifying every and each machine as above on my LAN, I installed a Linux Router (PFSense) it is free and works well. I just disabled the firewall and add a route to use for 10.1.0.0/24
I blogged about how fast it was to create a complete XenApp infrastructure in Azure [XenApp on Azure, is it really that easy ?] and it was fast but this is a Azure only deployment and nothing except base OS and few basic application. This is ideal for POC but not at all when you want to extend your existing on-premise infrastructure.
Then I wrote about CloudBursting XenApp / XenDesktop into Azure [CloudBursting XenApp / XenDesktop in Azure 1/2] where I showed how to use Studio console to link an Azure subscription and create a Machine Catalog to provision VM in Azure. But in the end, these VMs are “alone” in Azure and can’t be used just as is.
Now the link is established, possibilities to be able to actually use the VMs created in the CloudBursting XenApp / XenDesktop in Azure 1/2 blog become to make sense.
Note : The schema at the beginning of the blog is from a Citrix Summit presentation made by Josh Fleming (Principal Sales Engineer – Enterprise, Citrix) and Prasanna Padmanabhan (Director, Microsoft Solutions Engineering, Citrix) – TECH311