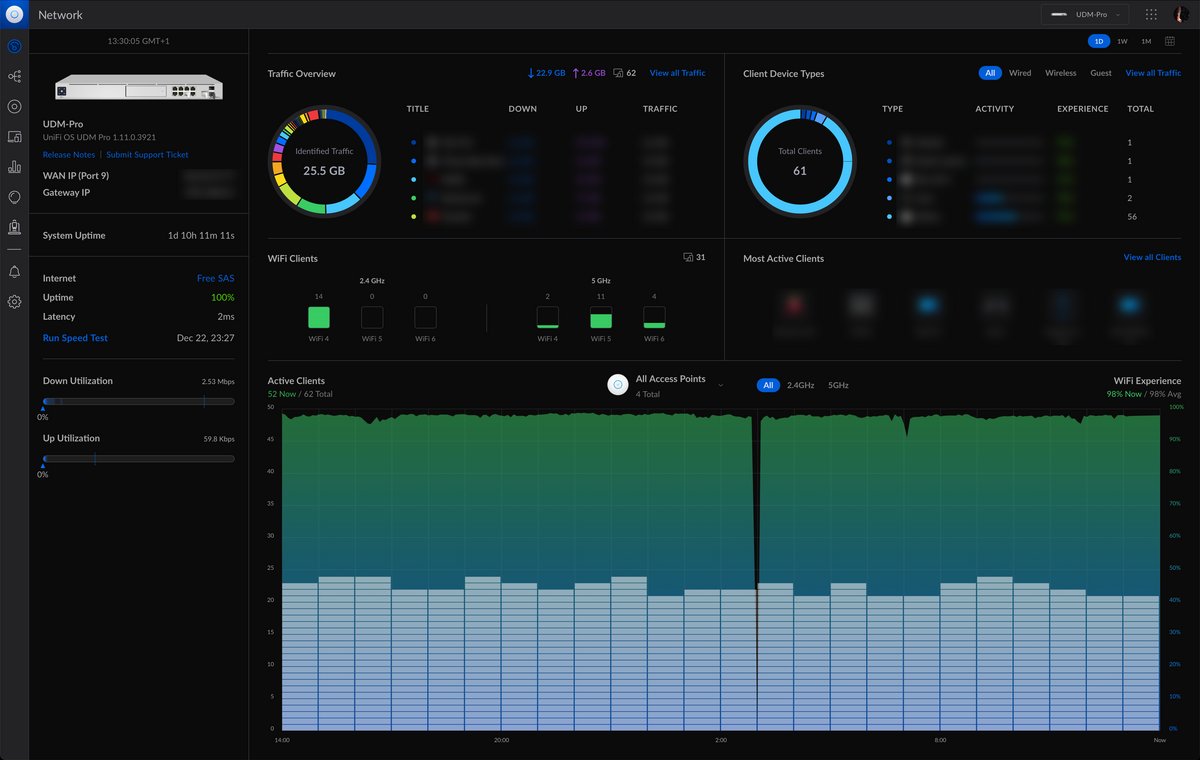
When you have a rather large network at home, you want and need to secure things a little bit. Family network usage / business network usage / IoT network usage all of these needs to work without impacting each other.
![]()
This is my first blog about Ubiquiti UniFi, I’m using this hardware for a year now and I’m very satisfy by the quality and the possibilities of all their products. On top of that my learning curve on the network knowledge has grown a lot, that’s a win !
For this blog I want to share how I created an isolated / dedicated network for all my IoT devices (cameras, car, doorbell, alarm etc etc)
Let’s do it !
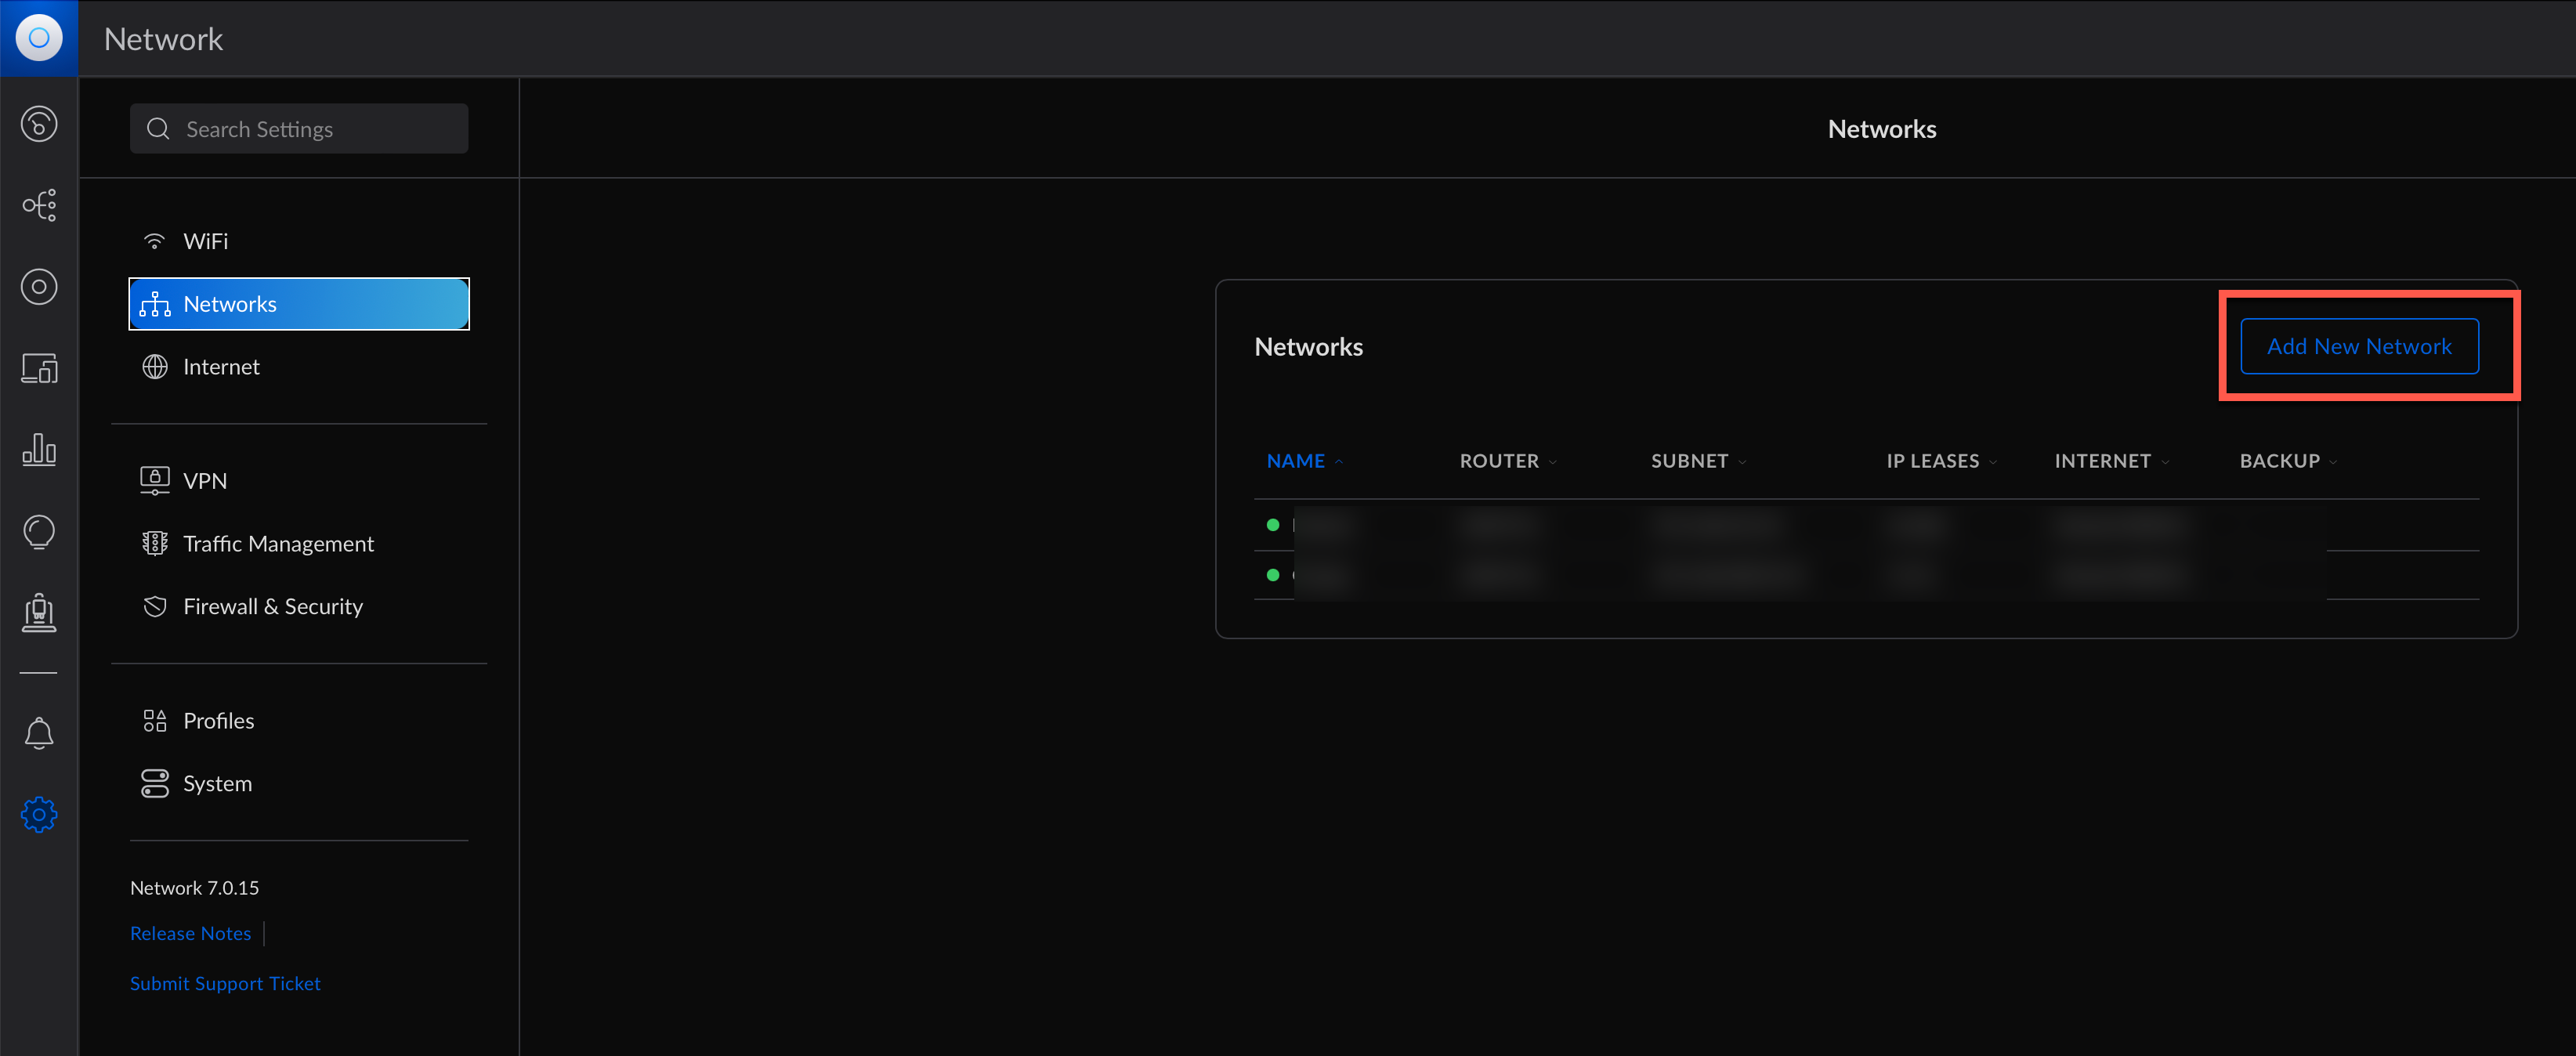
Creation of a new network
The first step is to create a new network, to do so click on the advanced option on the left vertical pane and on Networks

Then click on Add a New Network
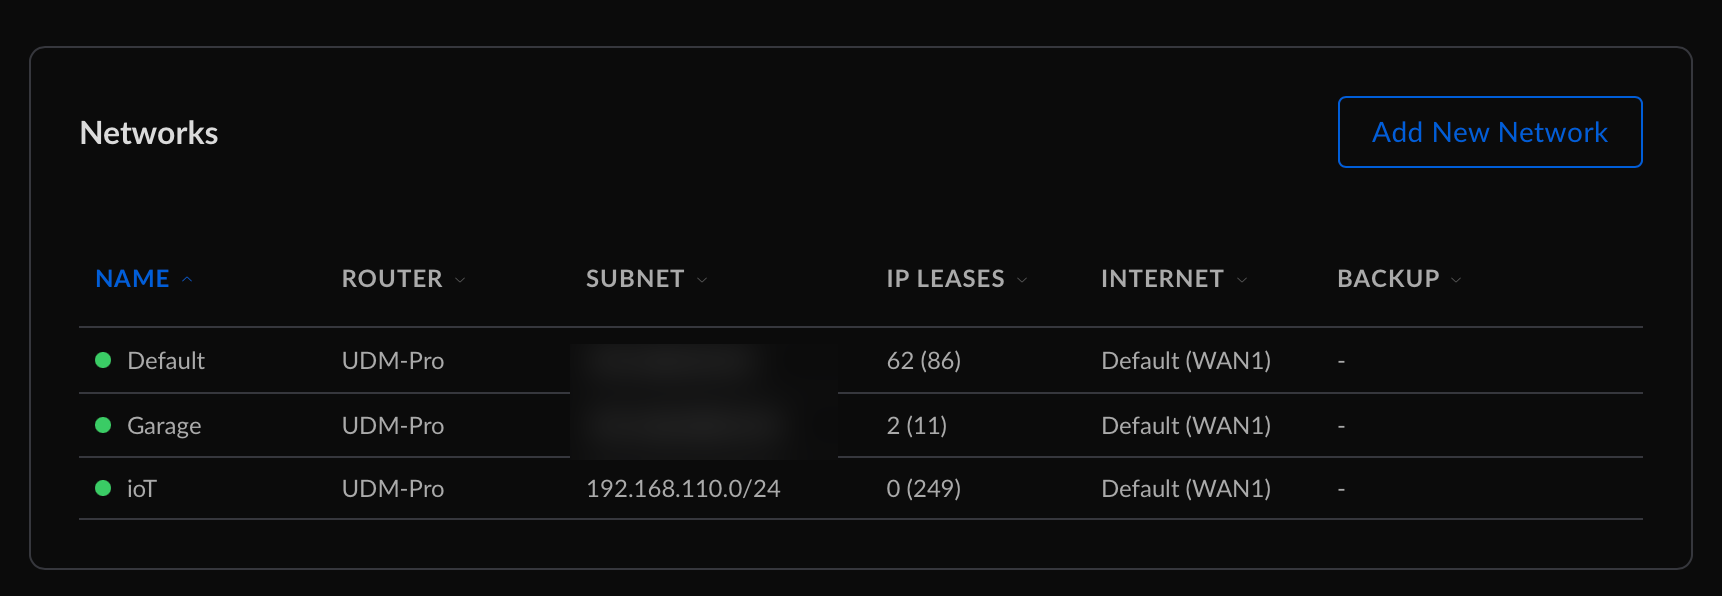
To create this new network we will need to provide
- A name : IoT
- a Gateway IP and a subnet : 192.168.110.1/24
- a vLan ID : 110
- Few other specifications such as DHCP
We can now proceed to the new network creation by clicking on Add Network
Creation of a new Wireless Network
Click now on wifi above the networks menu we just used. We can now create a new wifi network
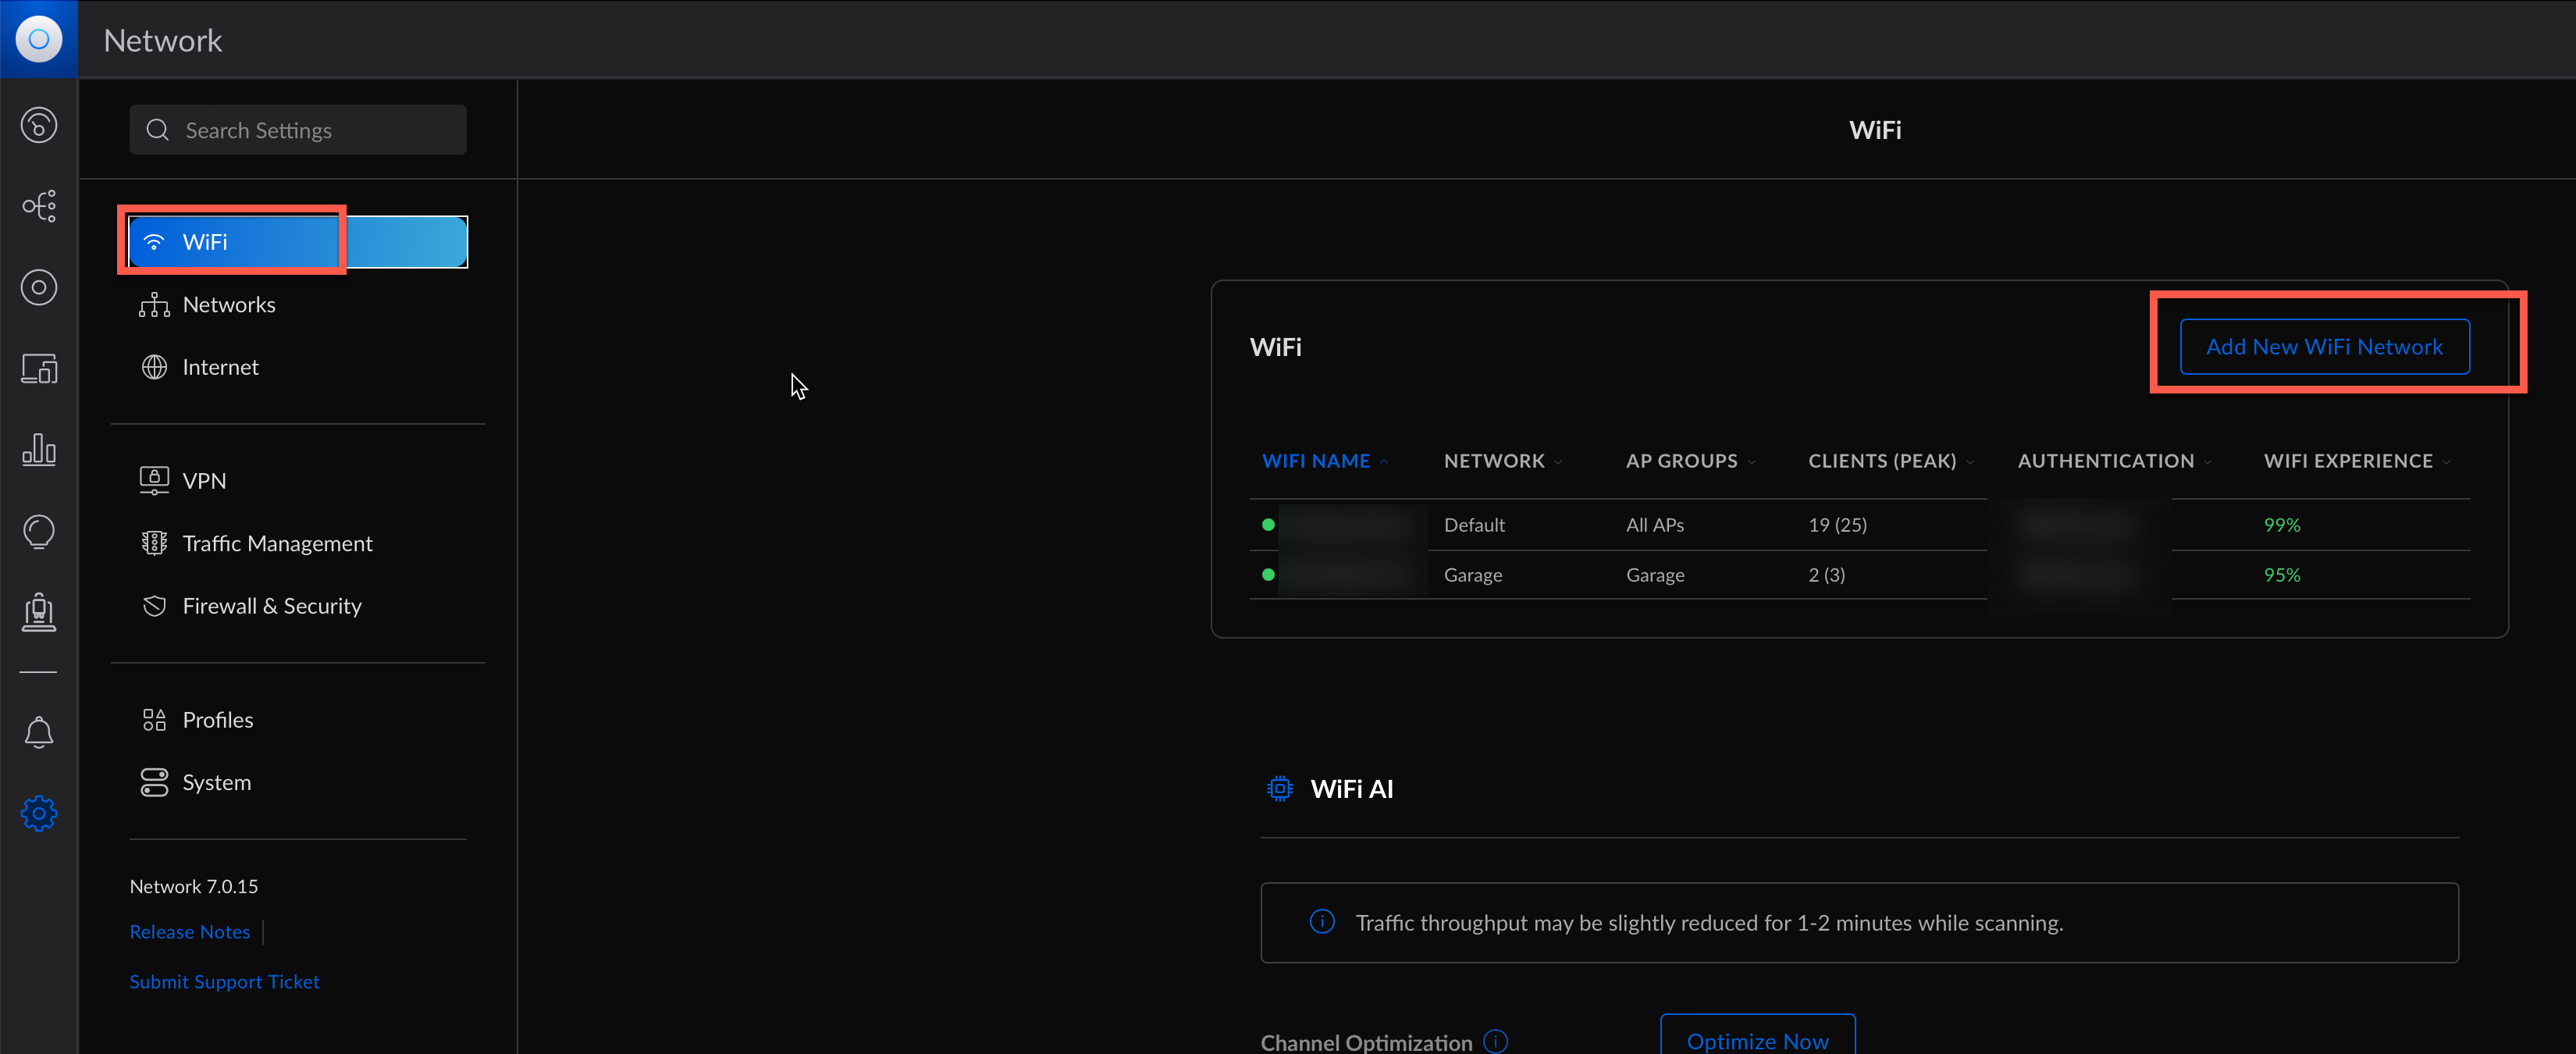
To create a new wifi network we need
- a name
- a password
- to chose the network we previously created
- choosing the access point to broadcast this new wifi
- few other options such as wifi band, protocol to use, hiding or not the wifi network.
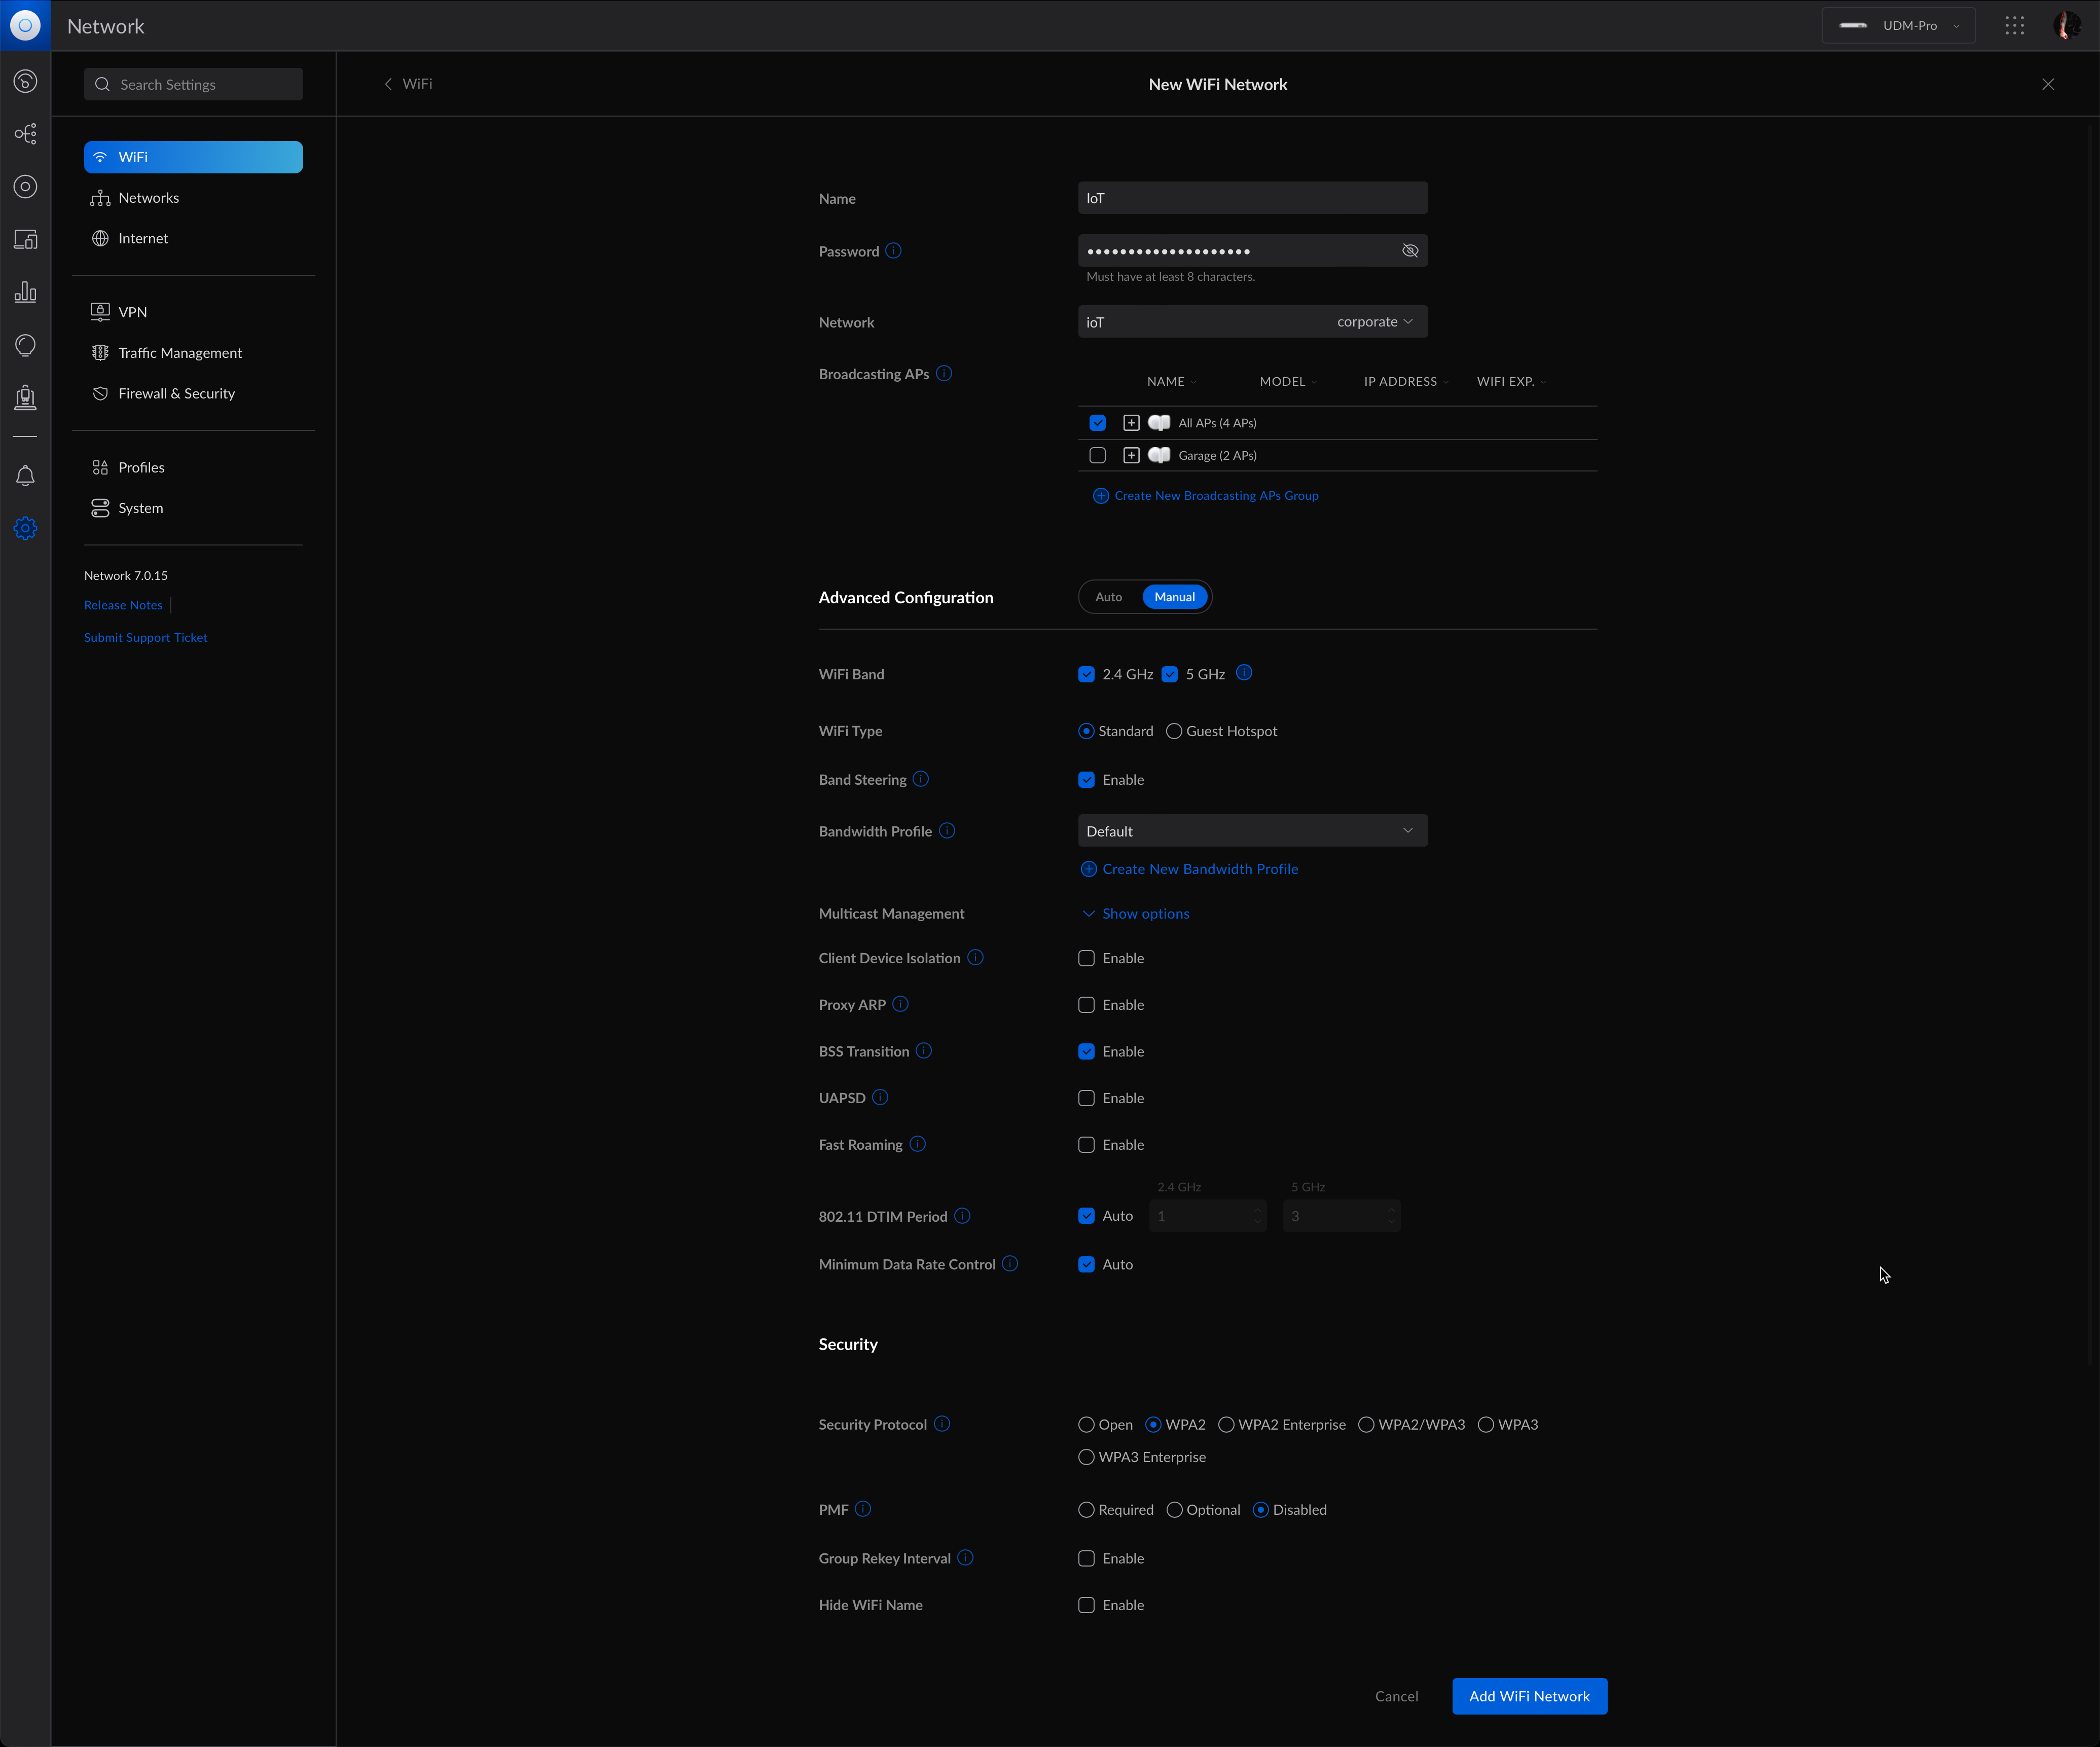
Click on Add Wifi Network to create it.
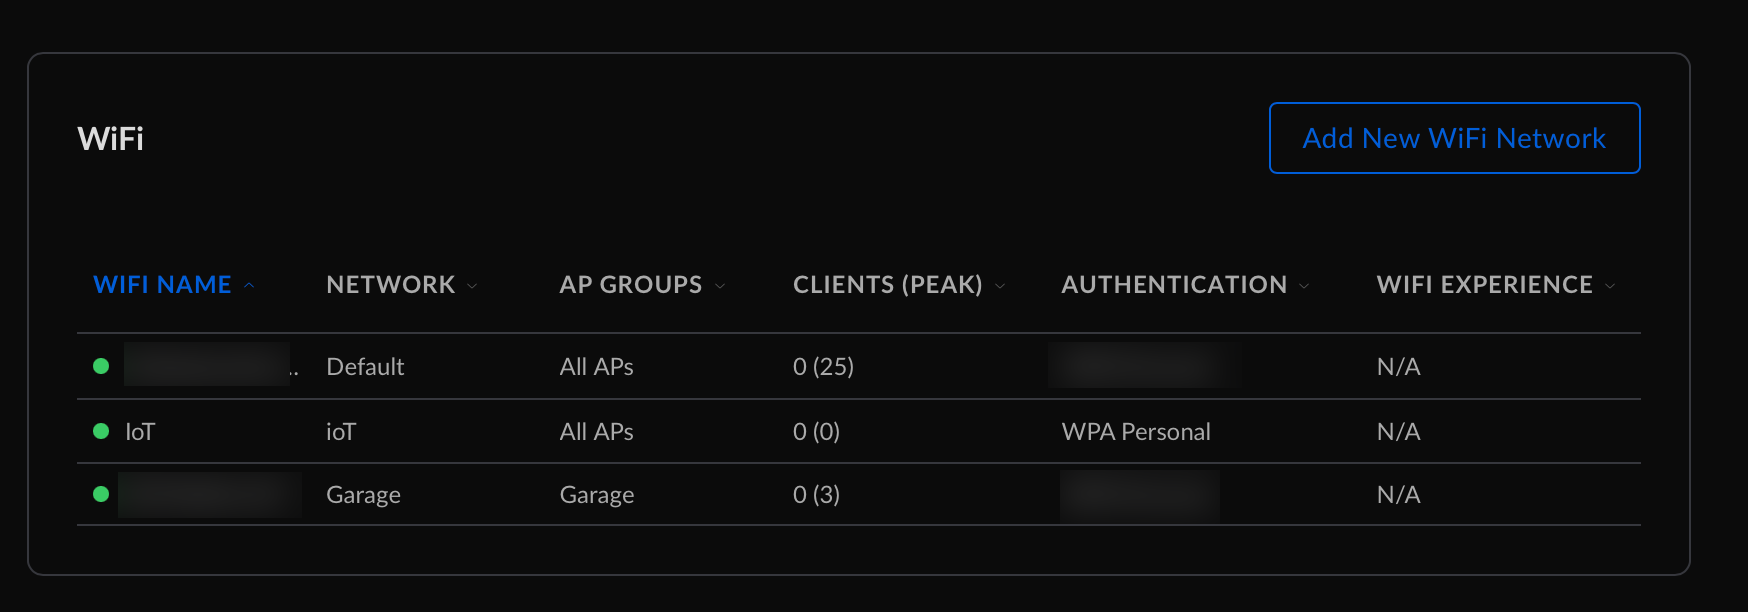
It means that all the devices connecting through this new wifi network will be on the vLan 110.
Assigning vLan 110 on UniFi switches
Now we will configure switch ports to use the configuration we build above.
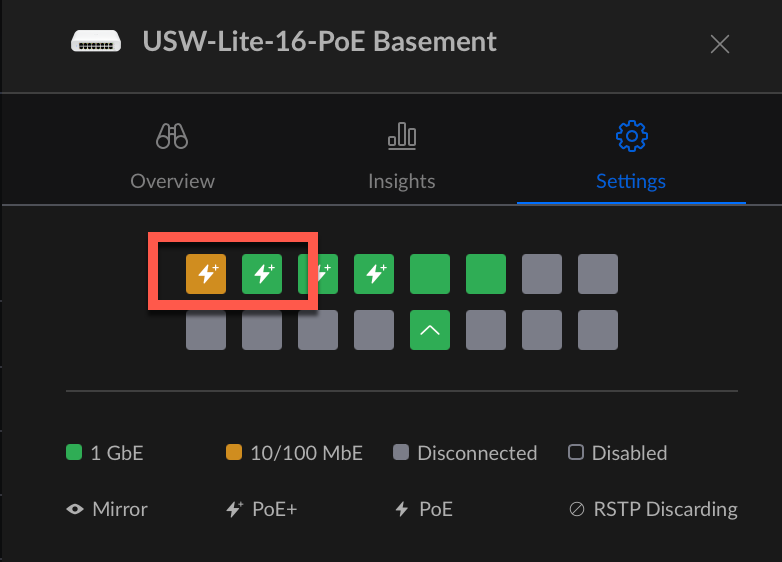
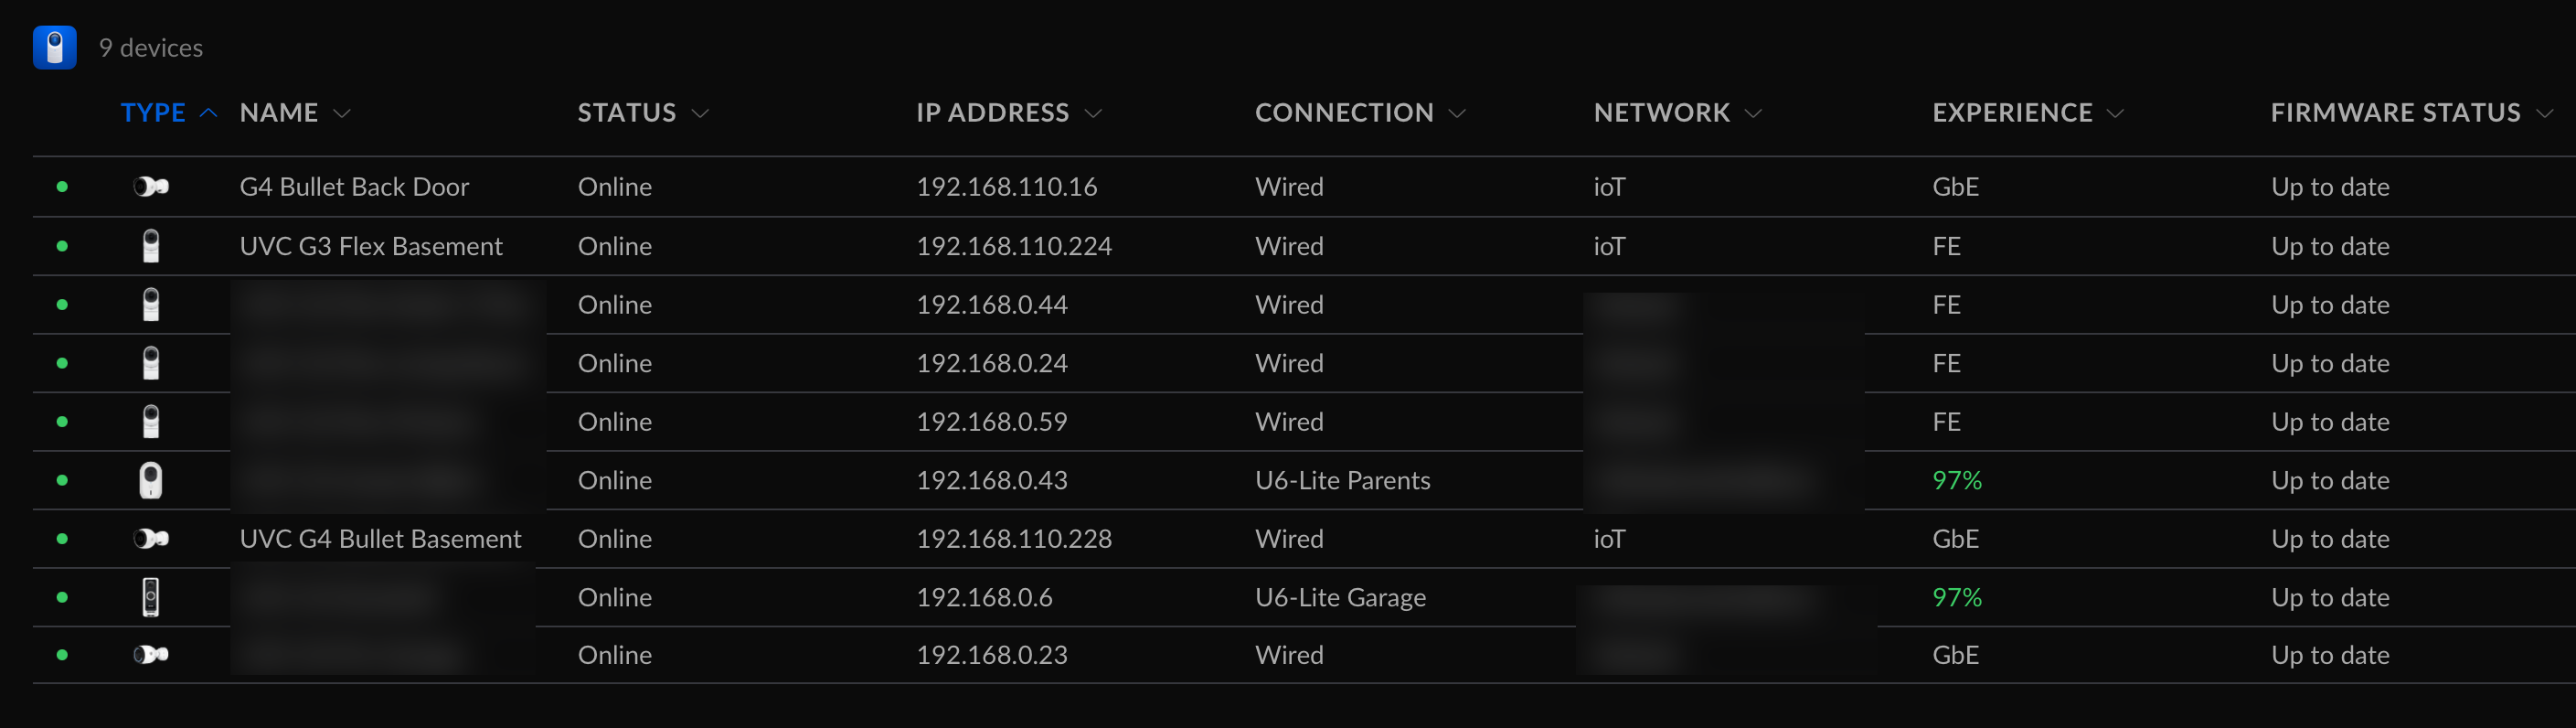
Of course I know which port are used by what so I can assign vLan to the proper devices. I kow on this USW-Lite-16 PoE switch two cameras are connected on the first two ports.
Let’s click on the first one (orange one)
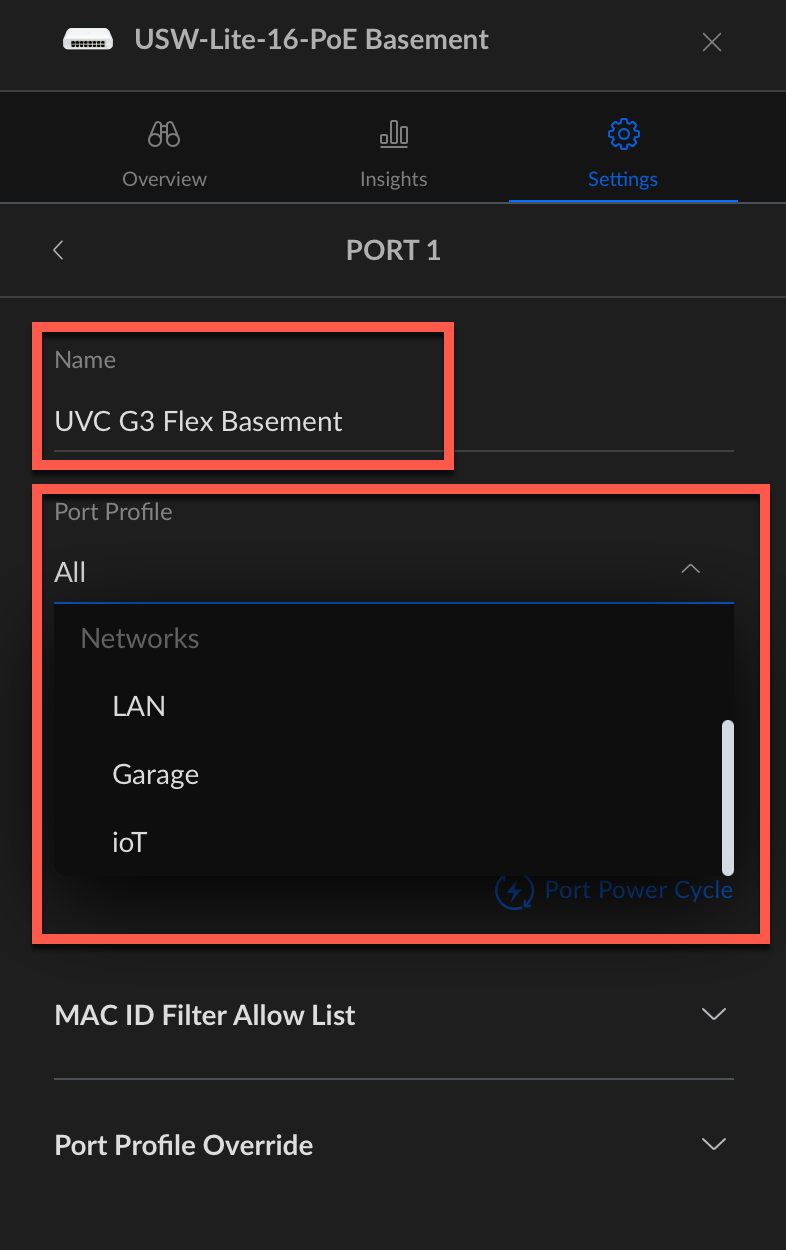
We can enter a name for this port (mandatory but it’s easier to find out what port is used by which device) and then select the IoT vLan then click on Apply. I had to reboot my cameras so they will have a new IP Address in 192.168.110.0/24 subnet.
Also by default, all the traffic is allowed between the different networks.
Blocking network traffic form / to the new IoT vLan
We need to navigate to the Settings menu and then select Firewall & Security
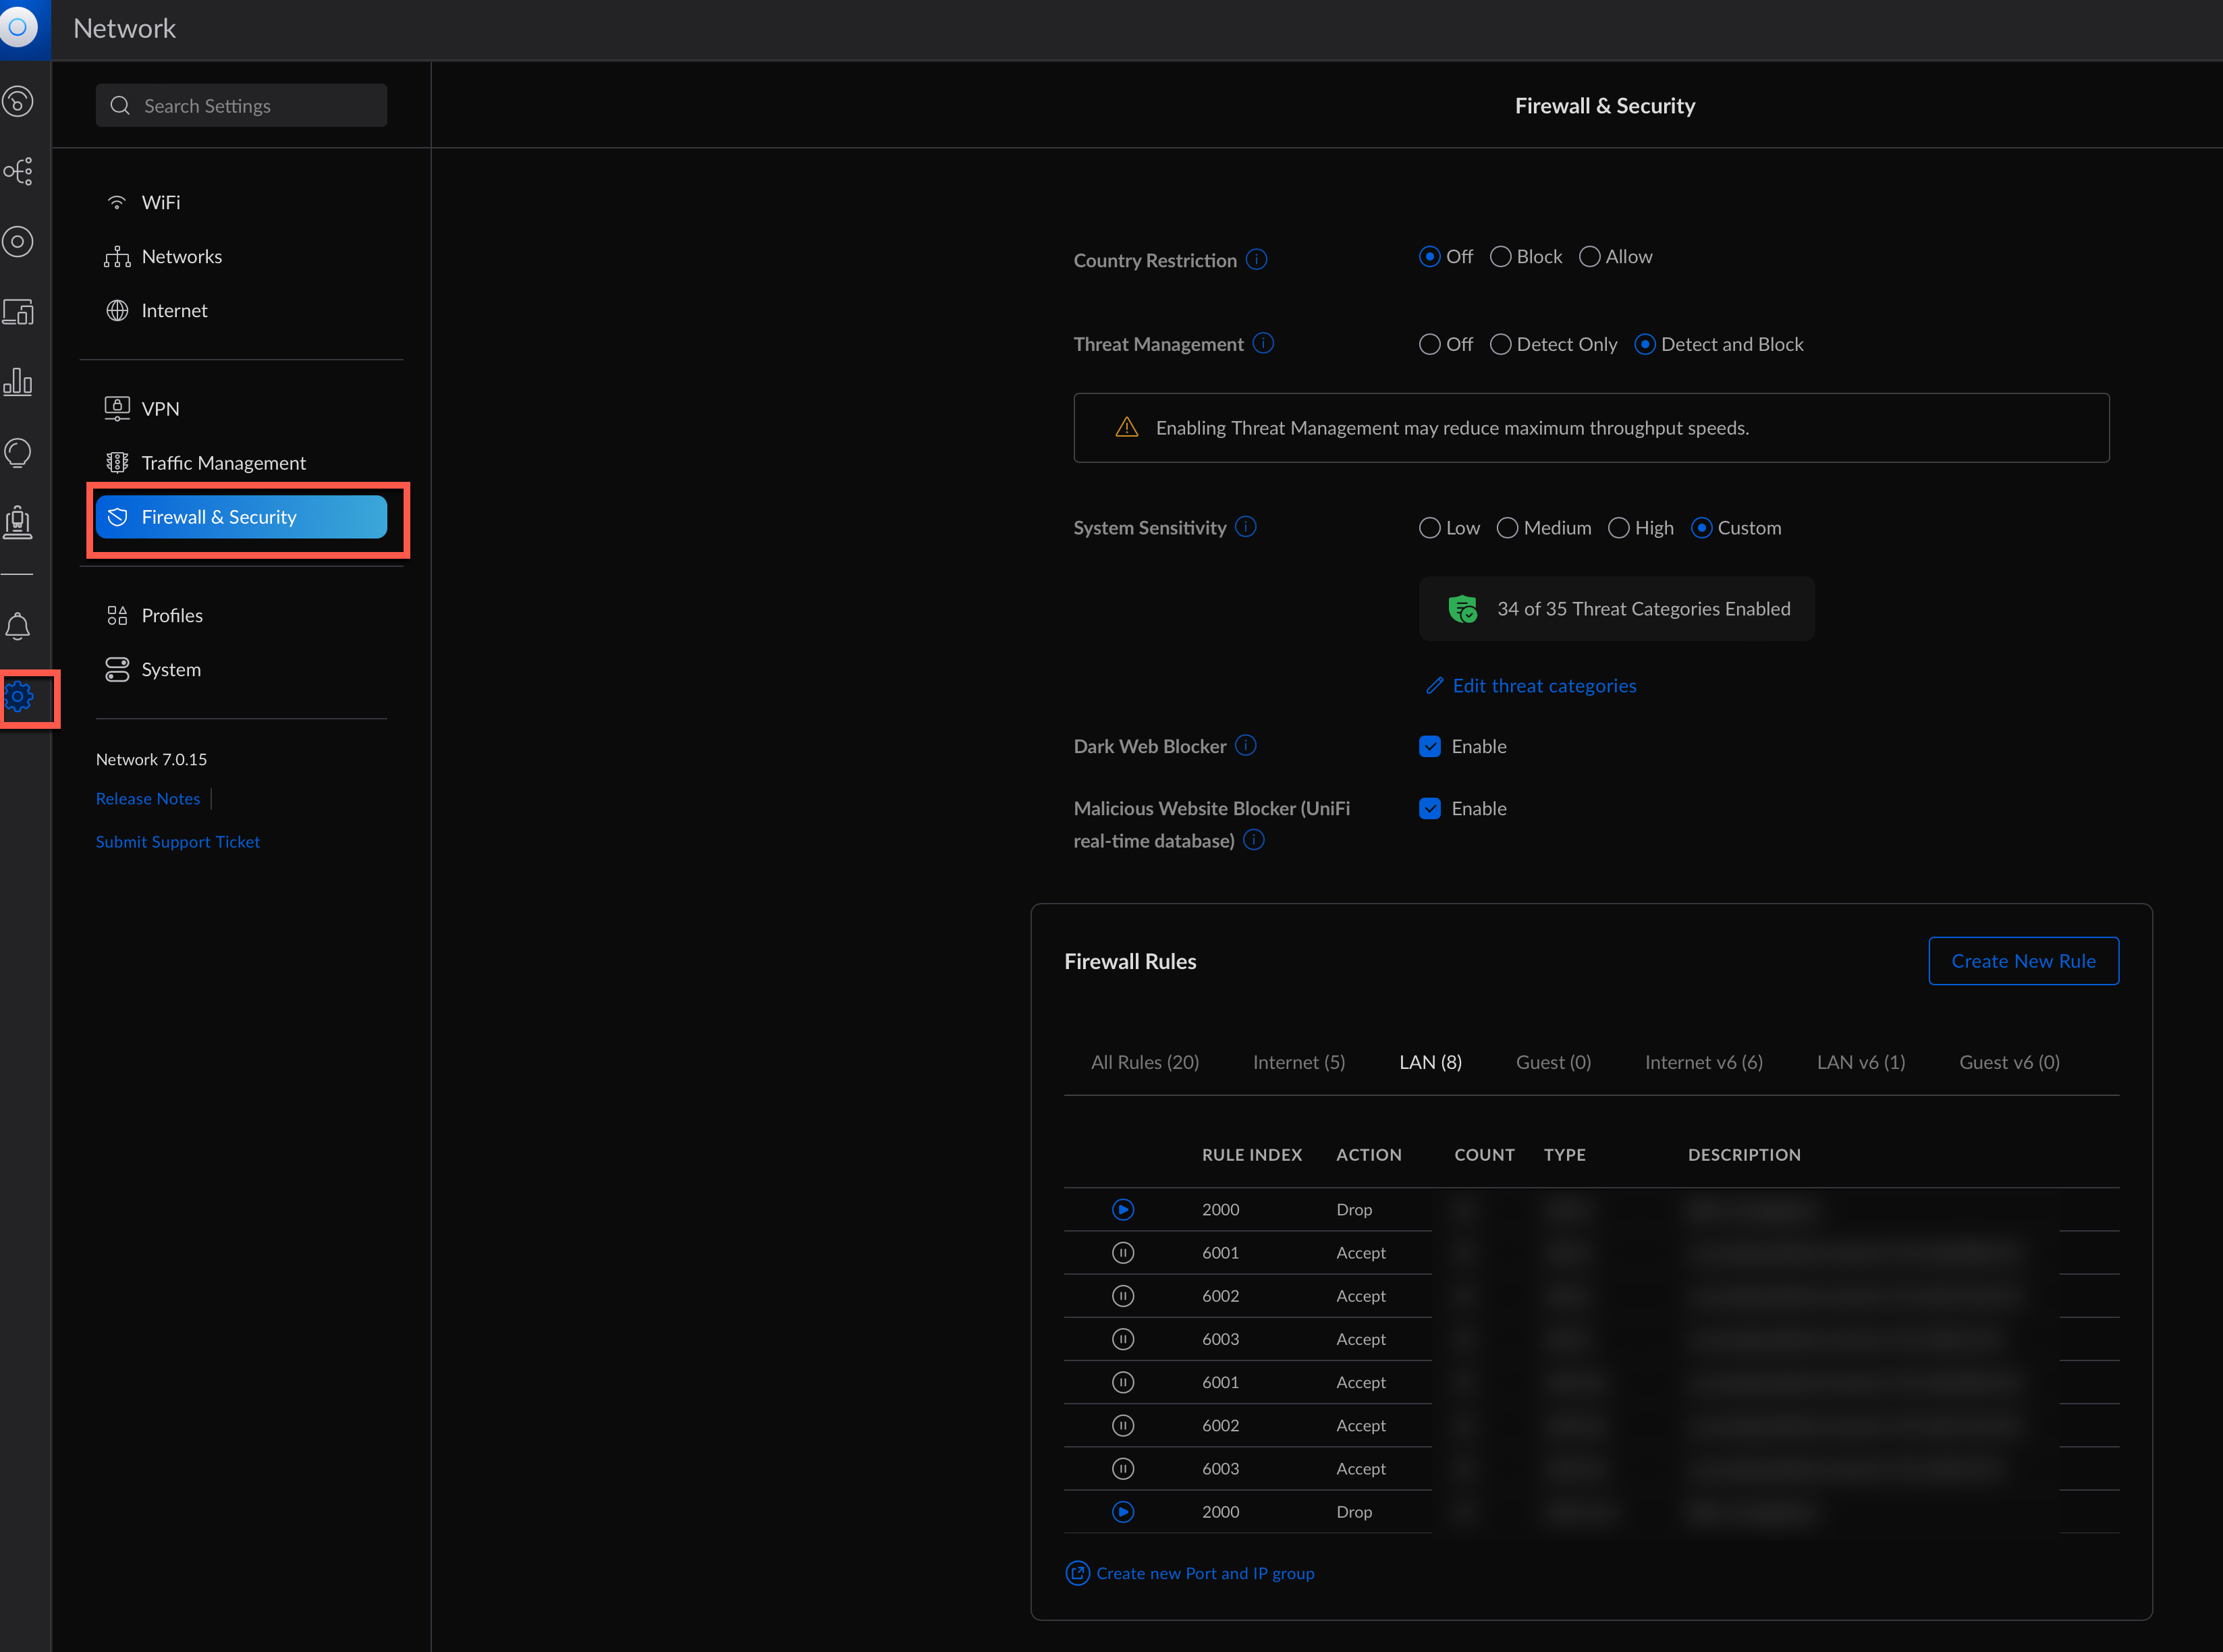
I already have few rules here in Lan IN so we need to create new ones. To do so we will click on Create new rule
In our case we want to isolate the IoT vLan / Network to communicate with other network (the default one for example)
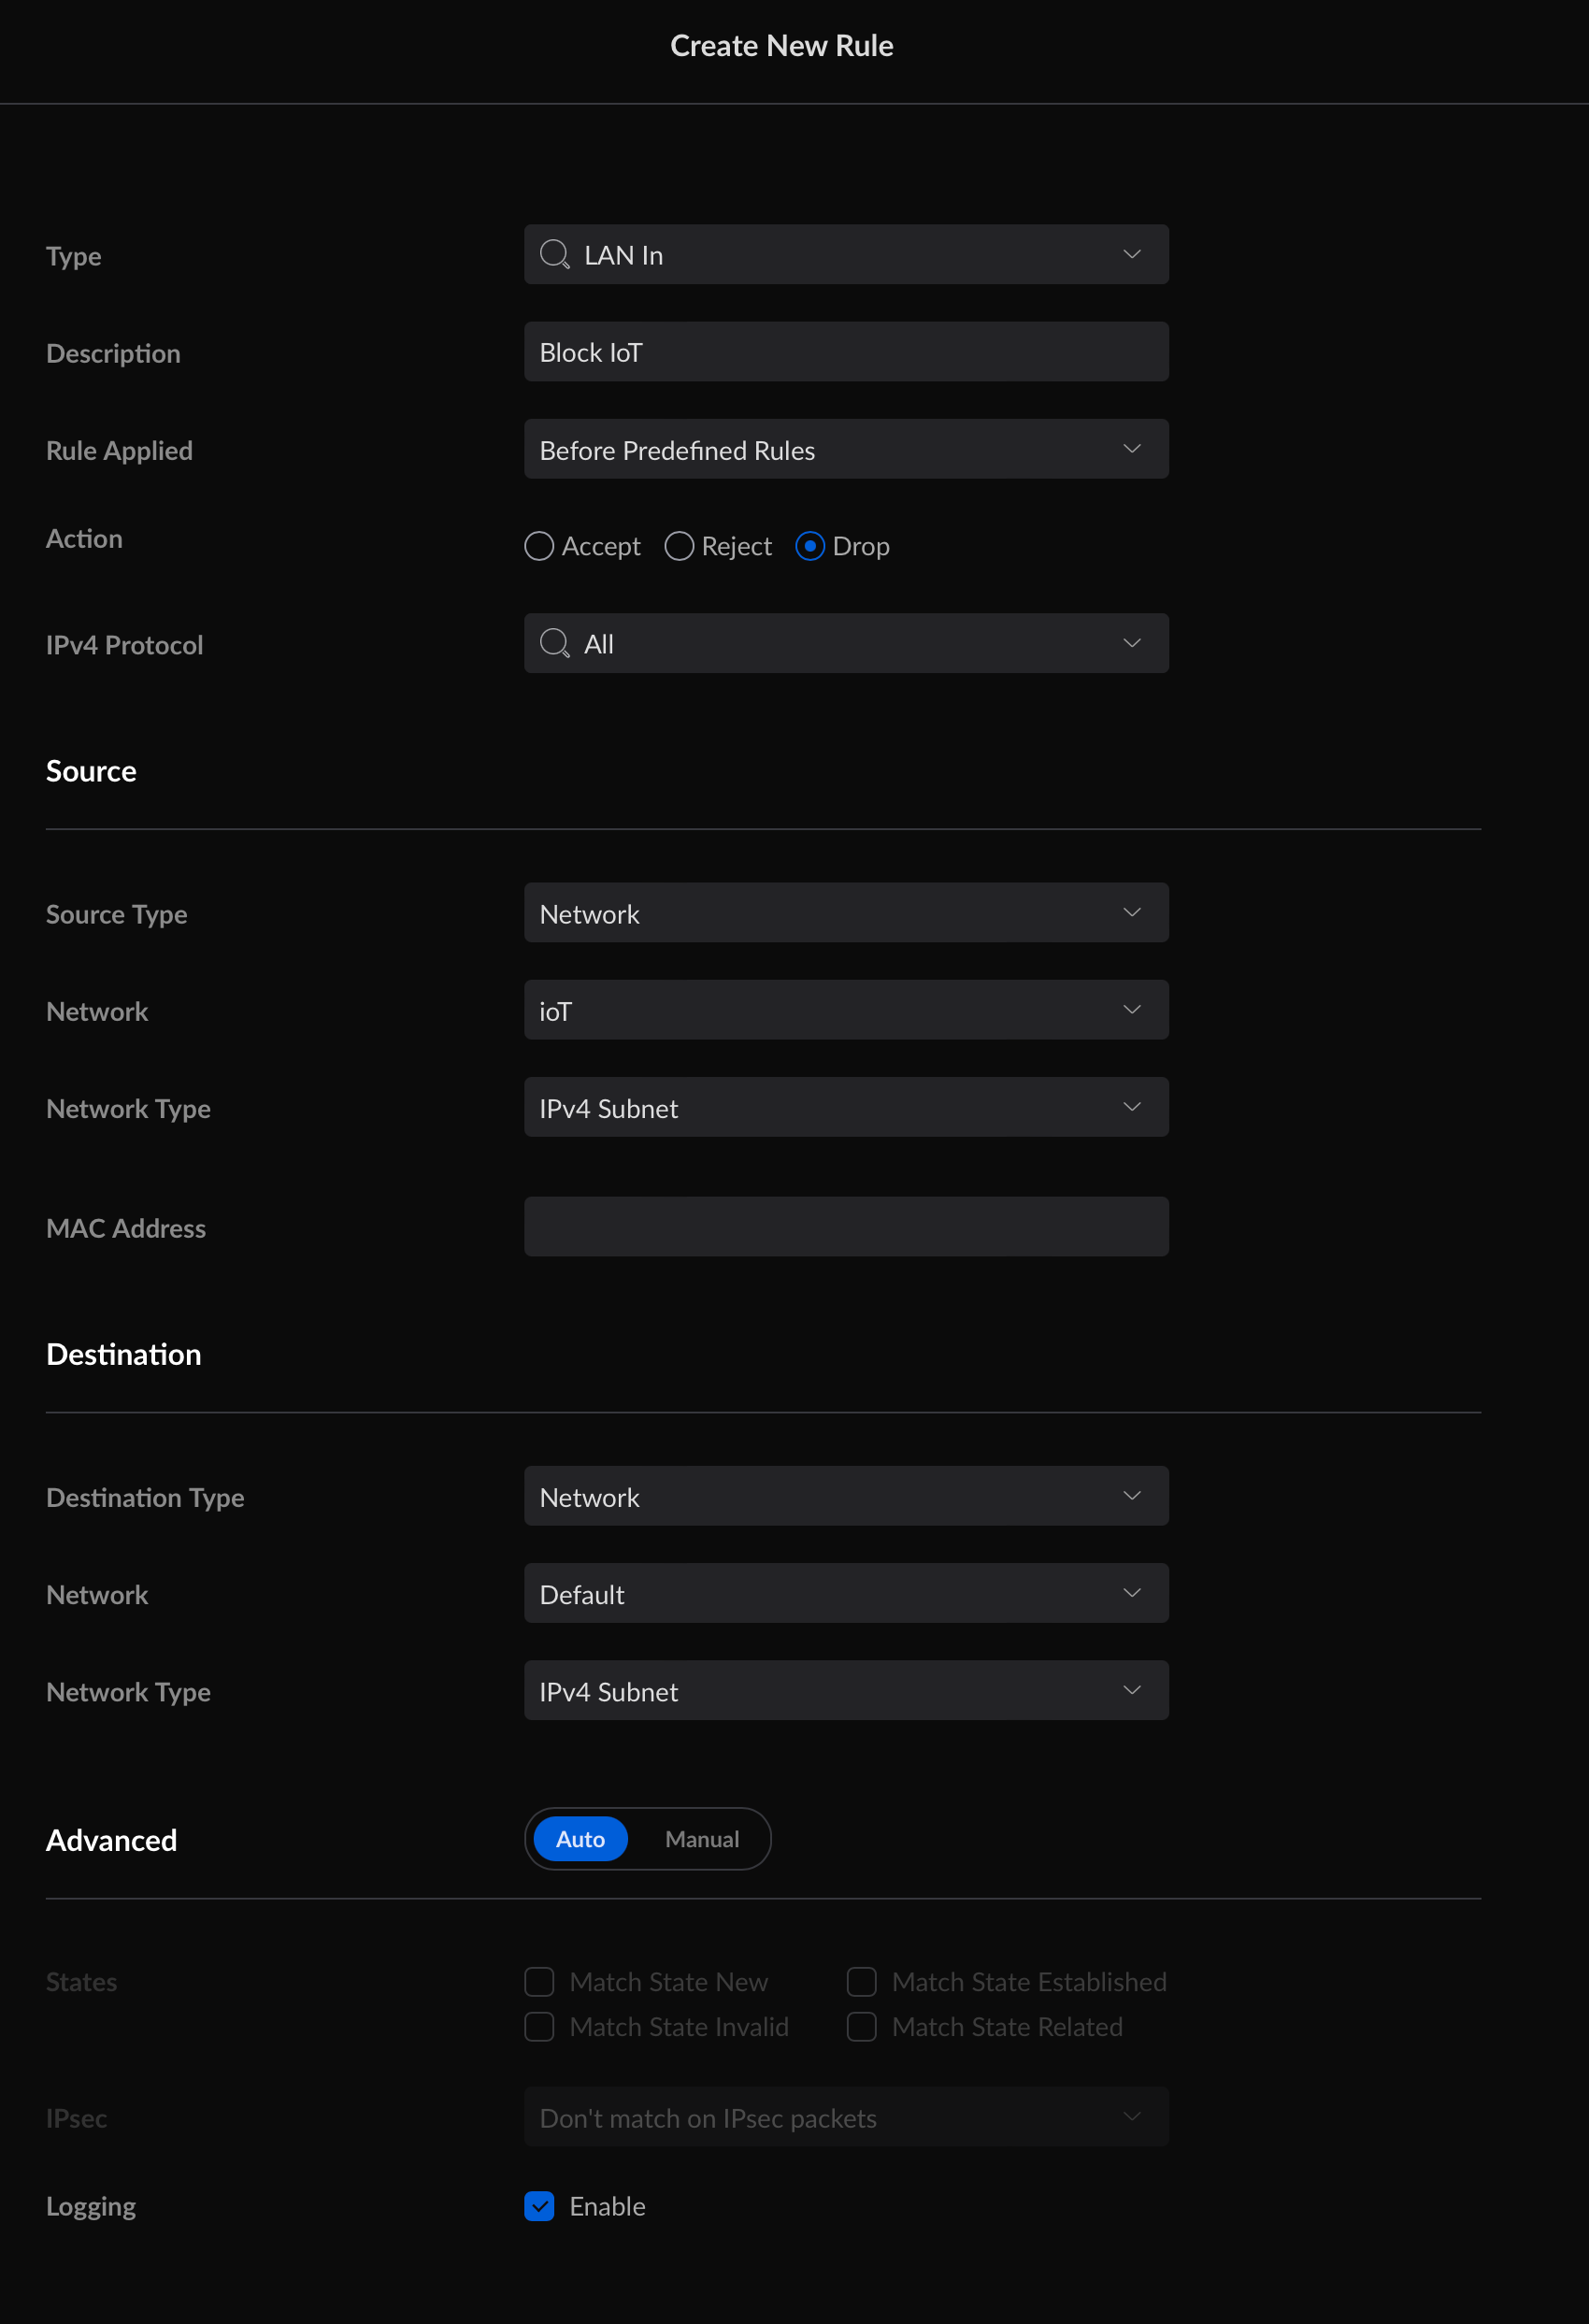
Give the rule a name, make sure that Before predefined rules is selected, the same with Enabled.
Select Source and change the Source Type to Network. Once that is done, use the dropdown menu to find the network you want to isolate (IoT) and select it. Under Destination, change the Destination Type to Network and in the dropdown, select the network you don’t want device in your source network to access. In my case that’s the default network.
Click on save, the rule should now show up under your LAN IN rules. The way it’s set up now, all traffic from all other networks to the new network is allowed, but no traffic is allowed to be initiated from this new network to the network selected in destination above.
We have now wifi + wired network isolated on the IoT vLan. This was fairly easy on the firewall side because I don’t need to access with devices from the lan to these cameras. The next step will be to add / move in this vLan all the Raspberry Pis / Virtual Machines that manage IoT, and there will be then some firewall tweaking to do in order to allow access from the main LAN network
You can repeat this as many time as you want to create isolated network.