
In today's virtualized environments / homelabs, maximizing network performance is crucial for ensuring smooth operation of hypervisors like Proxmox. One effective way to achieve this is by configuring Link Aggregation Control Protocol (LACP). In this blog, I'll walk you through setting up LACP in Proxmox to aggregate multiple network interfaces, providing redundancy and increased bandwidth.
Why Configure LACP in Proxmox?
LACP combines multiple physical network interfaces into a single logical interface, offering benefits such as:
- Increased Bandwidth: Aggregate multiple Gigabit Ethernet connections (e.g., 2 x 10 Gbps = 20 Gbps).
- Redundancy: If one link fails, others remain operational.
- Traffic Load Balancing: Distribute traffic efficiently across links.
Prerequisites
- Physical Interfaces: At least two physical network interfaces on your Proxmox server (e.g.,
eno1,eno2). - Switch Configuration: Configure your physical switch with VLANs and LACP-enabled ports if using a managed switch.
Mandatory but good advice is to move all your VMs / Containers to another node if you have a cluster to avoid any disturbance if you are live / on production.
Step-by-Step Configuration Guide
Open you Proxmox gui : https://yourproxmoxIP:8006 and select the proxmox server the the System / Network option
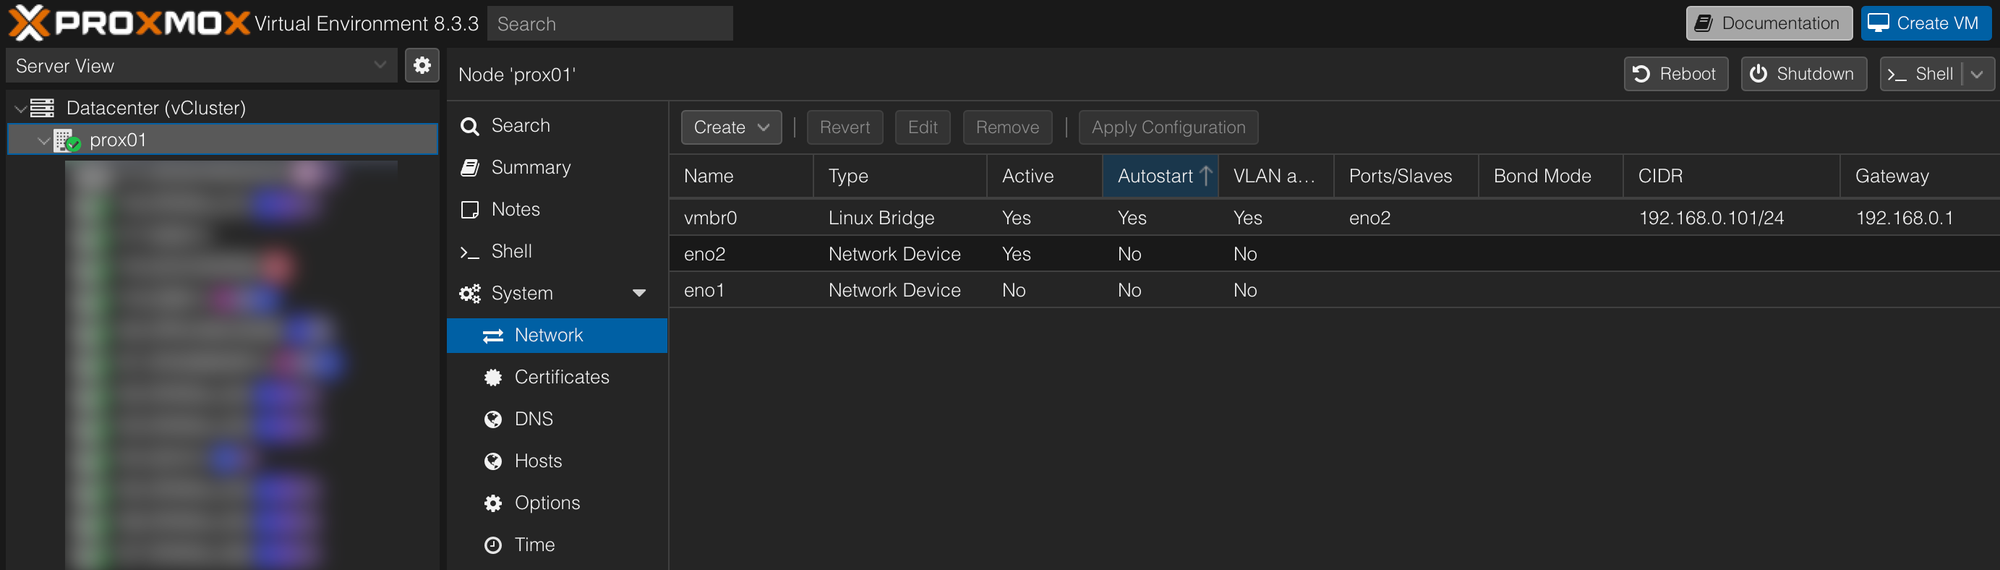
Open the Linux Bridge vmbr0 to delete the configured nic in the bridge ports part ¢
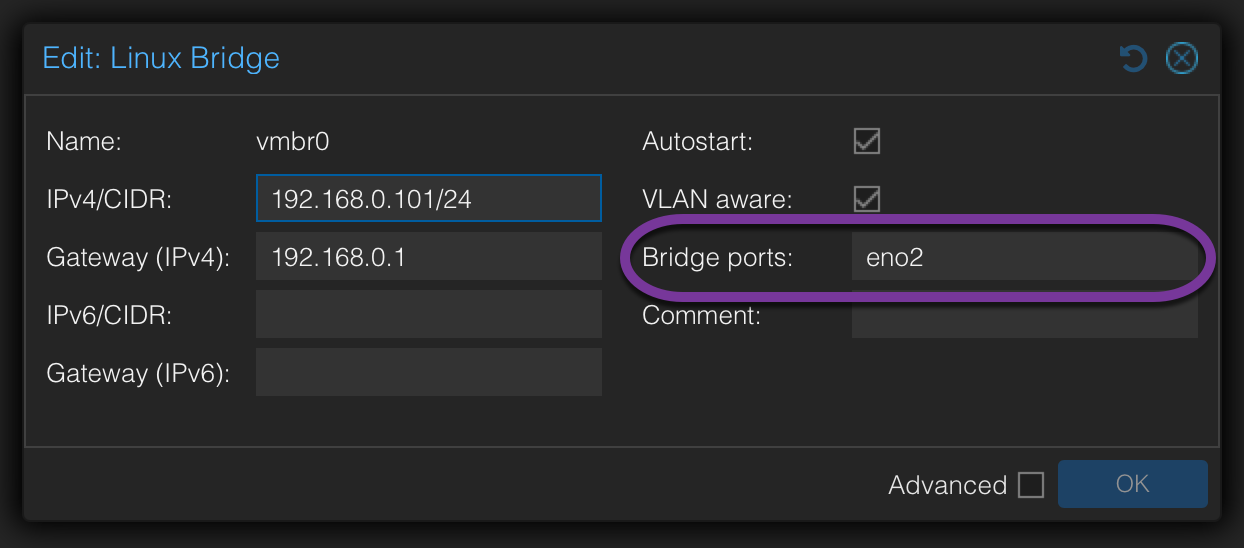
Empty the current configured nic and click on OK but ton Apply the change yet because you'll lose the connexion to the hypervisor.
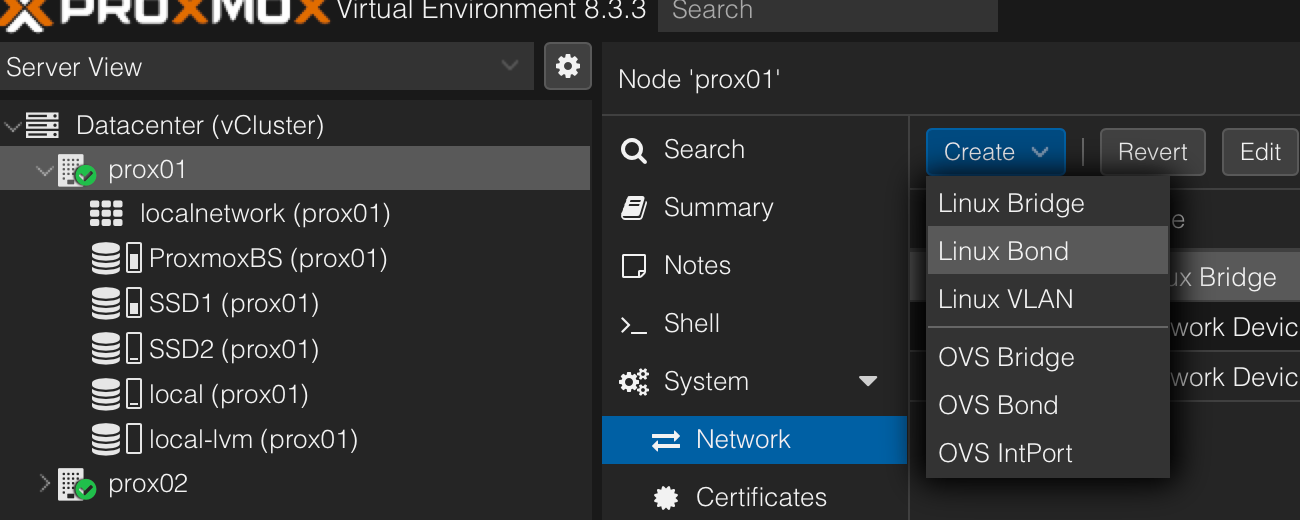
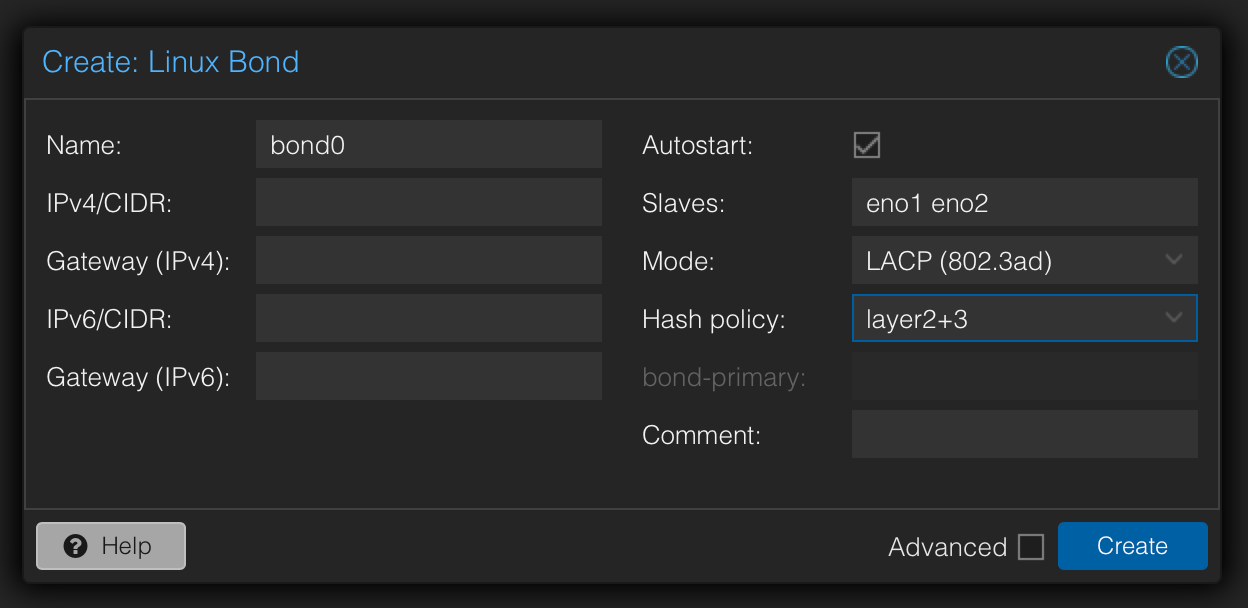
Next click on Create / linux Bond
Now enter the two or more nics in Slaves, chose LACP and layer2+3 (depend of your switch). Click on Create
Now double click on your bridge adapter to add the bond0 Bridge ports (where the nic was configured before we deleted it)
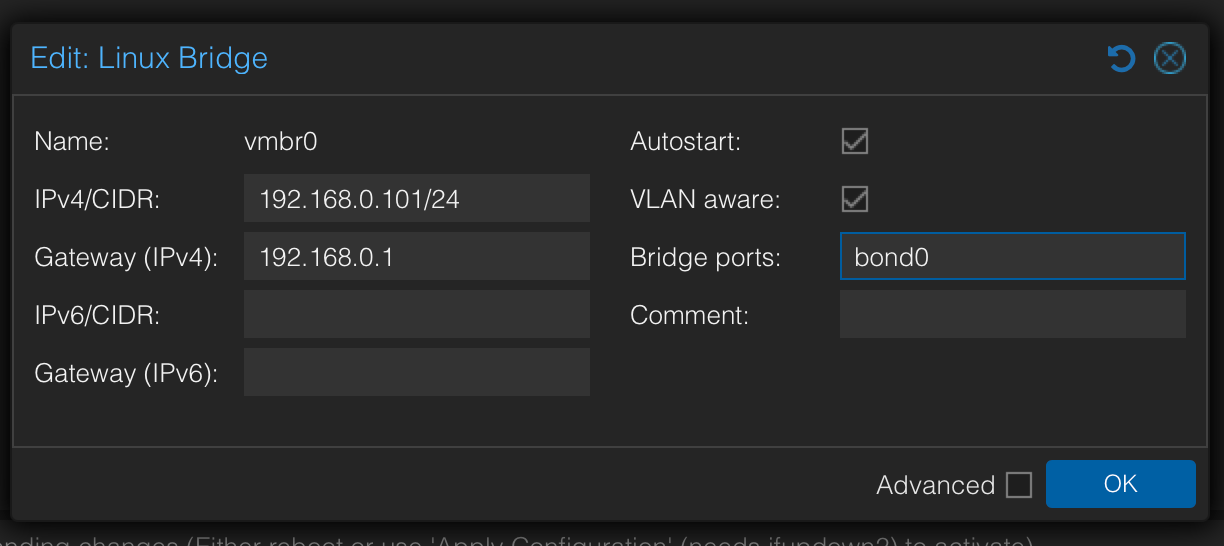
Click on OK
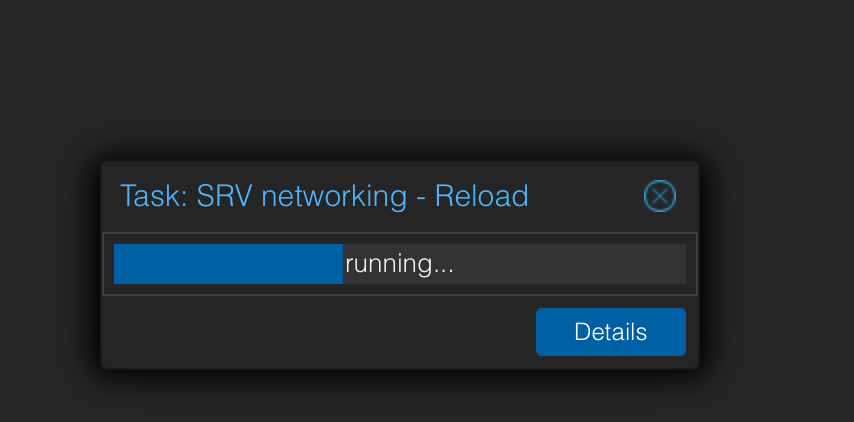
Now before Appling the change, move over to your switch to enable LACP on the two network port, once it's done, Apply the change
it's back online

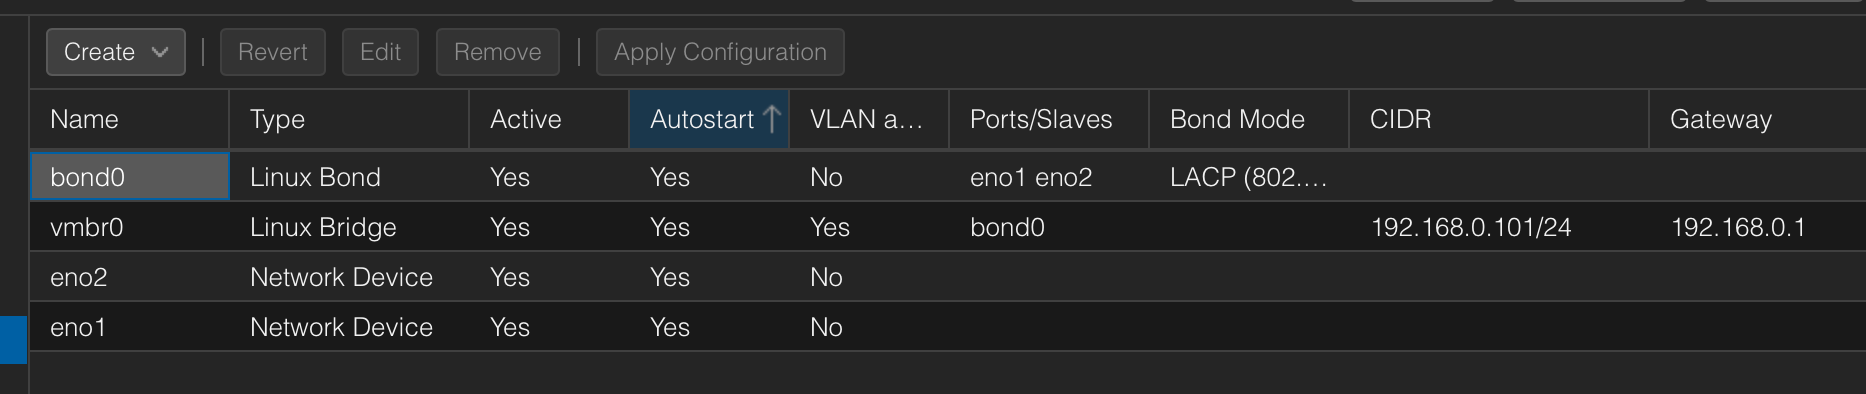
If you have another promox node, you can do the same to keep the same configuration accross your cluster.
Troubleshooting Tips
- Link Status Issues: Ensure cables are securely connected and the switch ports are enabled.
- VLAN Mismatches: Confirm VLANs on both Proxmox and the switch match for tagged traffic.
- Switch Configuration: Verify LACP is enabled on the physical switch port (if using a managed switch).